Philco 47-1230 Cabinet Restoration
Posts: 486
Threads: 28
Joined: Jan 2024
City: Tulsa
State, Province, Country: Oklahoma
I still wasn’t satisfied, so I stripped the cabinet again and refinished it again. It’s already 93 degrees in Oklahoma, so this is a chore! I didn’t like that the finish was so much darker than the original. I tried my best to keep it lighter this time, and I’m pretty happy. But I will say, there’s one compromise. The veneer patches on the right shoulder are more noticeable. It seems that I can either stay true to the original color or I can conceal the veneer patches. I think I’ll go with the former. Granted, it’s not that unsightly. Here it is, out in my garage:
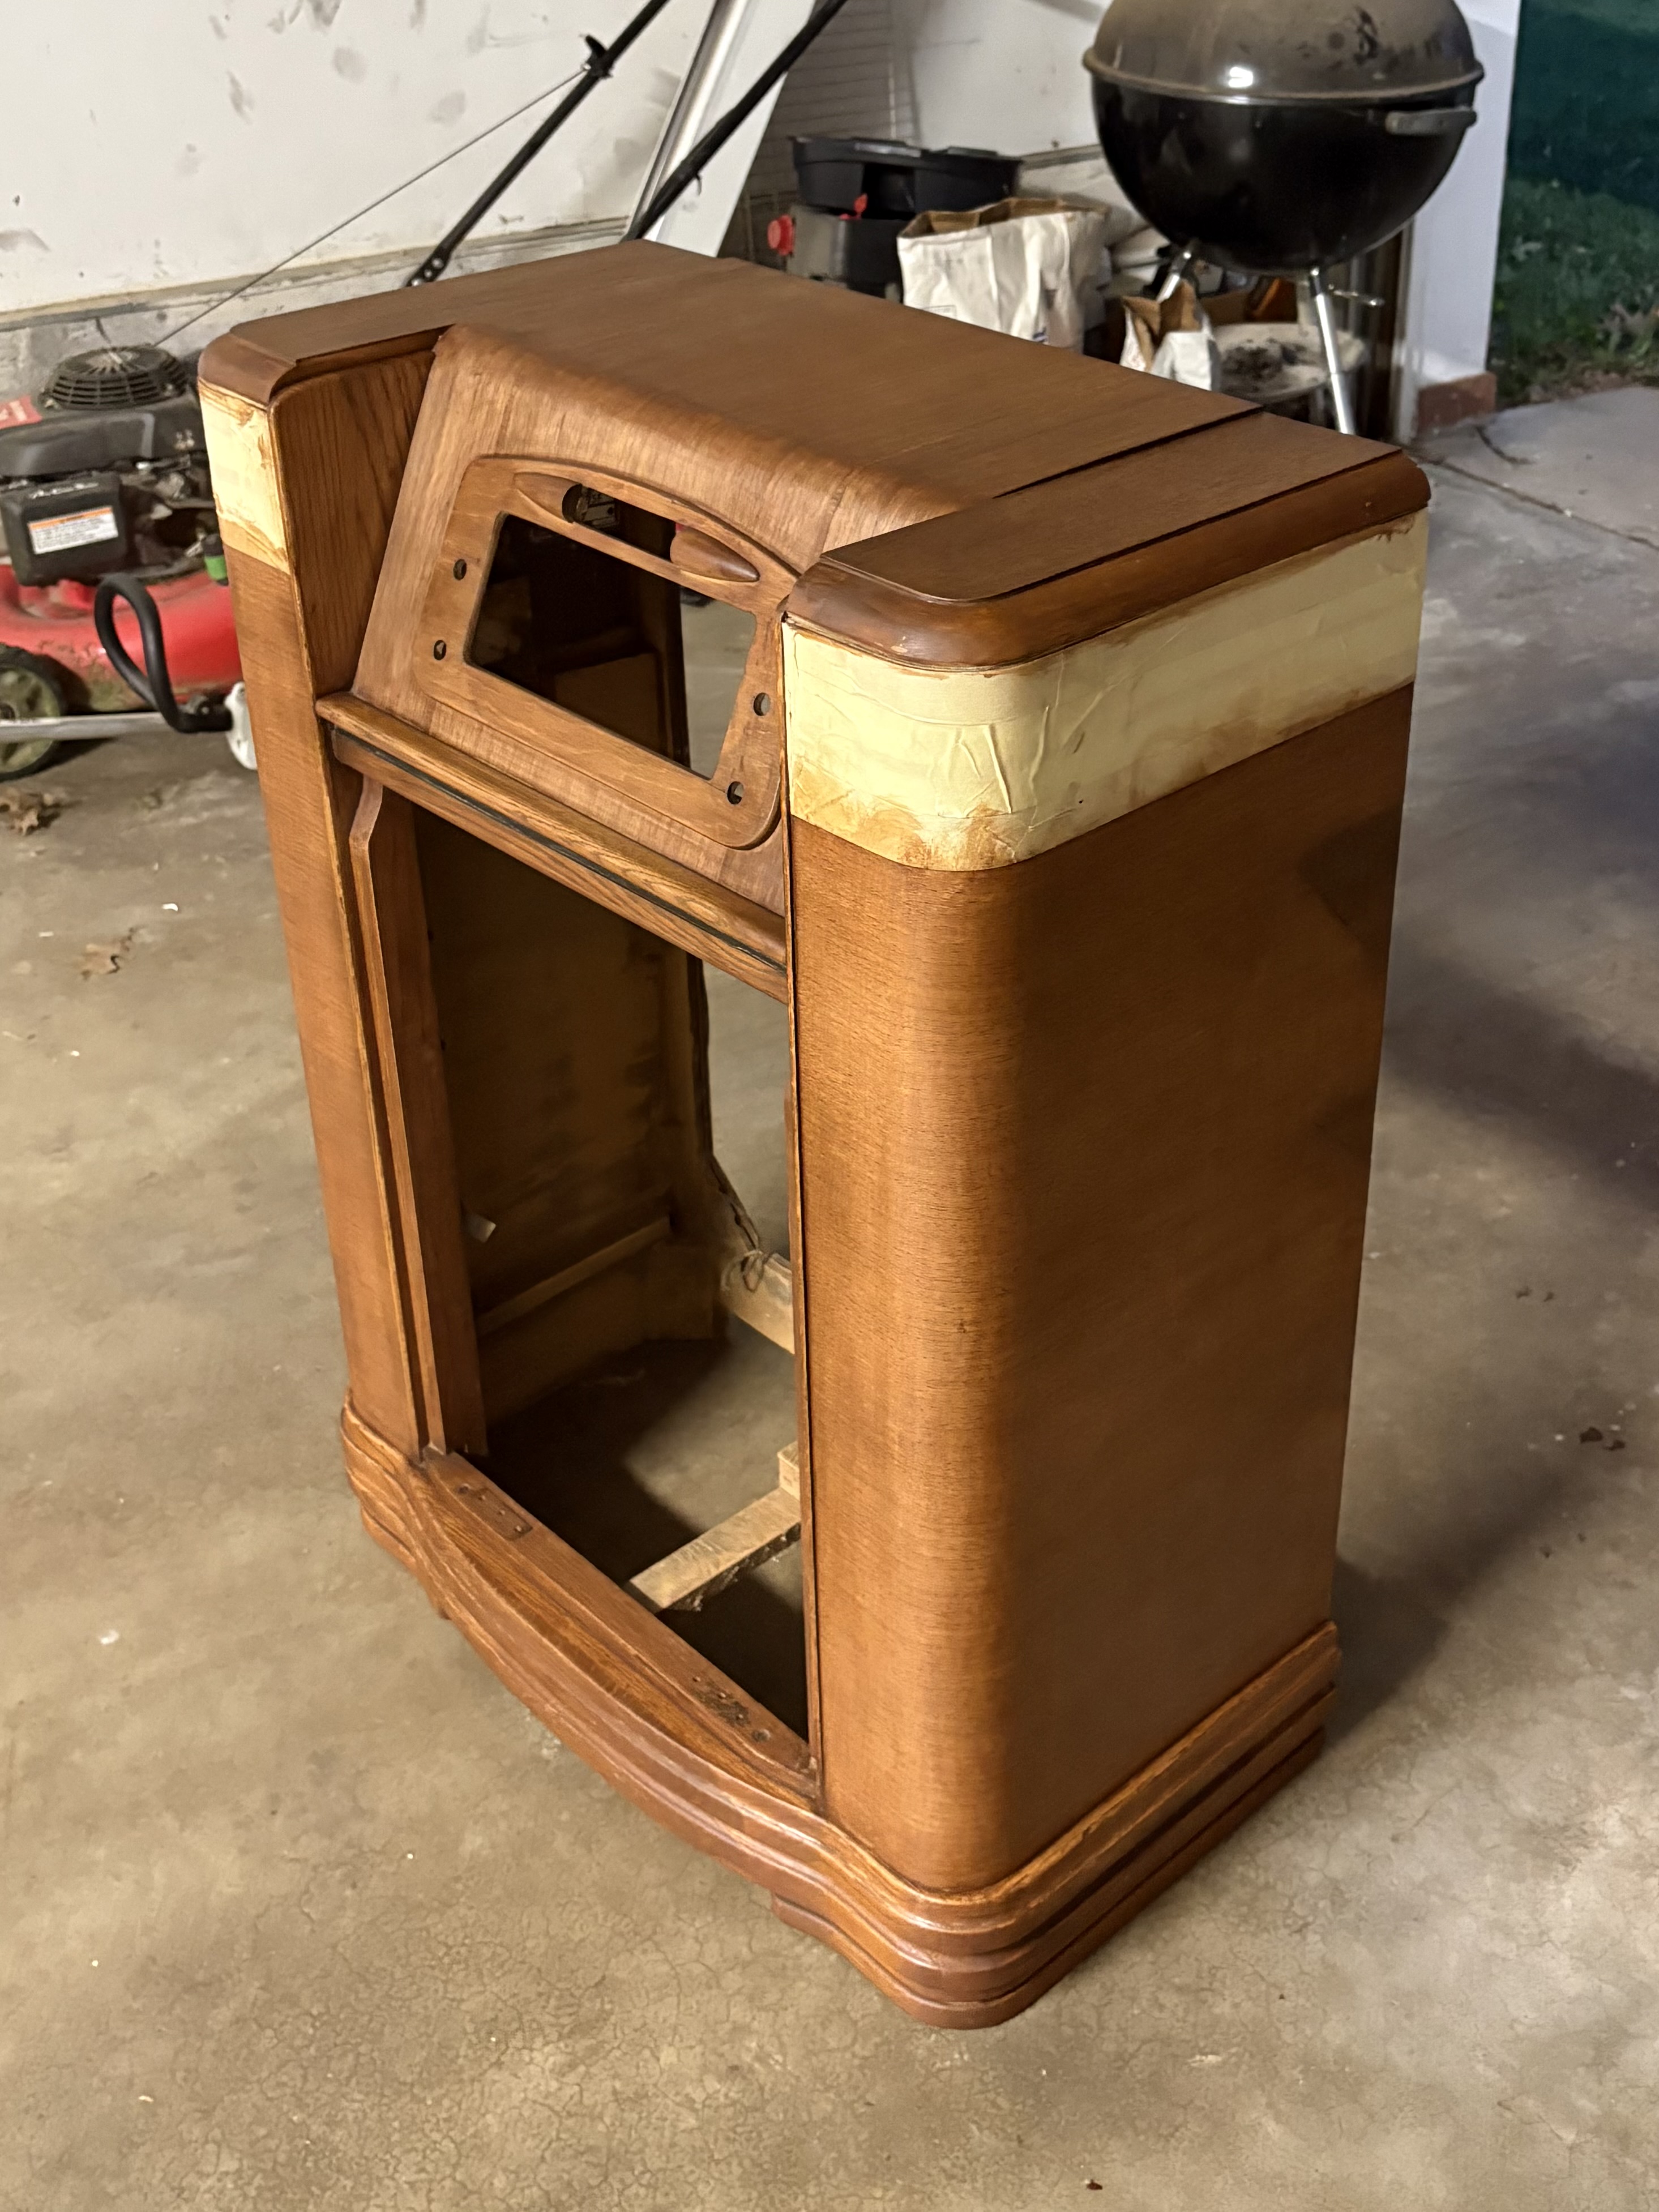
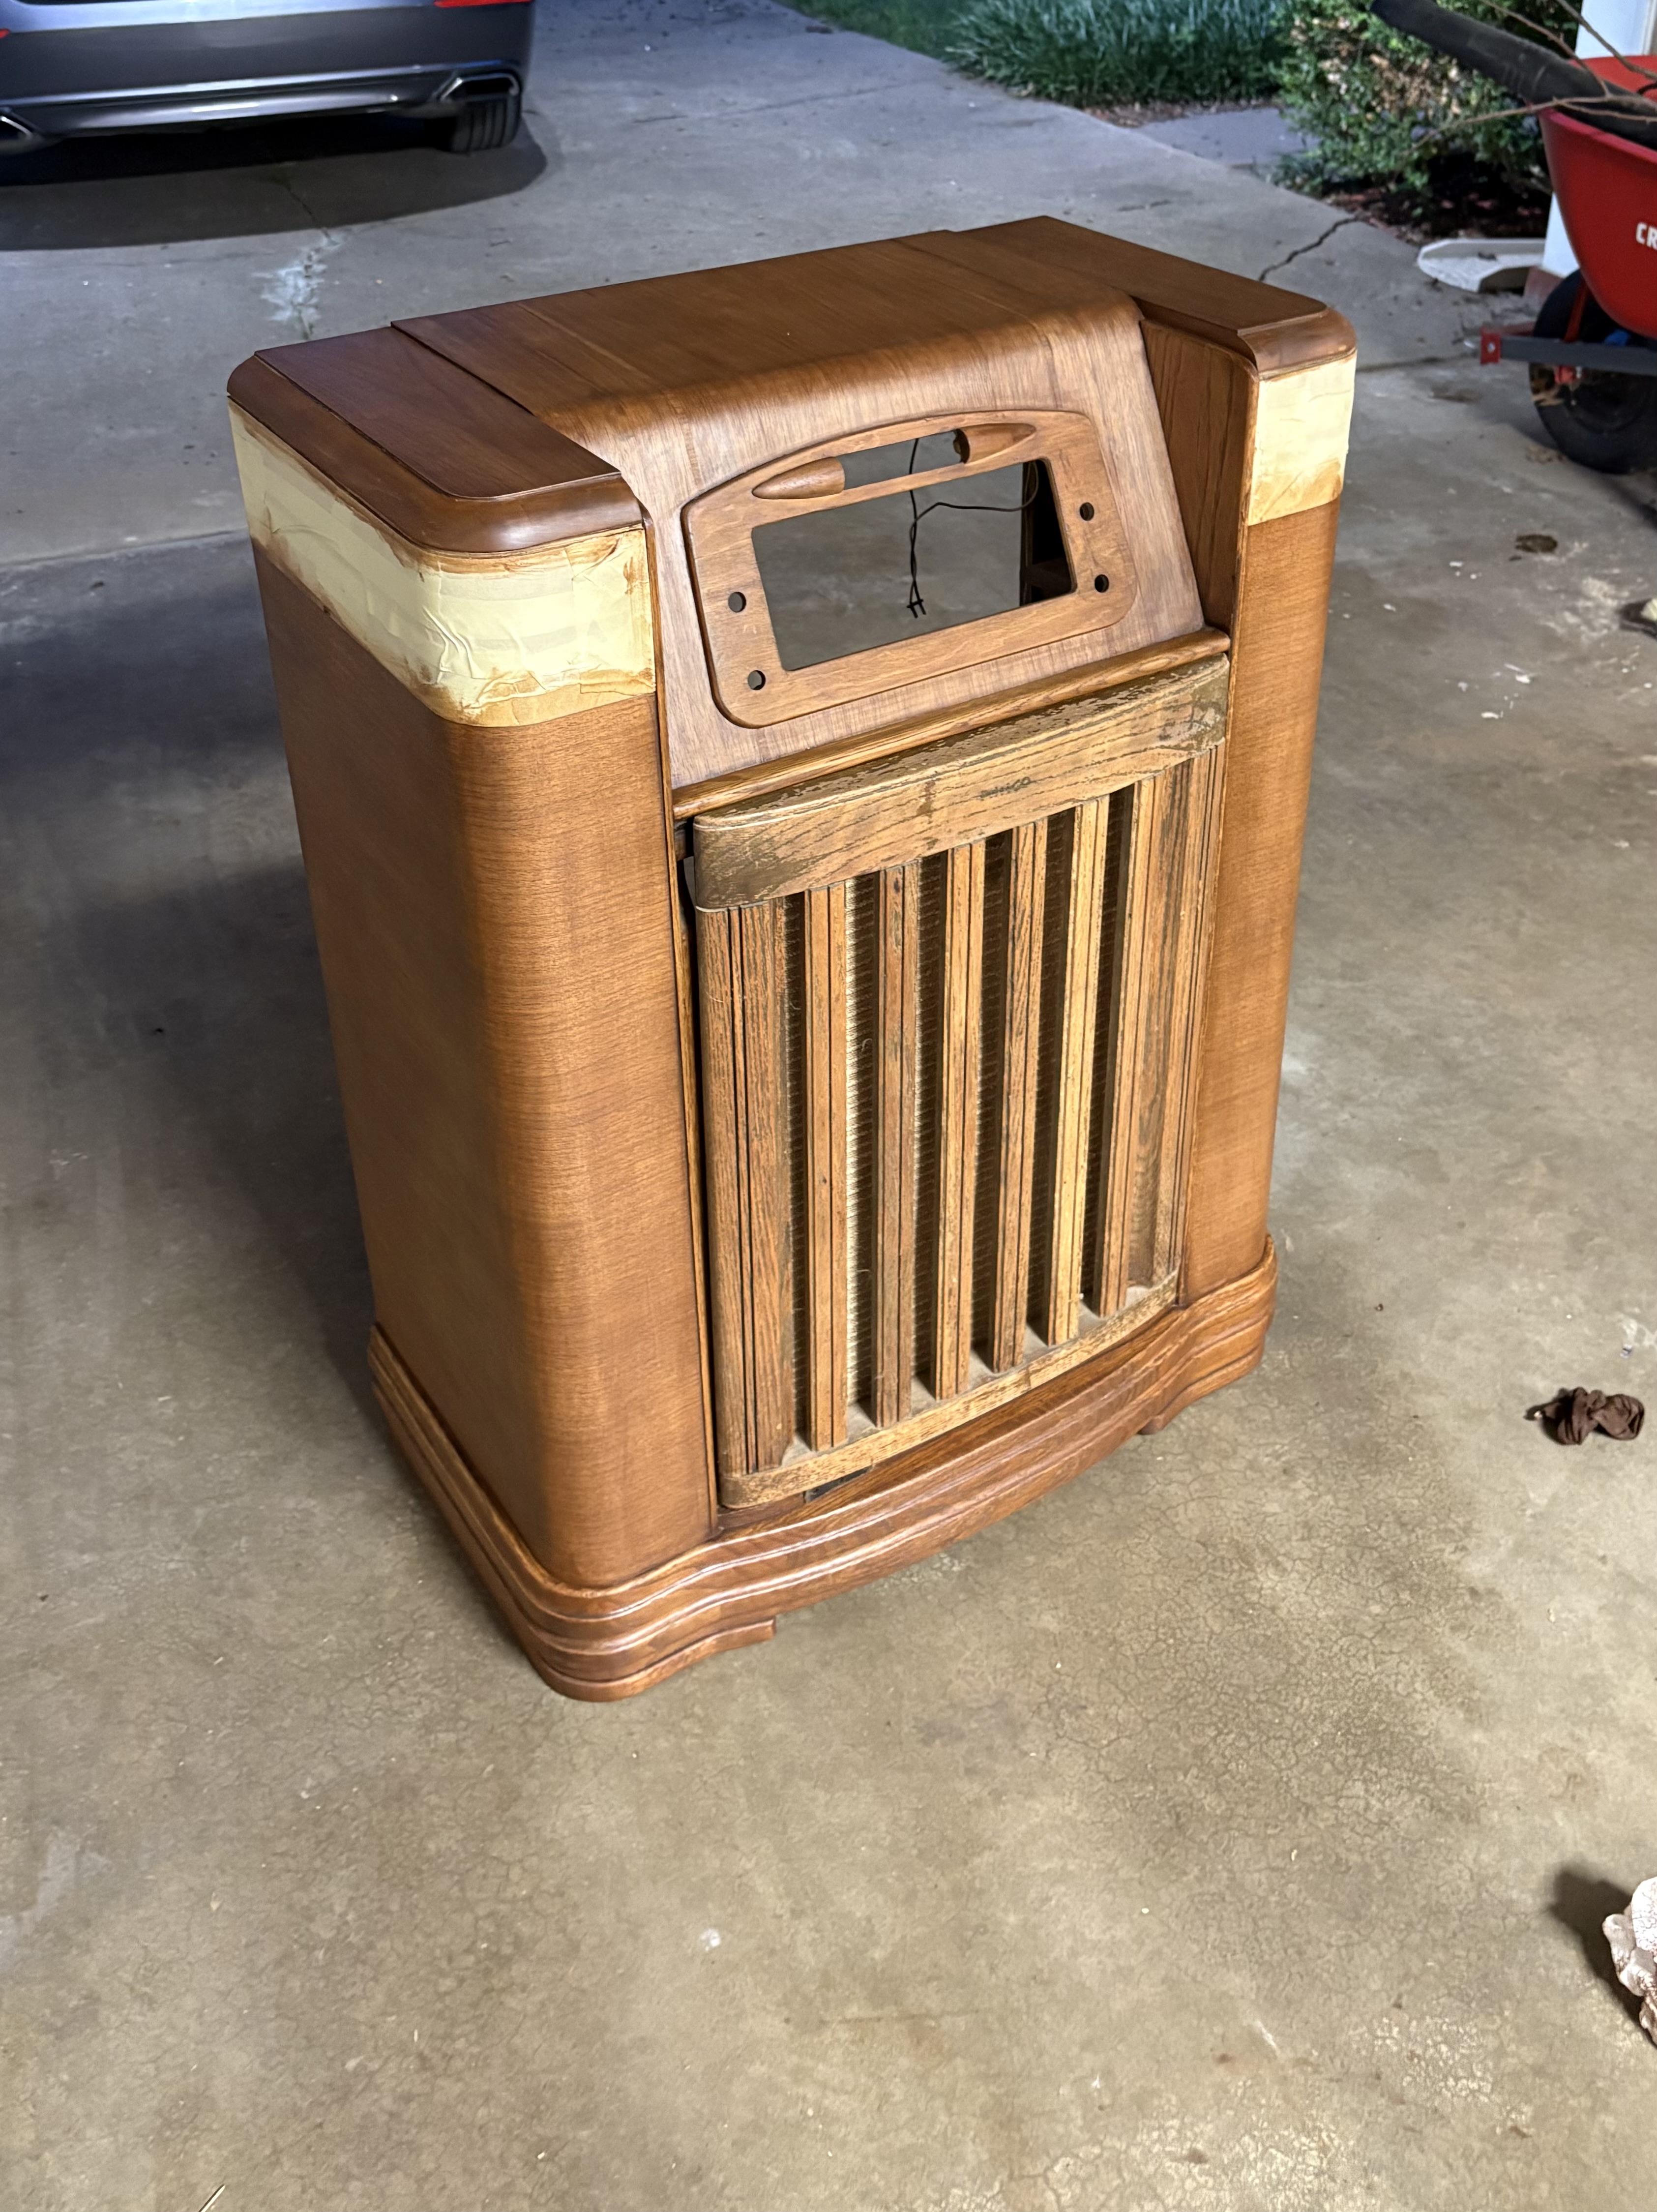
And here I have the speaker grill (which I have not yet stripped or refinished), shown against the new stain. I feel like it’s pretty close. And I’m overall more satisfied that the coloration is even.
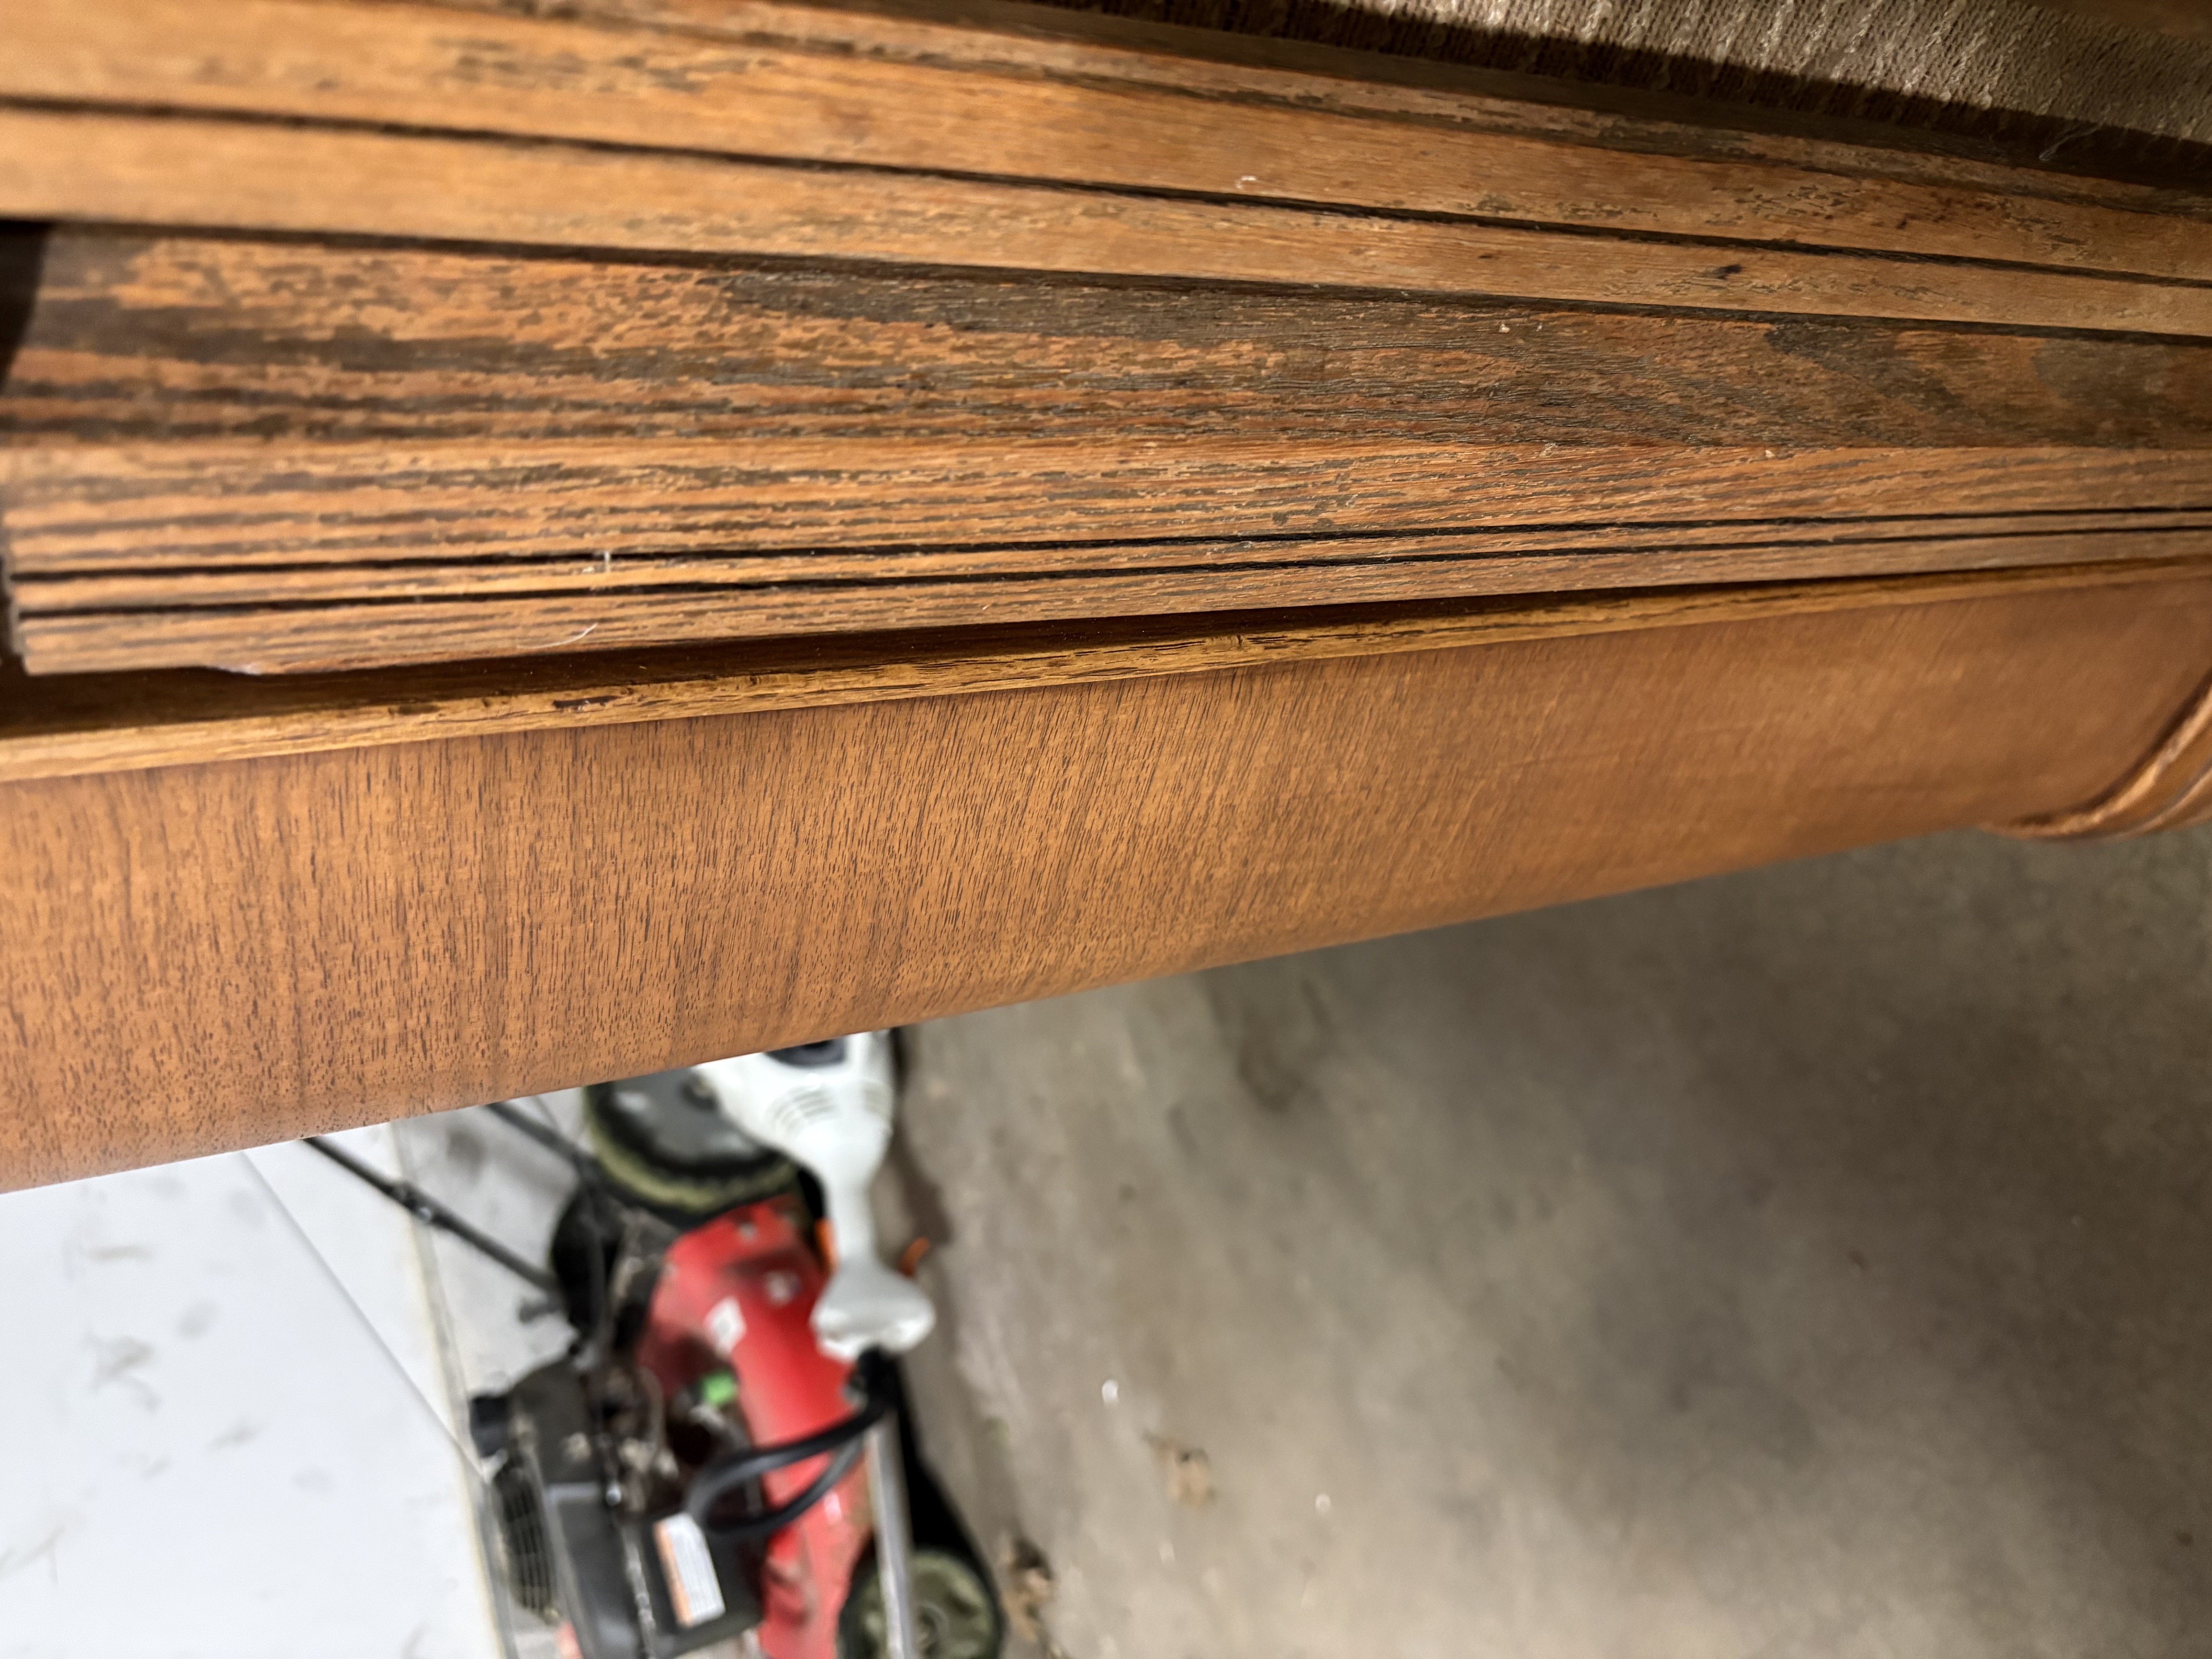
And here it is, back in my office:
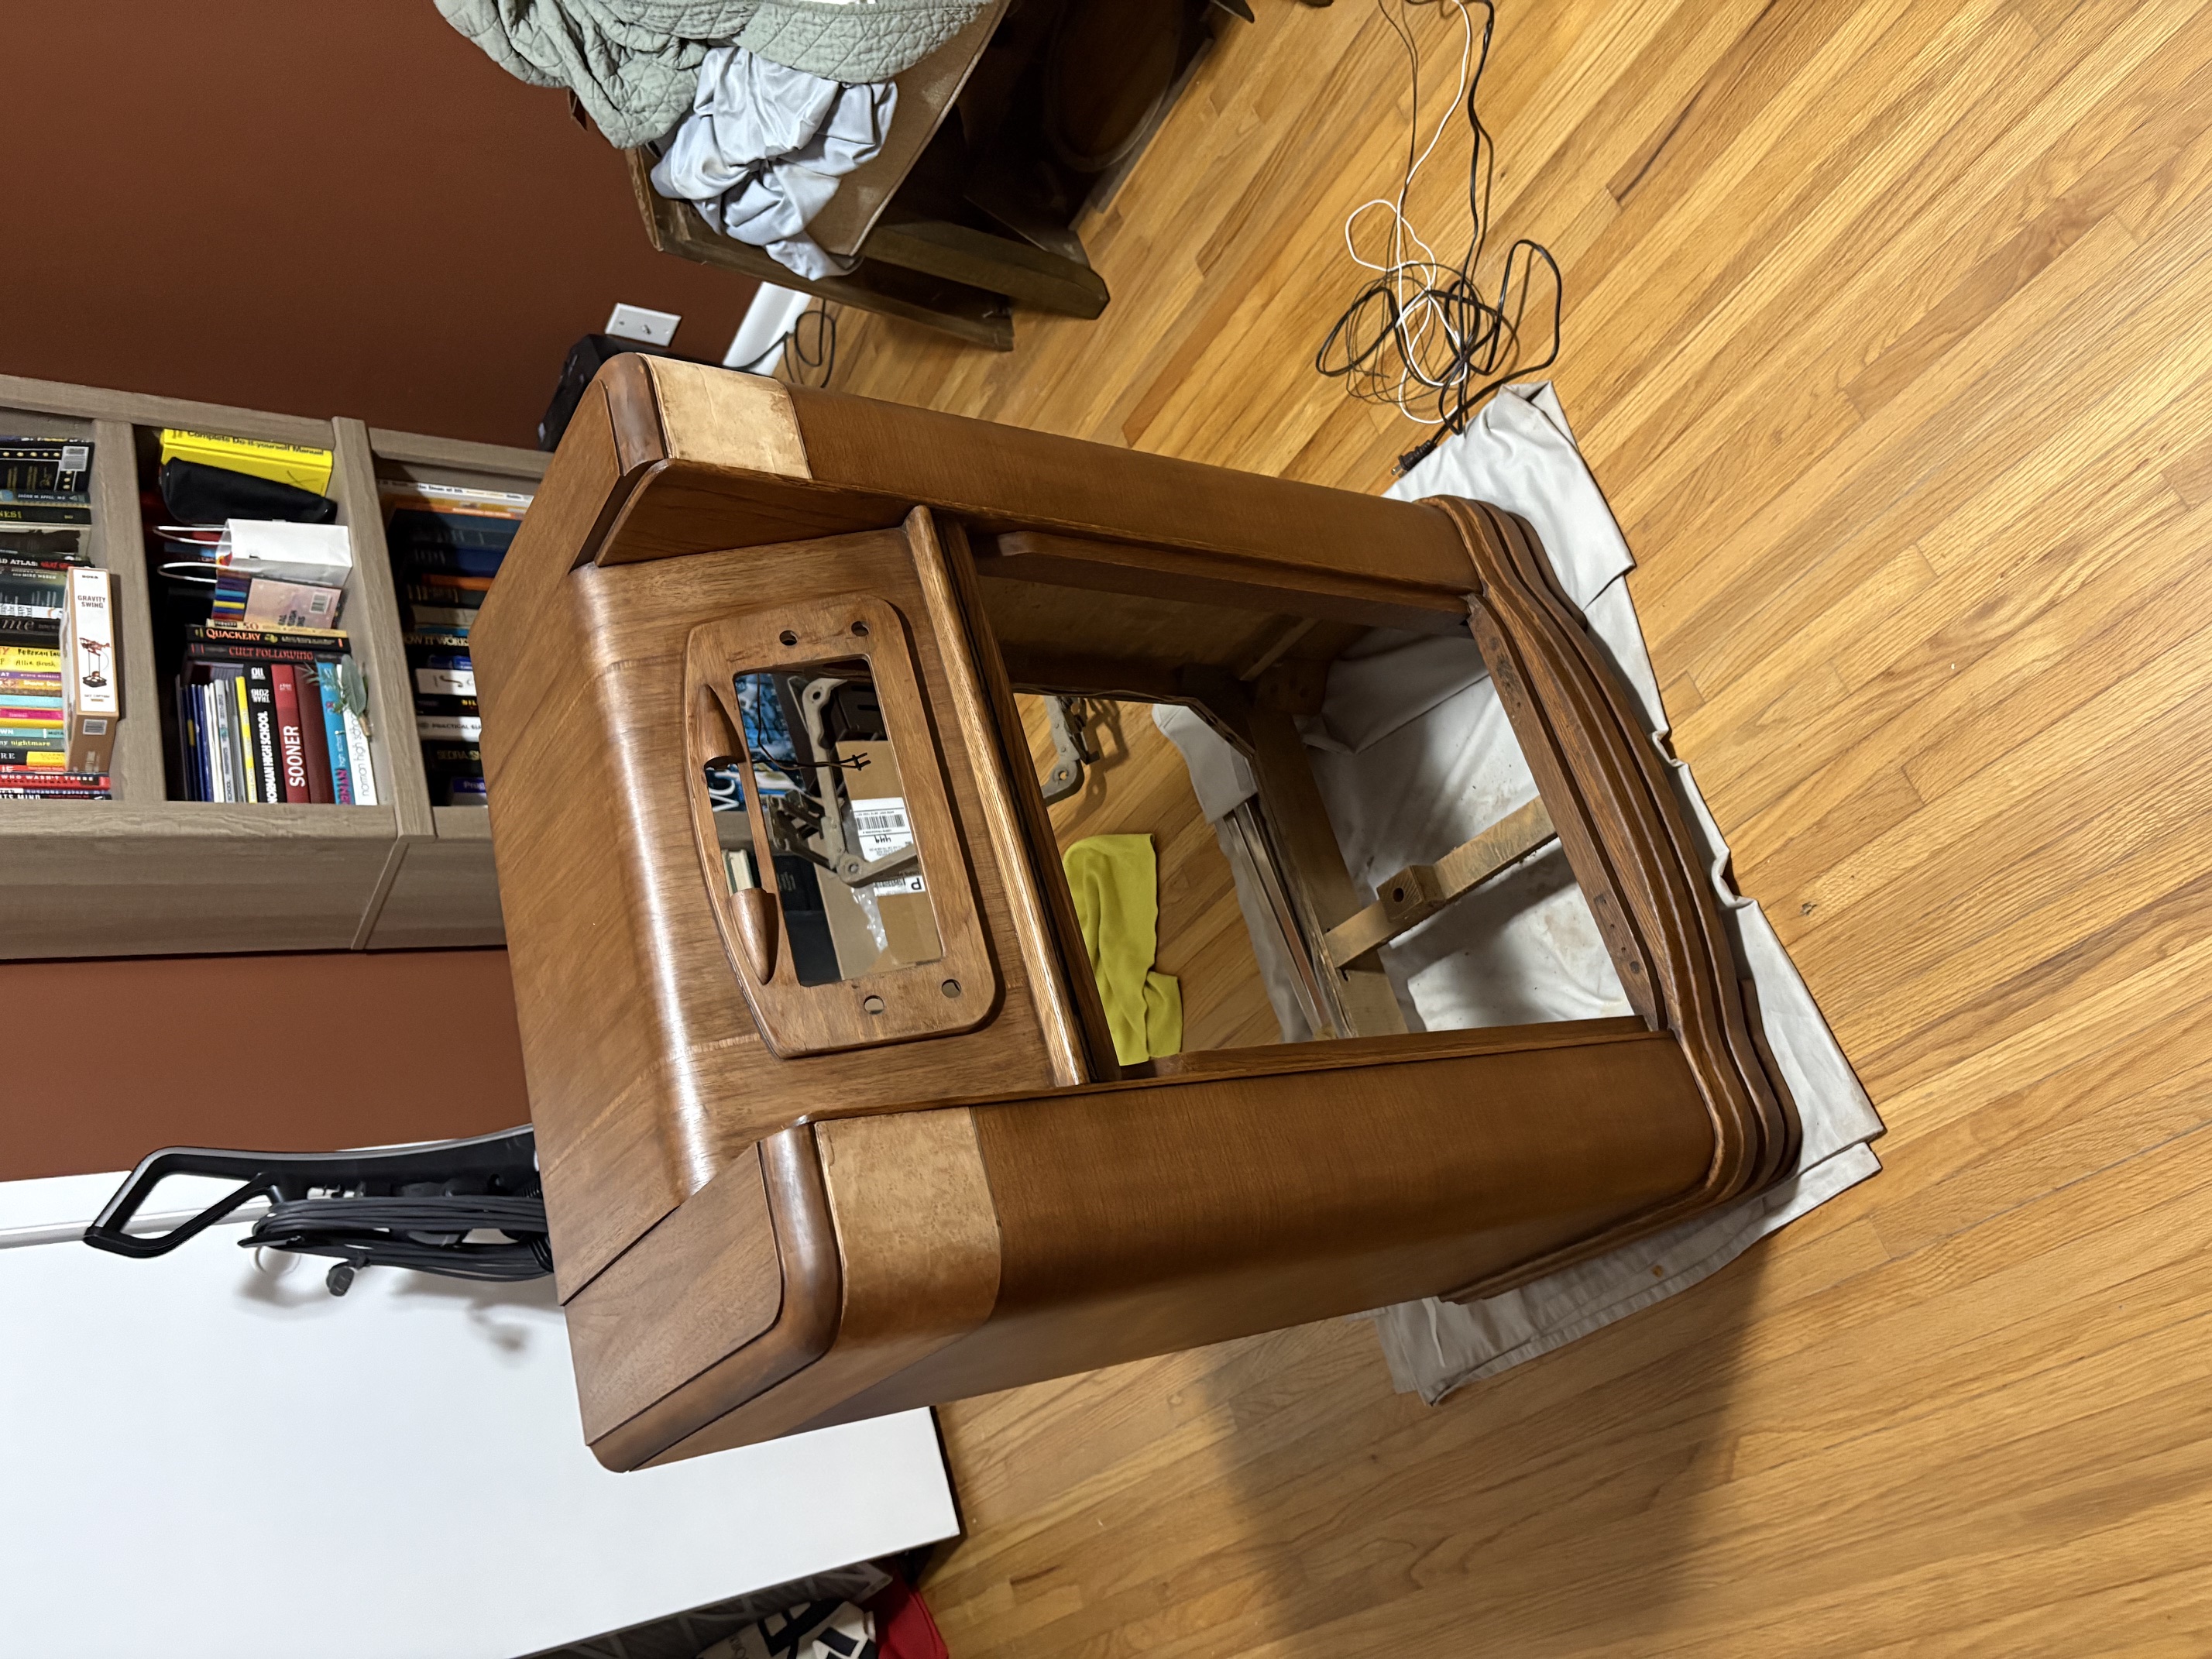
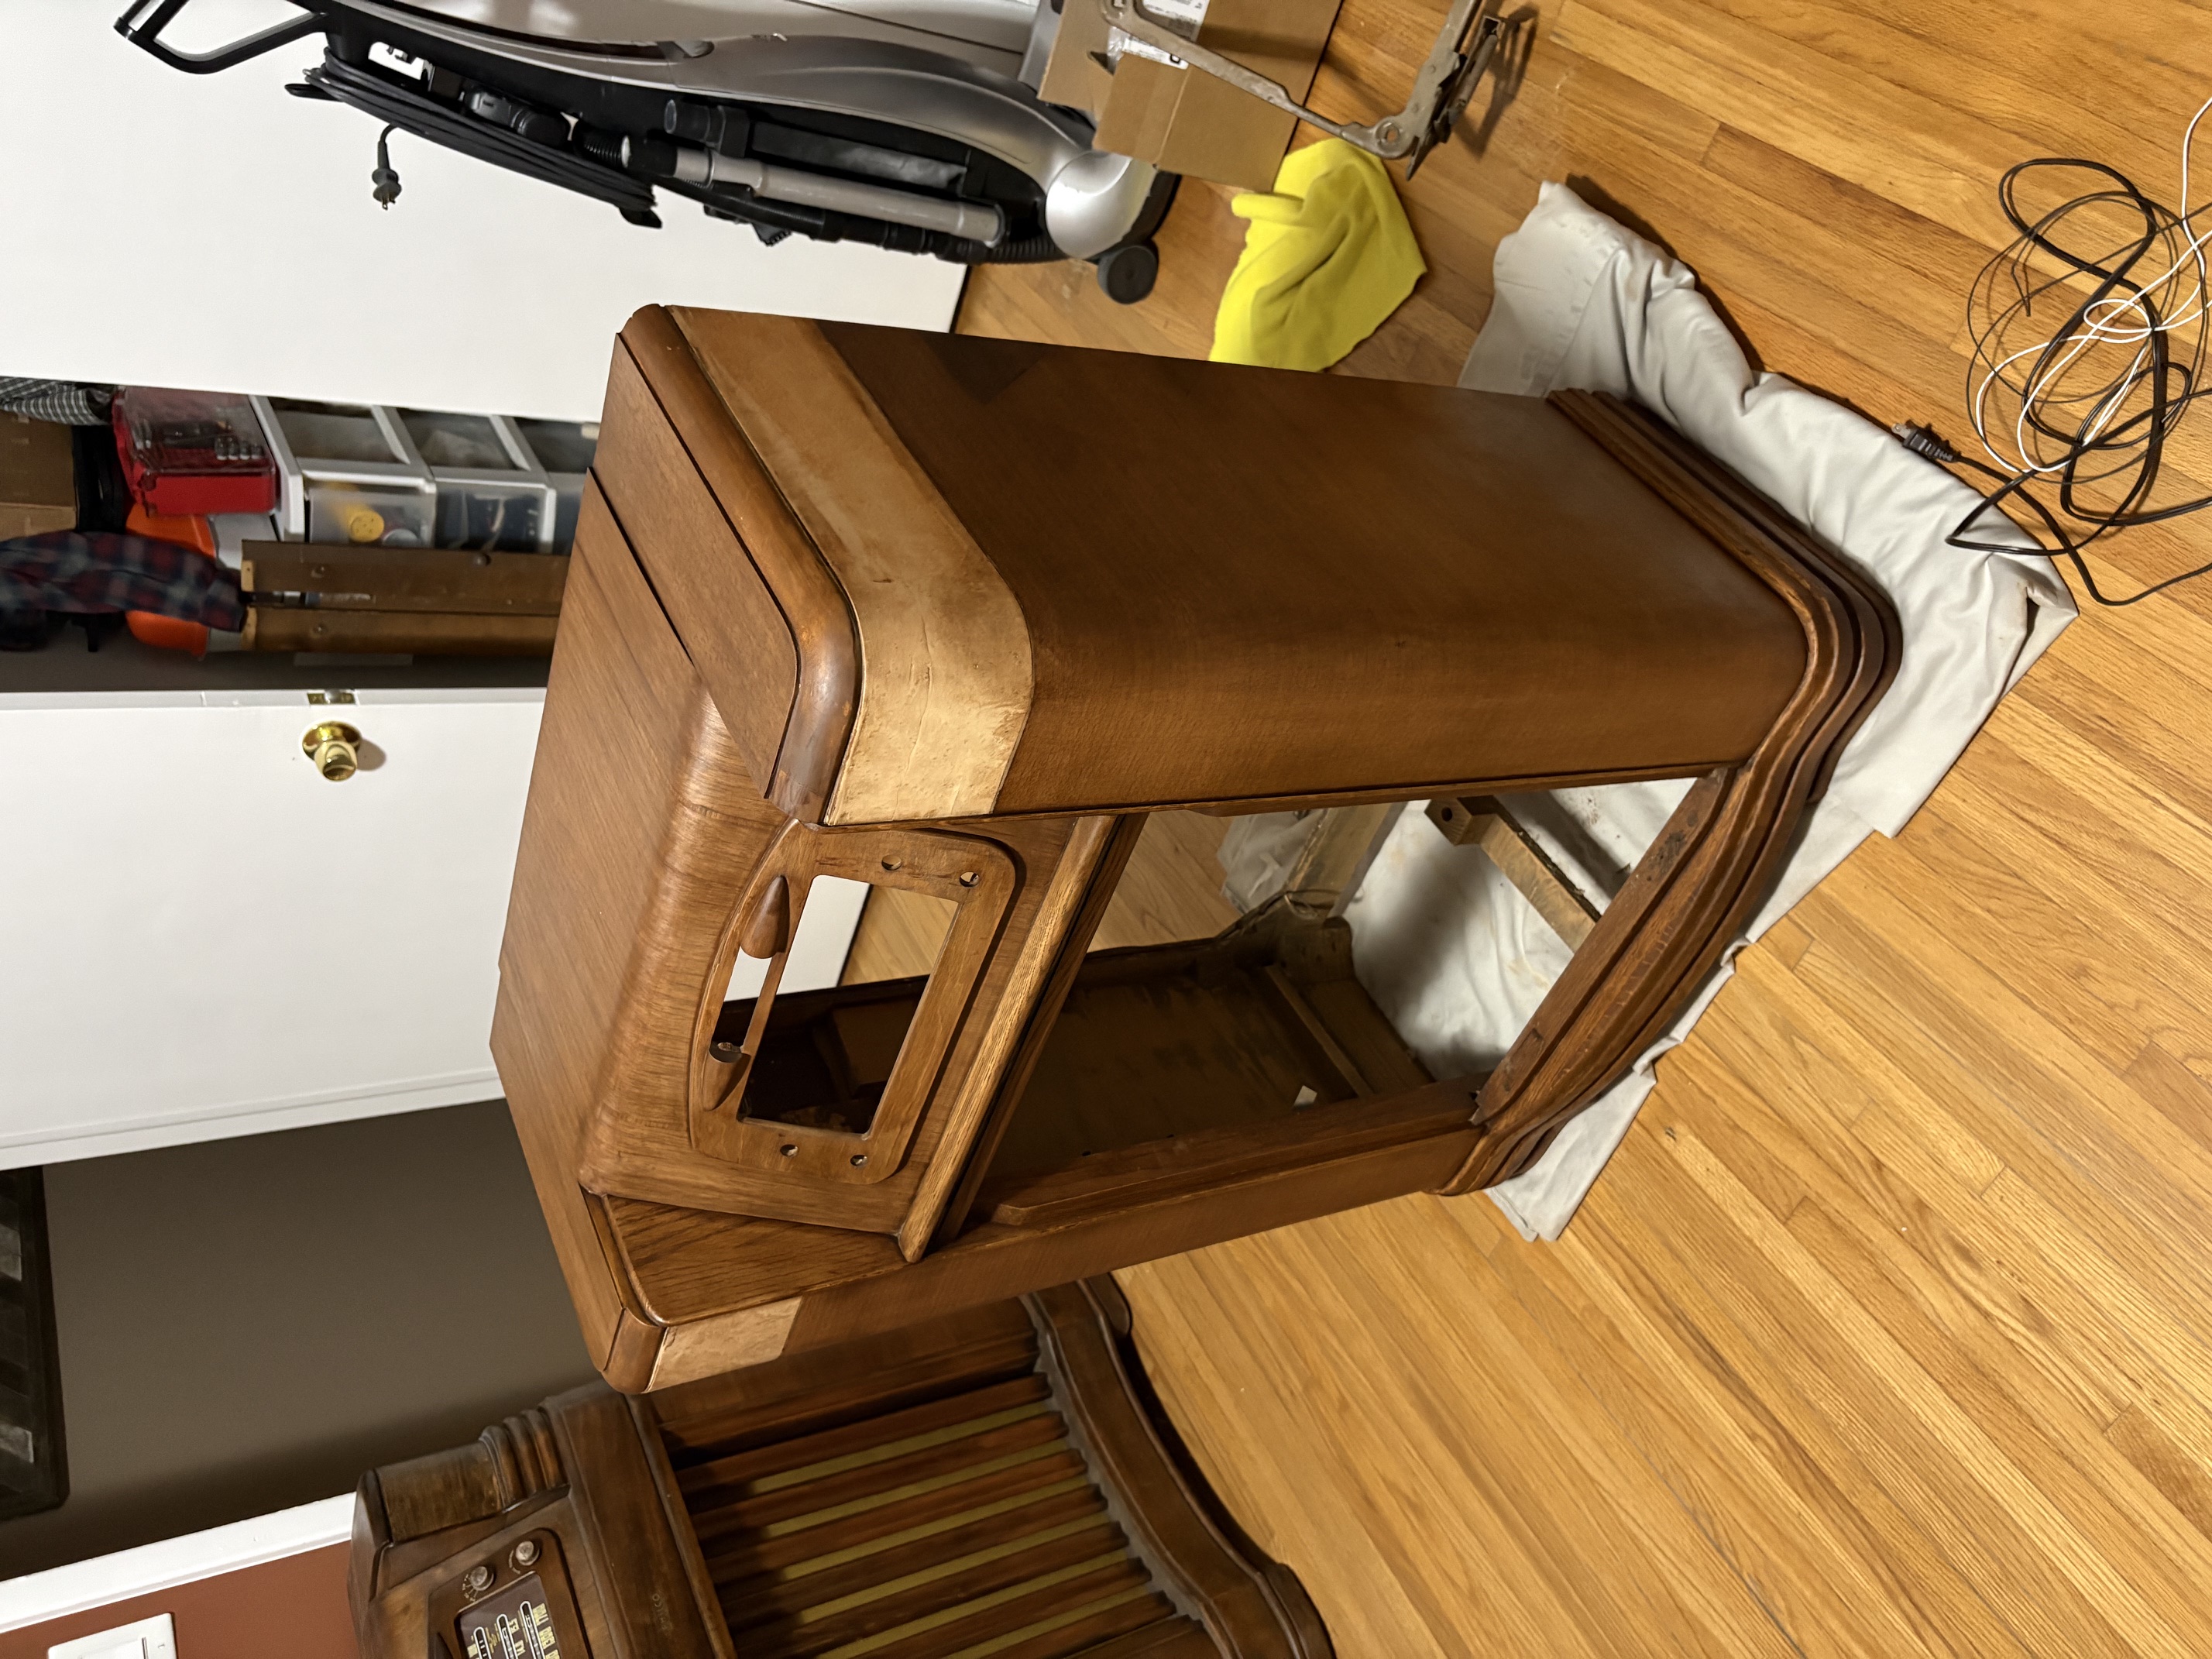
If anyone has any ideas on blending those veneer patches a bit better, I’m open to suggestions. Or perhaps more folks agree that they are tolerable?
Joseph
Philco 39-750 EZ
Philco 46-480
Philco 47-1230
Philco 48-482
Philco 49-906
Posts: 486
Threads: 28
Joined: Jan 2024
City: Tulsa
State, Province, Country: Oklahoma
I guess I’ll add that I’m also happier that the coloration is consistent this time, too.
Joseph
Philco 39-750 EZ
Philco 46-480
Philco 47-1230
Philco 48-482
Philco 49-906
Posts: 5,650
Threads: 56
Joined: Sep 2008
City: Sandwick, BC, CA
Joseph;
When I made veneer patches I always tried to avoid creating straight edges particularly when I was cutting across the grain. I tried to mimic the shape of of the grain, like the ring pattern, where it has these irregular arrow head or oval shapes, the more irregular the better. The human eye tends to be more drawn to straight edges then curved ones.
Regards
Arran
Posts: 486
Threads: 28
Joined: Jan 2024
City: Tulsa
State, Province, Country: Oklahoma
Thanks, Arran! Let me ask, do you have any photo demonstrations of veneer patches you’ve done? I’m having a difficult time finding information about an arrowhead shape.
In this case, “the damage is done” with my veneer patches. That is to say, they’ve been installed. And I think I can make them work. I’ve been mulling it over, and I realized that I nearly had a color match the other day. I had taken this photo:
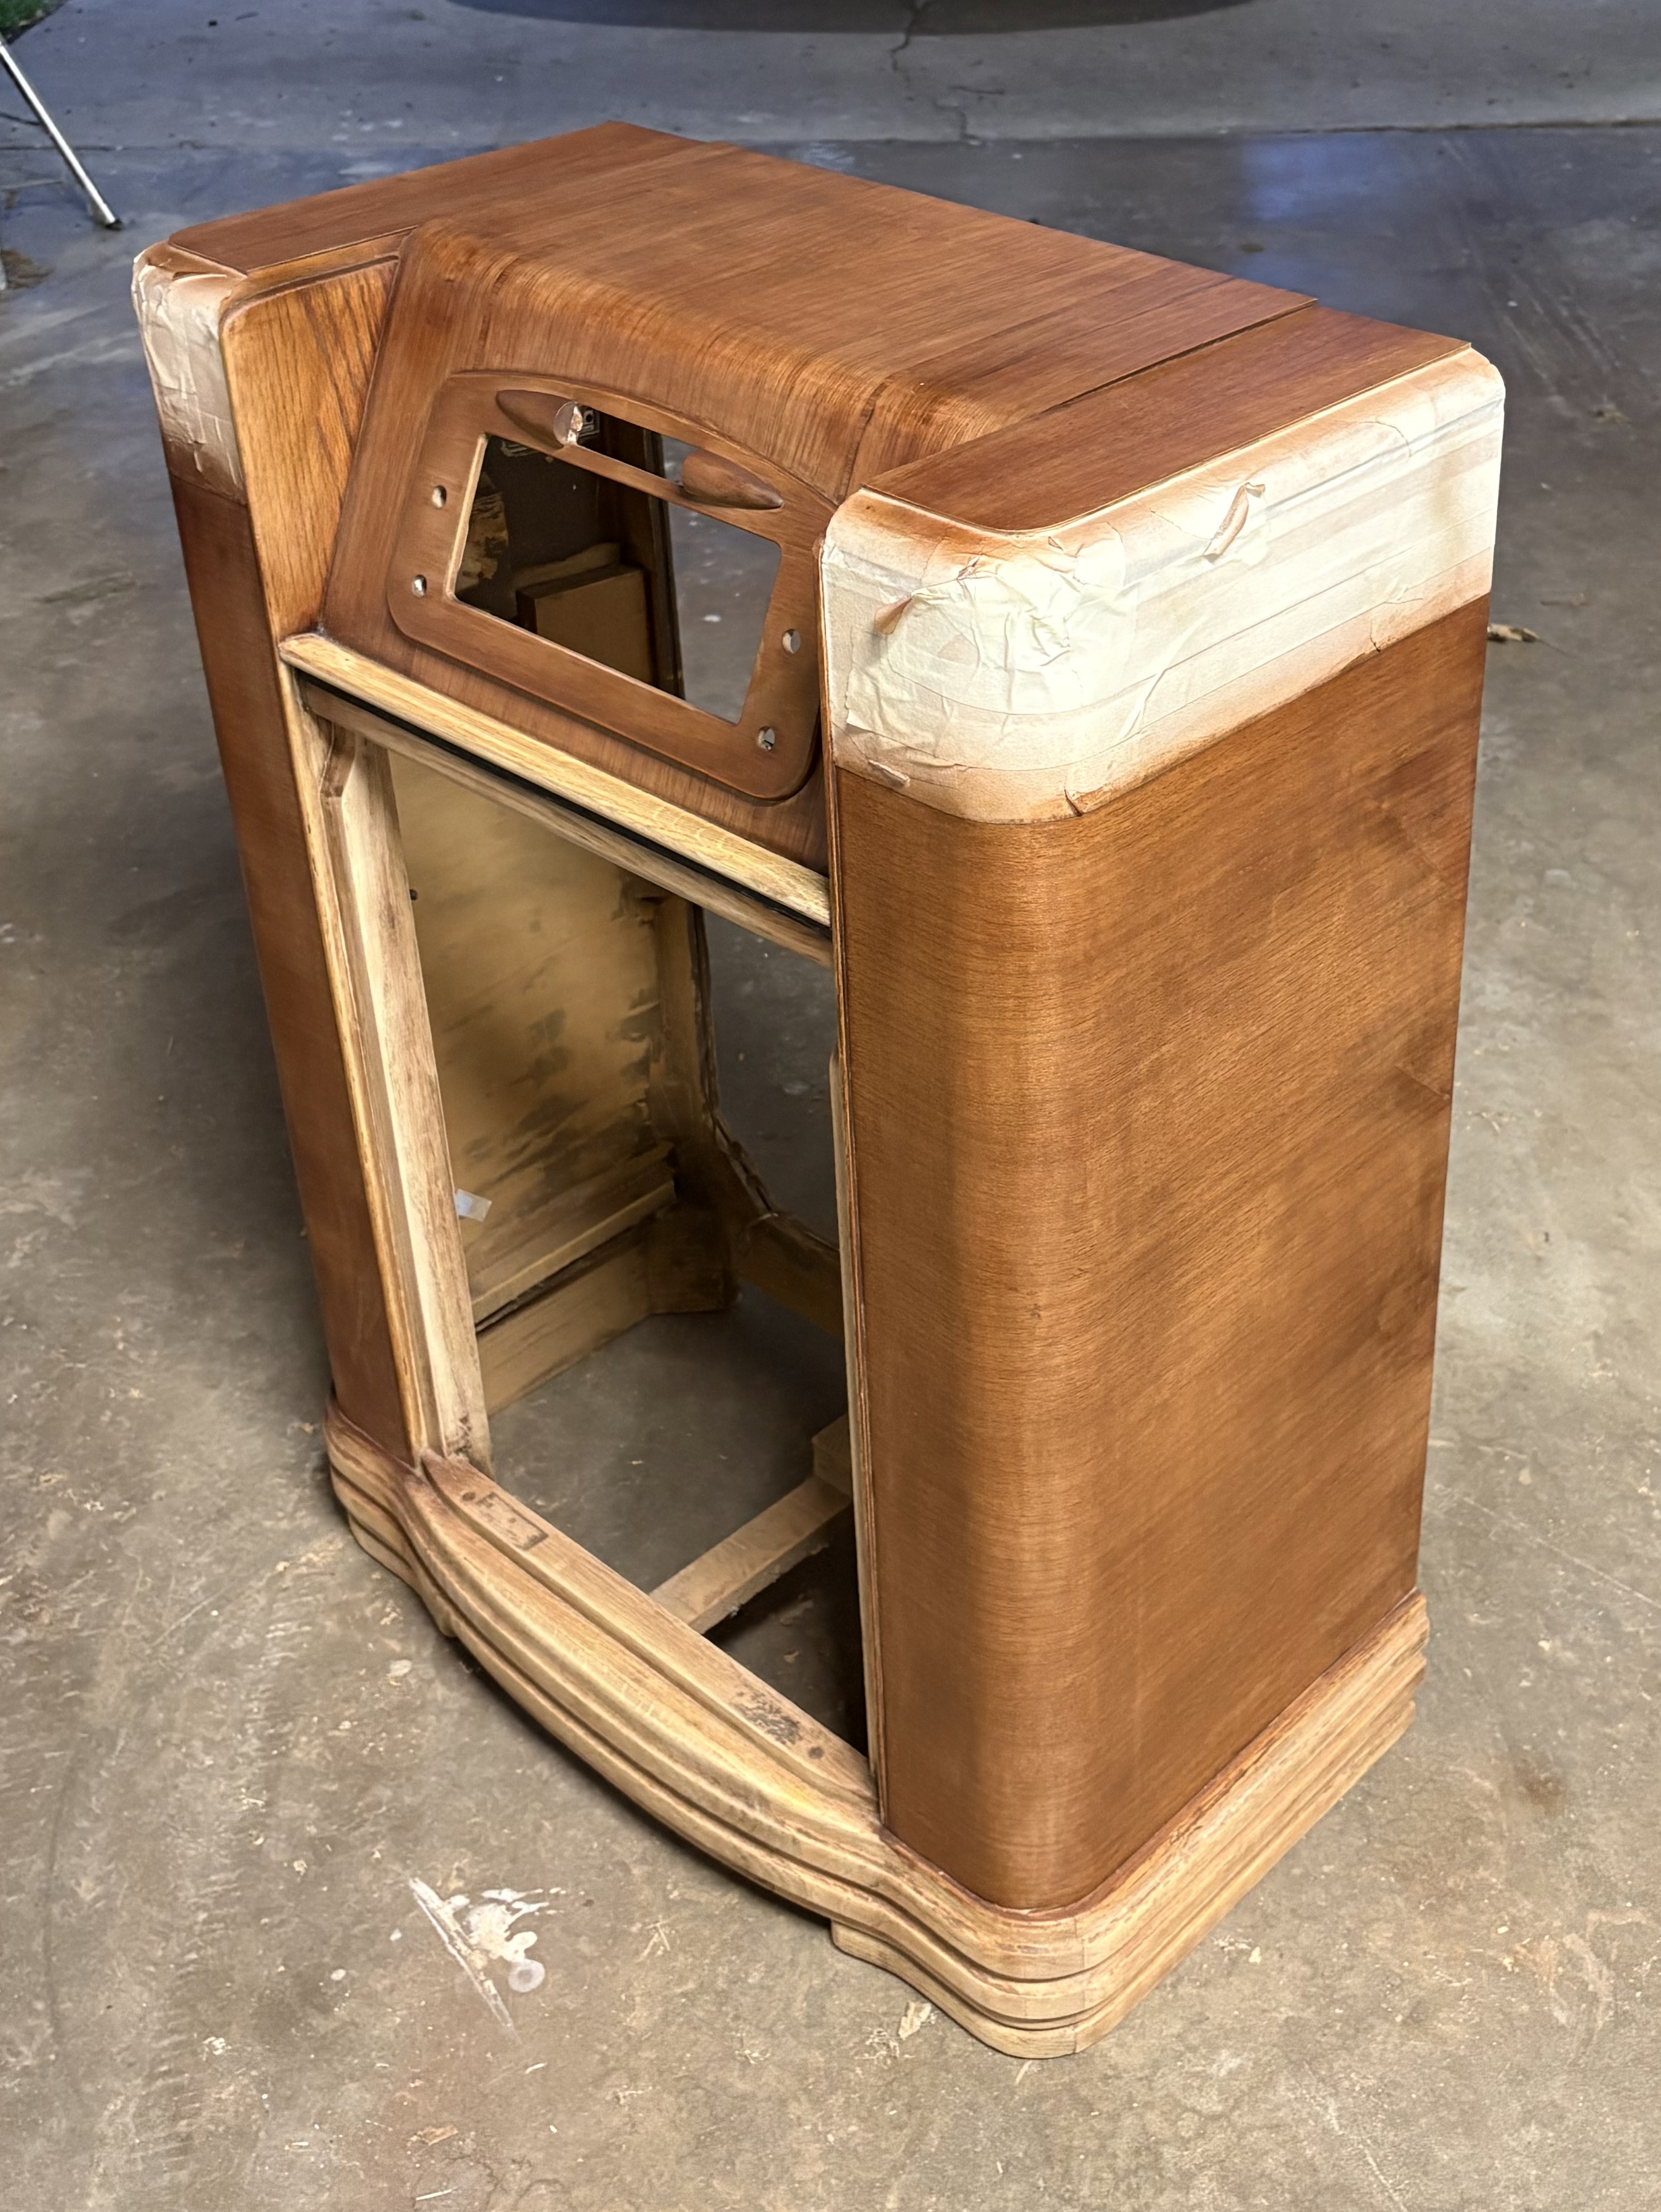
So what went wrong last night? I thought about it, and I think I know. I’ve been unhappy with the results a couple of times now, for various reasons. Each time I’ve stripped the finish and tried again. And I’m sure that, by now, I’ve stripped that dilute amber wood dye and thinned red chestnut stain treatment I had originally applied to these patches, in an effort to match their color to the original veneer. I believe that these patches are now too brown, and not enough toward the red-orange coloring.
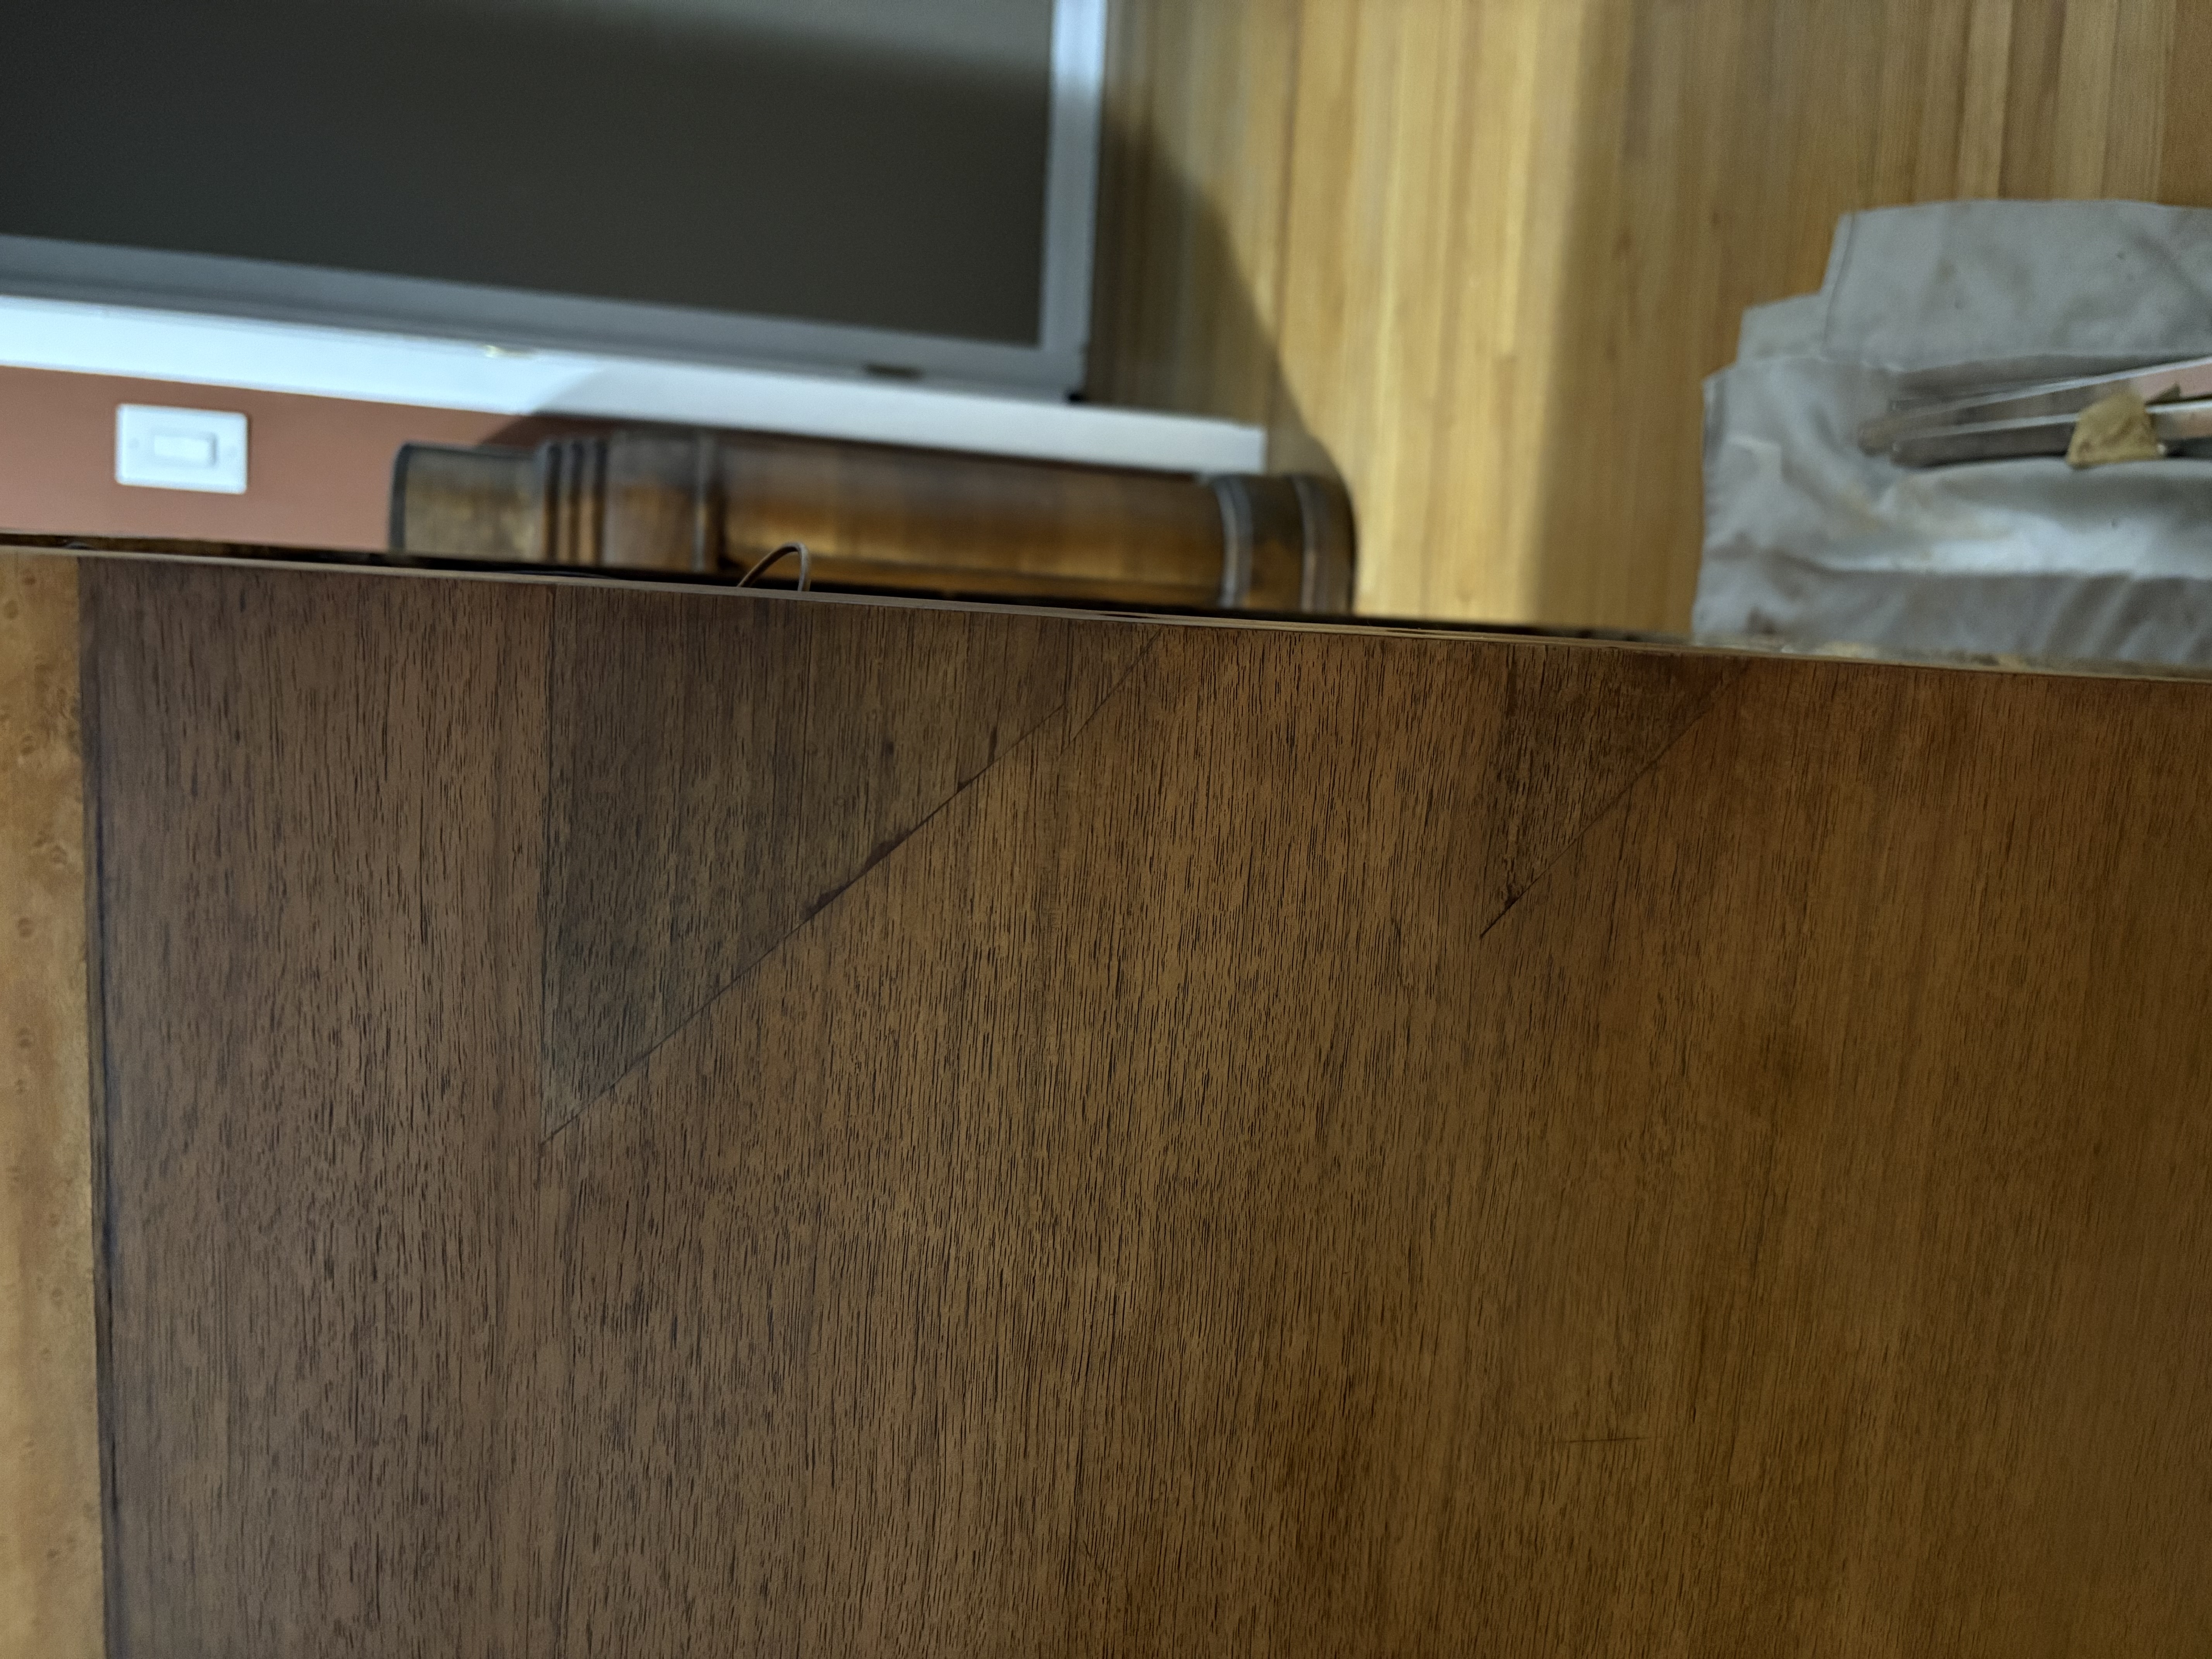
I’m happy with the overall results, so here is what I propose. This evening I will mask off the panels so that only these patches are exposed, and I will use lacquer thinner to strip them. I’ll reapply the dye and stain, and then I’ll refinish them as normally. There’s no reason to strip the entire cabinet again, so I think I can manage it by targeting these two patches.
Joseph
Philco 39-750 EZ
Philco 46-480
Philco 47-1230
Philco 48-482
Philco 49-906
Posts: 486
Threads: 28
Joined: Jan 2024
City: Tulsa
State, Province, Country: Oklahoma
Joseph
Philco 39-750 EZ
Philco 46-480
Philco 47-1230
Philco 48-482
Philco 49-906
Posts: 486
Threads: 28
Joined: Jan 2024
City: Tulsa
State, Province, Country: Oklahoma
As for the dark splice lines, at this point I’ll put on a couple of coats of clear coat to lock in the work I’ve done (after I stain the upper panels, of course), and then I can use some finishing gels or markers to blend over those dark lines. If I can carefully blend it to look like a continuous grain, I think we’ll have the job done!
Joseph
Philco 39-750 EZ
Philco 46-480
Philco 47-1230
Philco 48-482
Philco 49-906
Posts: 486
Threads: 28
Joined: Jan 2024
City: Tulsa
State, Province, Country: Oklahoma
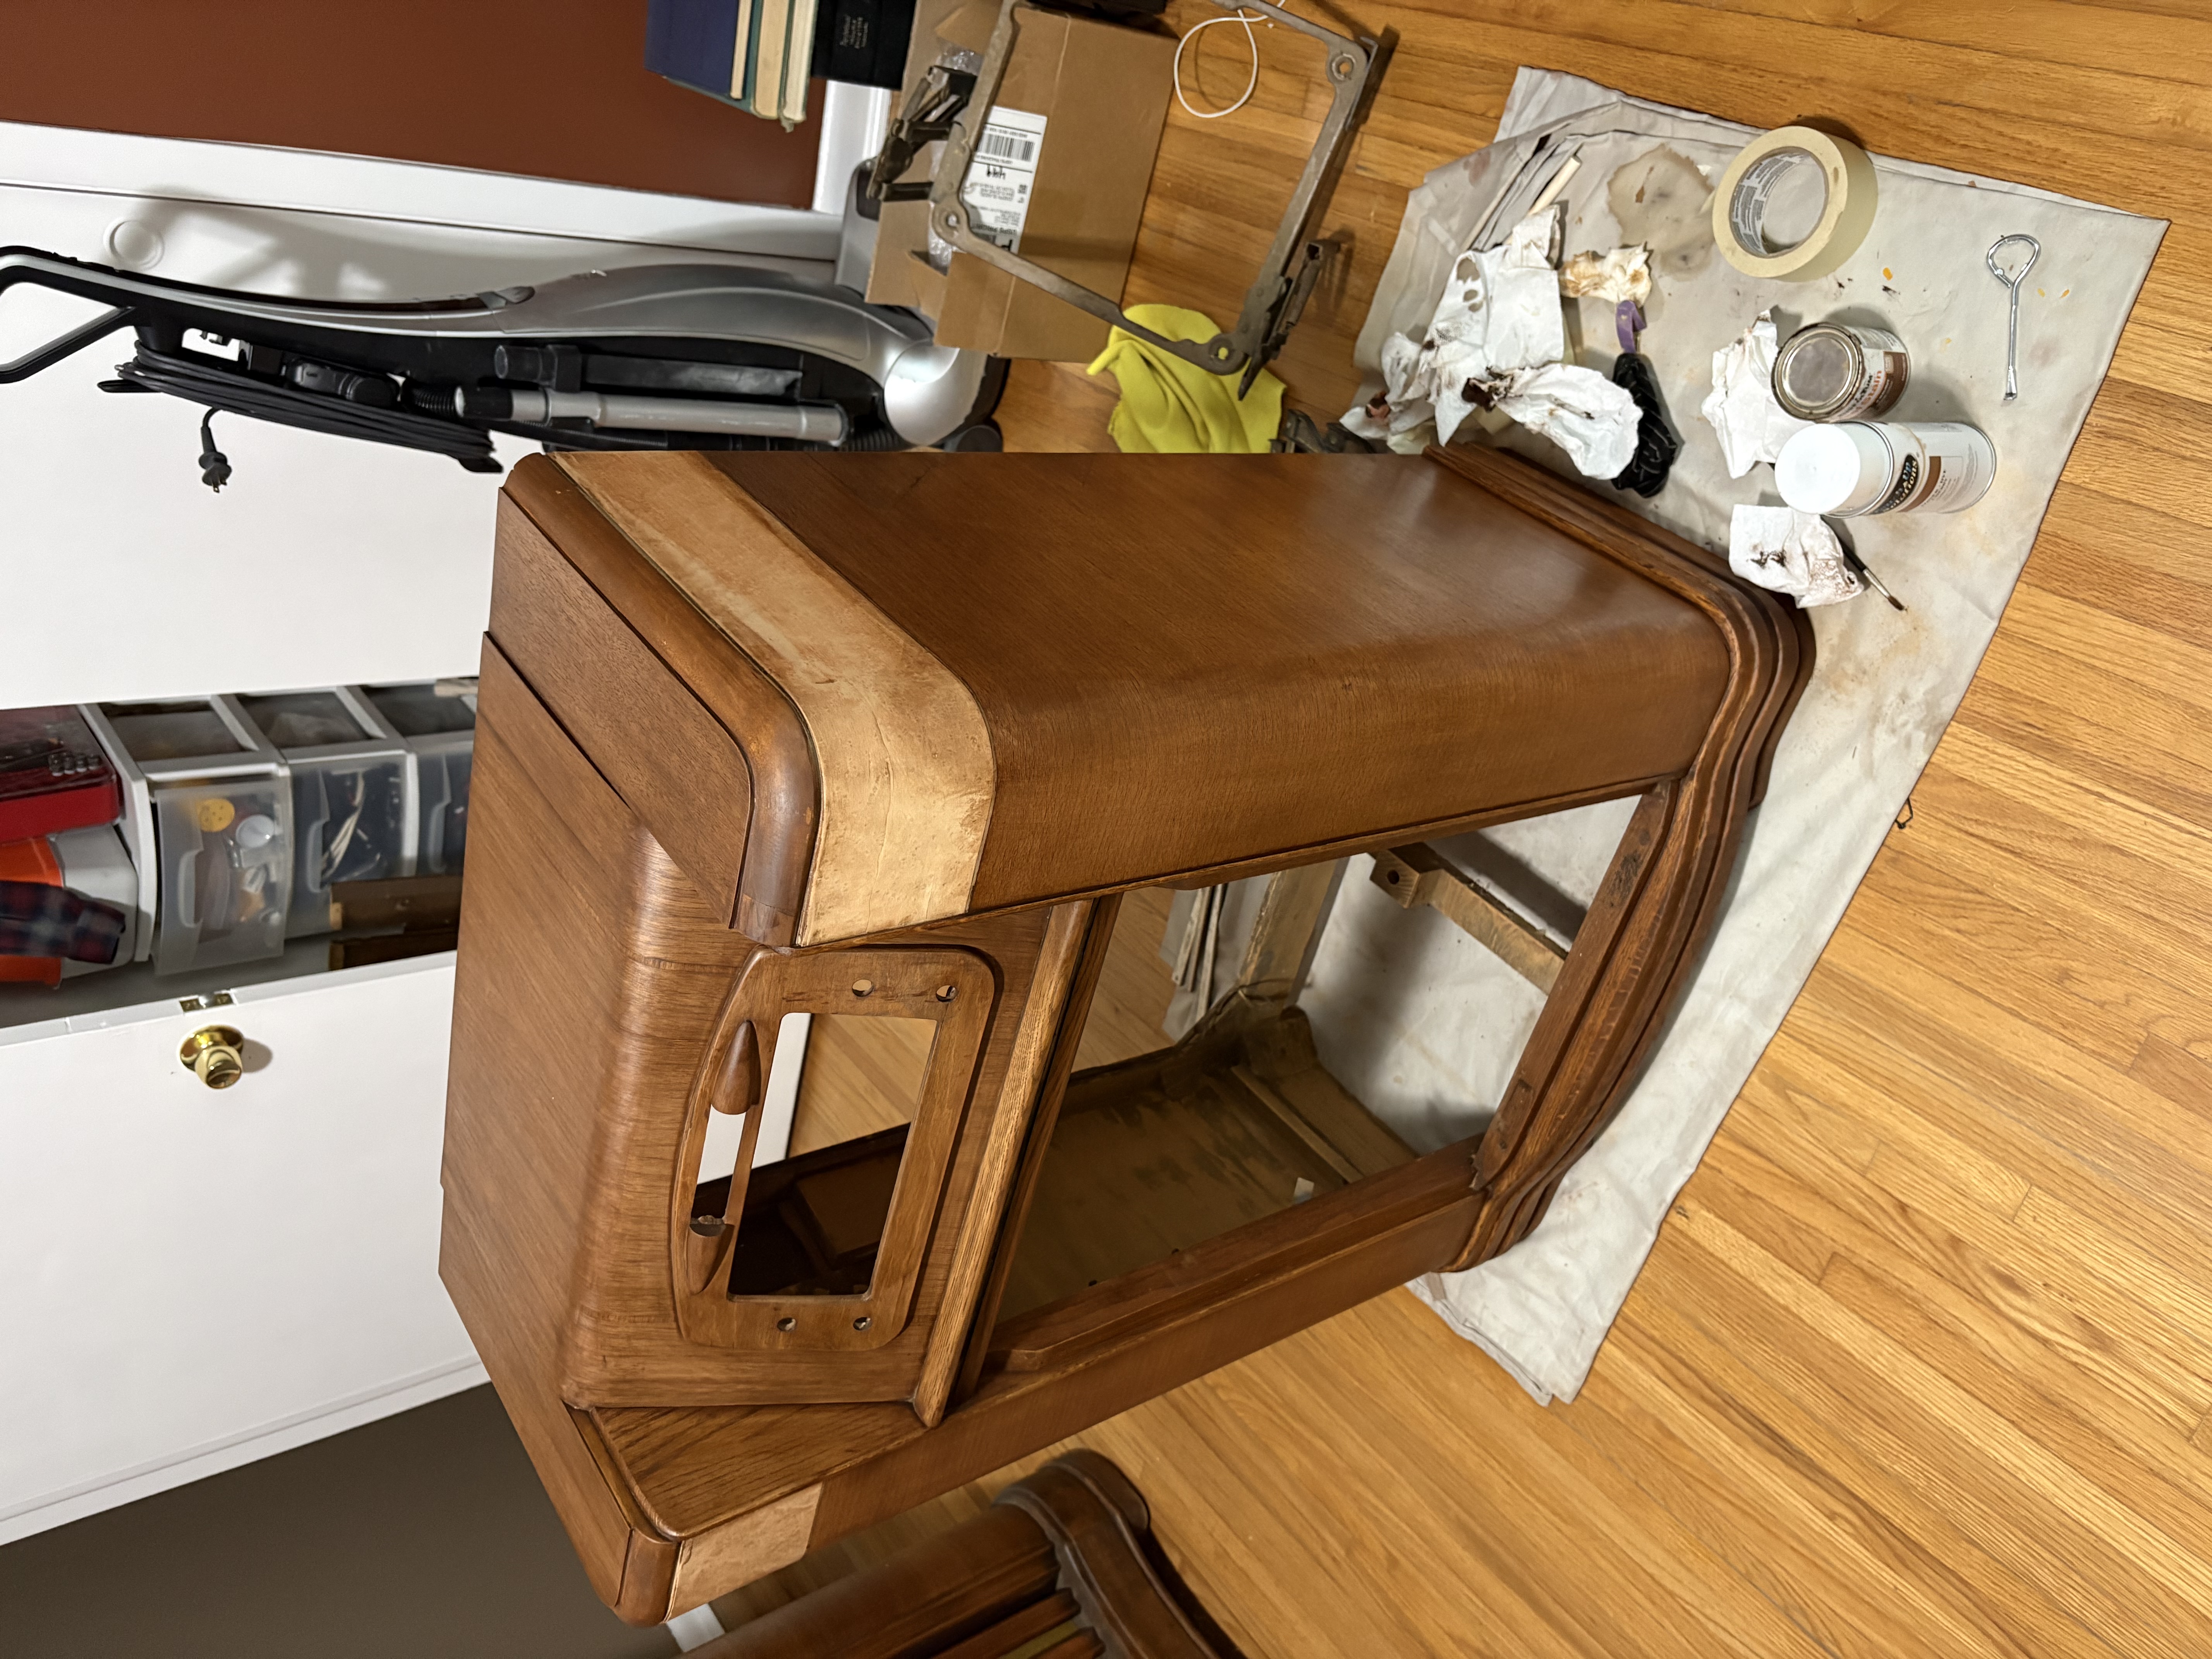
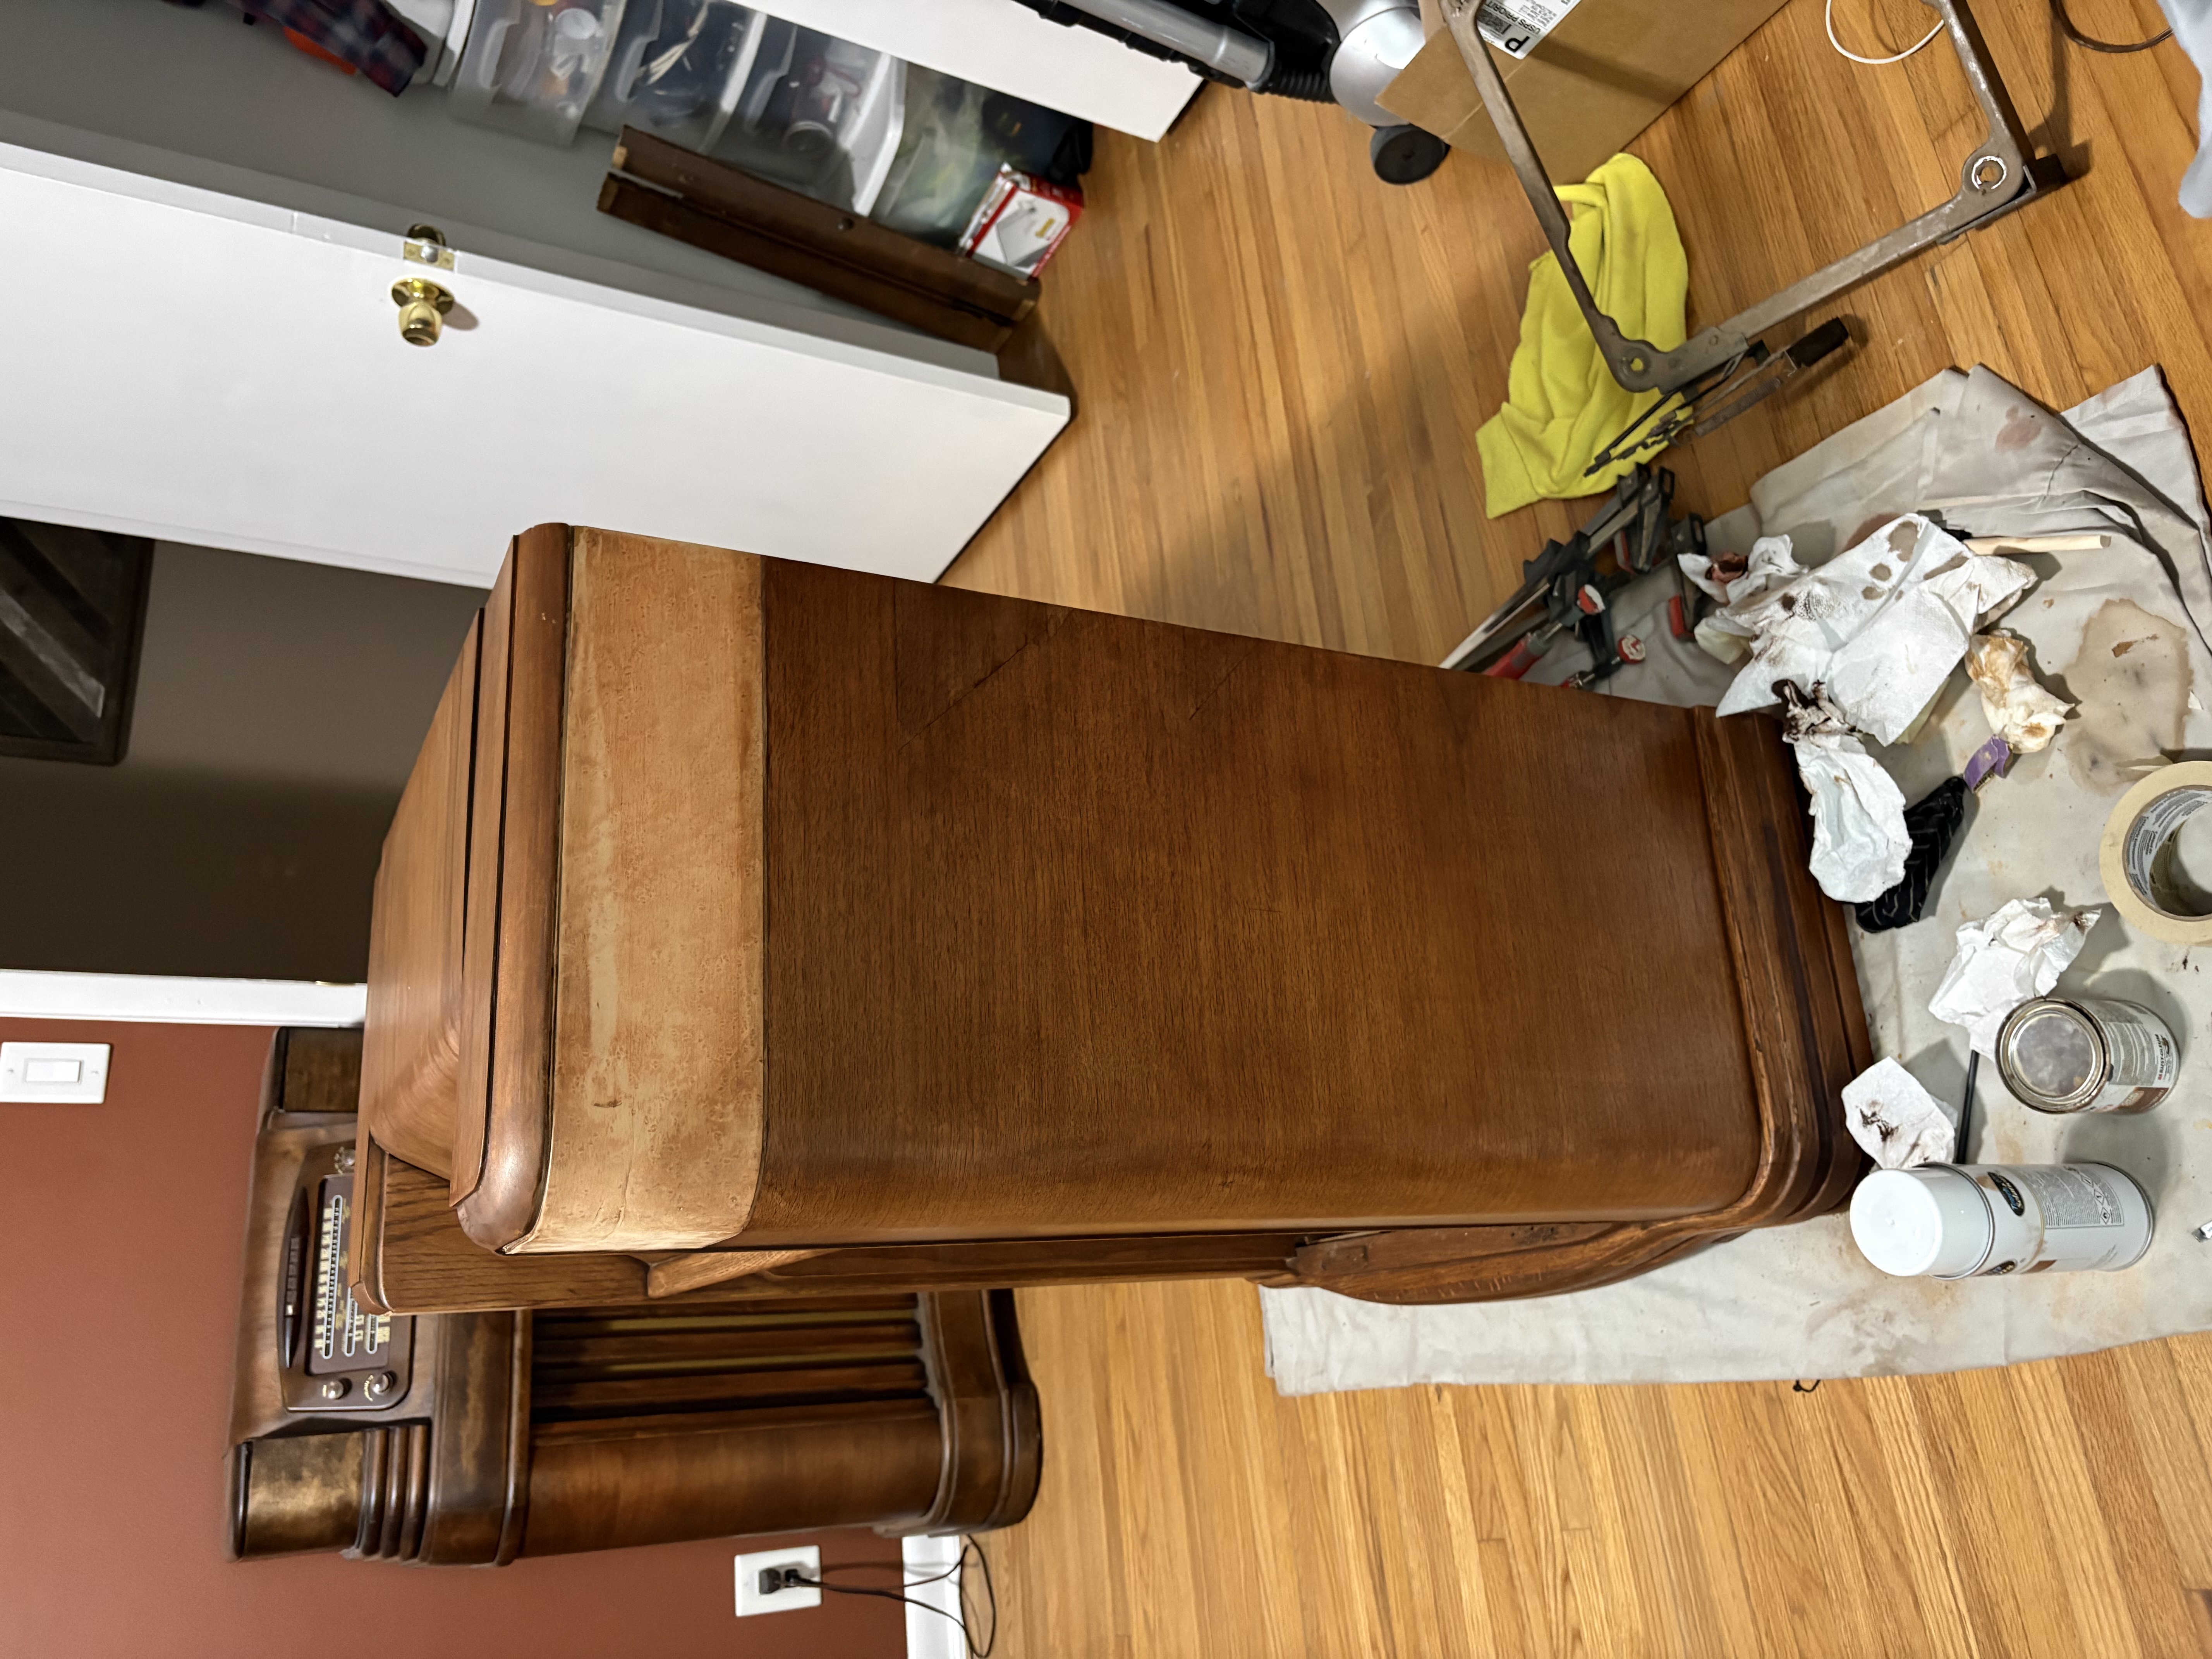
I took a break for dinner to let it all dry, and then took a look at it. It was looking even better at that point. I figured I could do a bit more, just to refine the color, so I’ve been “buffing” the veneer patches with oil-based stains. I’ve found that oil-based stains somewhat soften and meld with toner, allowing me to refine the color a bit further. At this point, we’re dangerously close to a match! I think I’ll leave it alone at this point, in fear of accidentally ruining it.
Joseph
Philco 39-750 EZ
Philco 46-480
Philco 47-1230
Philco 48-482
Philco 49-906
Posts: 711
Threads: 46
Joined: Sep 2009
City: Lapeer, MI
State, Province, Country: USA
Joseph, The cabinet looks outstanding. Well done! Joe
Courage will follow when Faith takes the lead.
Posts: 486
Threads: 28
Joined: Jan 2024
City: Tulsa
State, Province, Country: Oklahoma
Thank you very much! It certainly took some patience. I’d estimate that I spent about twelve hours on it this week. Something would go wrong and I would have to try again. I had to remind myself of Bob Ross—there are no mistakes, only happy accidents.

I digress, but I do have a fun fact. I was born the very day that Bob Ross passed away—July 4th, 1995. Perhaps Bob’s spirit flew by and graced me with just enough artistic patience to get these radios done! 
In any event, next will be those lighter portions of the shoulders and then the speaker grill. I also need to refinish the interior. I have some primer and brown paint that come close to matching the original interior color.
Joseph
Philco 39-750 EZ
Philco 46-480
Philco 47-1230
Philco 48-482
Philco 49-906
Posts: 486
Threads: 28
Joined: Jan 2024
City: Tulsa
State, Province, Country: Oklahoma
Joseph
Philco 39-750 EZ
Philco 46-480
Philco 47-1230
Philco 48-482
Philco 49-906
Posts: 486
Threads: 28
Joined: Jan 2024
City: Tulsa
State, Province, Country: Oklahoma
What kind of clear coat do you all think will be most appropriate, satin or semi-gloss? I’m leaning toward semi-gloss. I’d like to put a couple of coats on the cabinet before the decals or any grain filler. That way, if I need to do any fine sanding to smooth the grain filler I’m not eroding the finish.
Joseph
Philco 39-750 EZ
Philco 46-480
Philco 47-1230
Philco 48-482
Philco 49-906
Posts: 486
Threads: 28
Joined: Jan 2024
City: Tulsa
State, Province, Country: Oklahoma
Oh, you know what? I misunderstood the directions for the wood grain filler. It can be applied over stain, but not over toner. Oh, well! I’ve never used it before, but read about it and thought I would give it a try.
You know, I could try my hand at a classic shellac finish. I’ve never tried it, but I understand that rubbing the shellac into the wood does a fine job of filling in the grain.
Joseph
Philco 39-750 EZ
Philco 46-480
Philco 47-1230
Philco 48-482
Philco 49-906
Posts: 486
Threads: 28
Joined: Jan 2024
City: Tulsa
State, Province, Country: Oklahoma
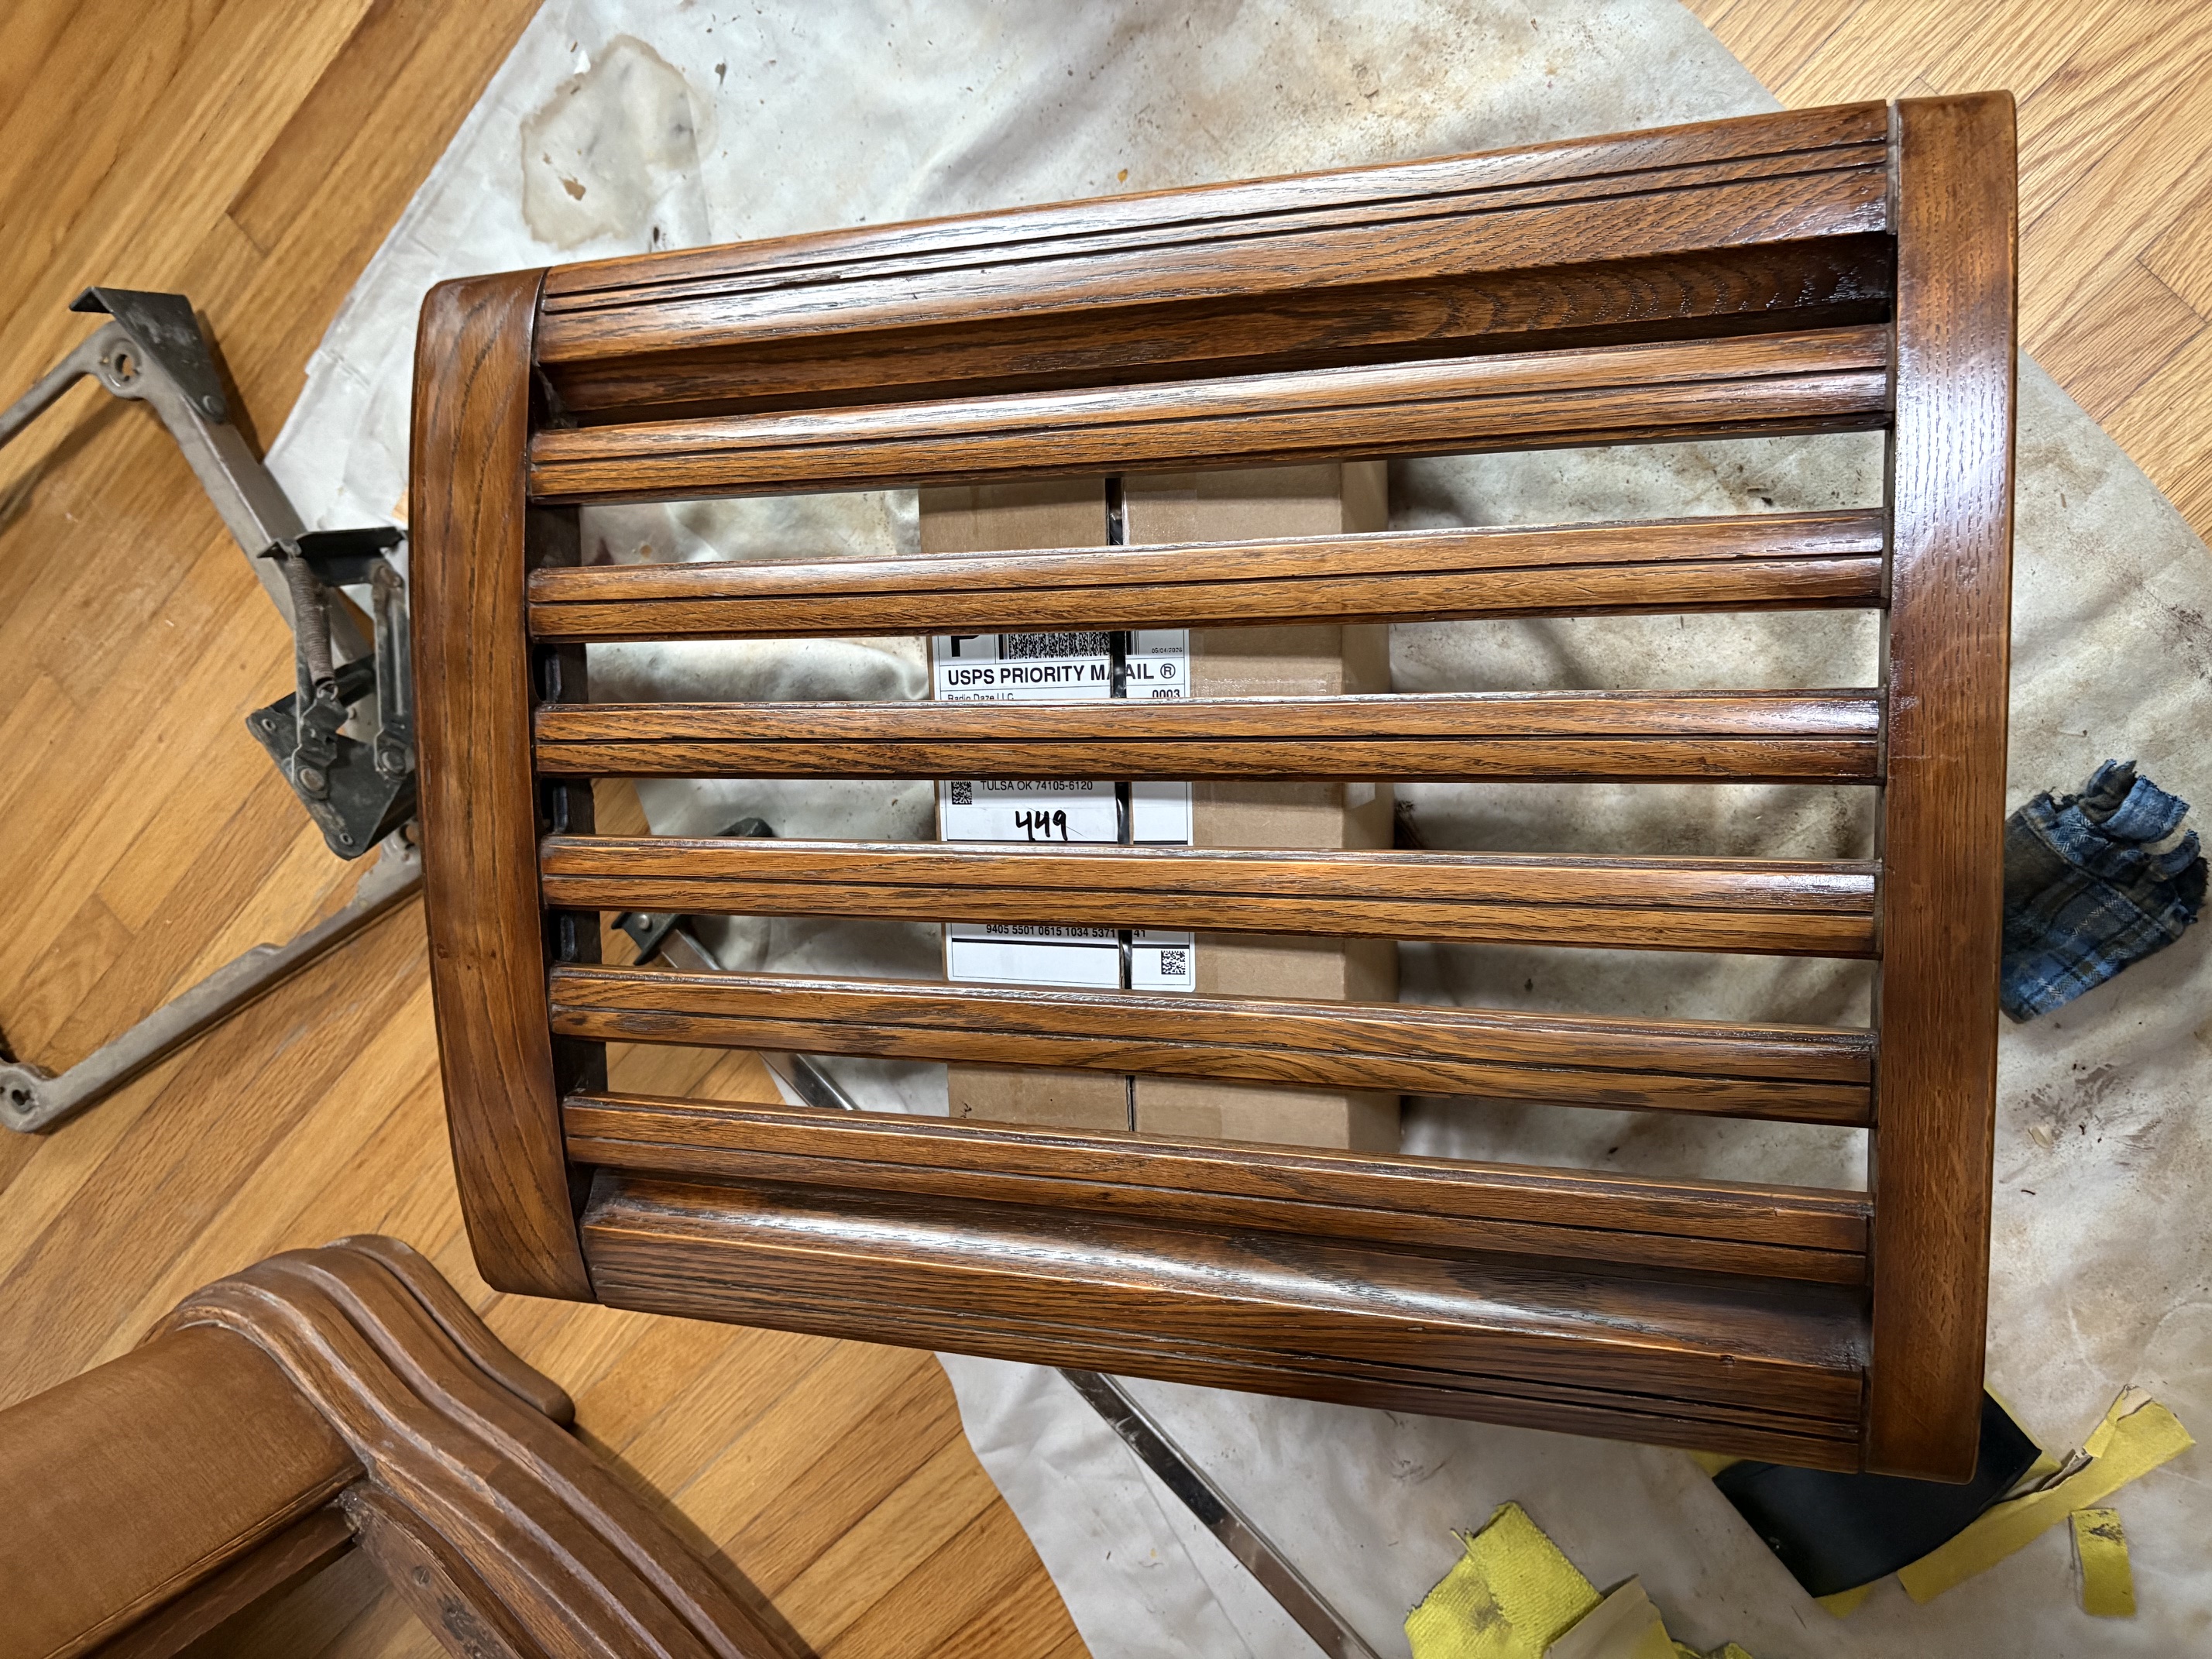
And here is the speaker panel, finished to match the rest of the cabinet. Not only is it difficult to match new veneer to old, but it’s also difficult to match veneer to solid wood. They take the color of the stains and toners differently. I ended up going too dark on this speaker panel, and had to lighten it back up by scrubbing with 0000 steel wool and mineral spirits.
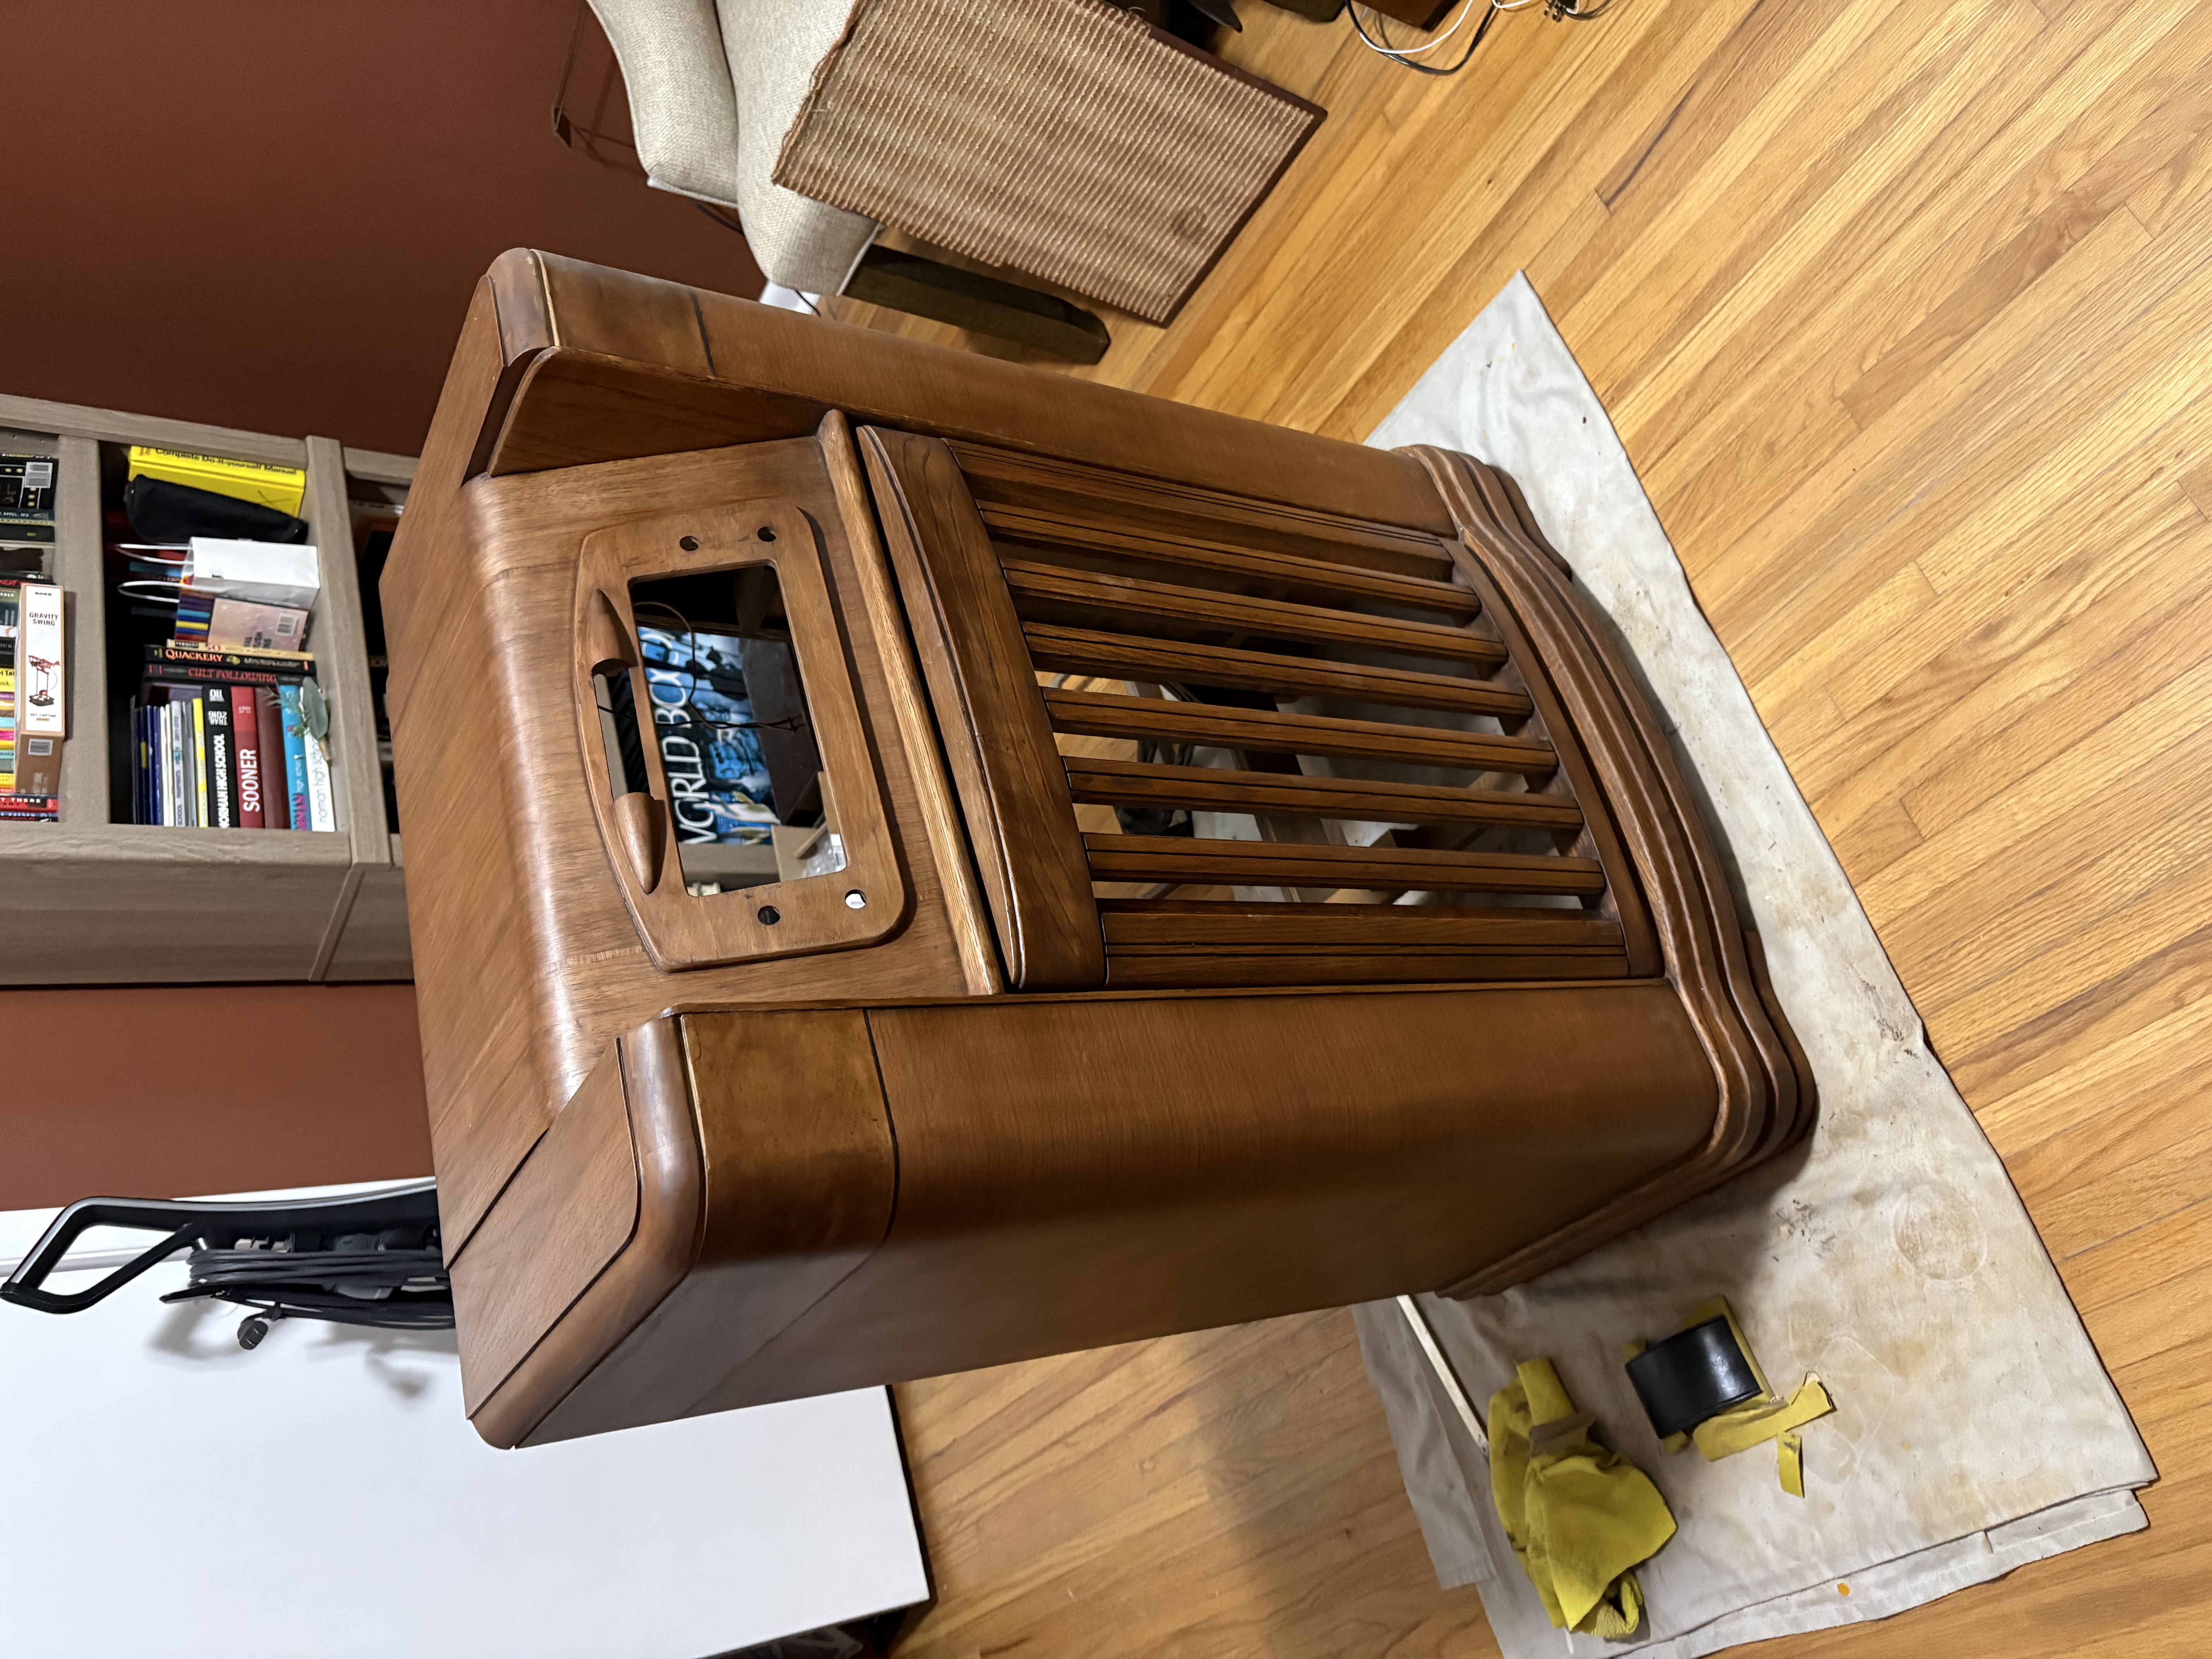
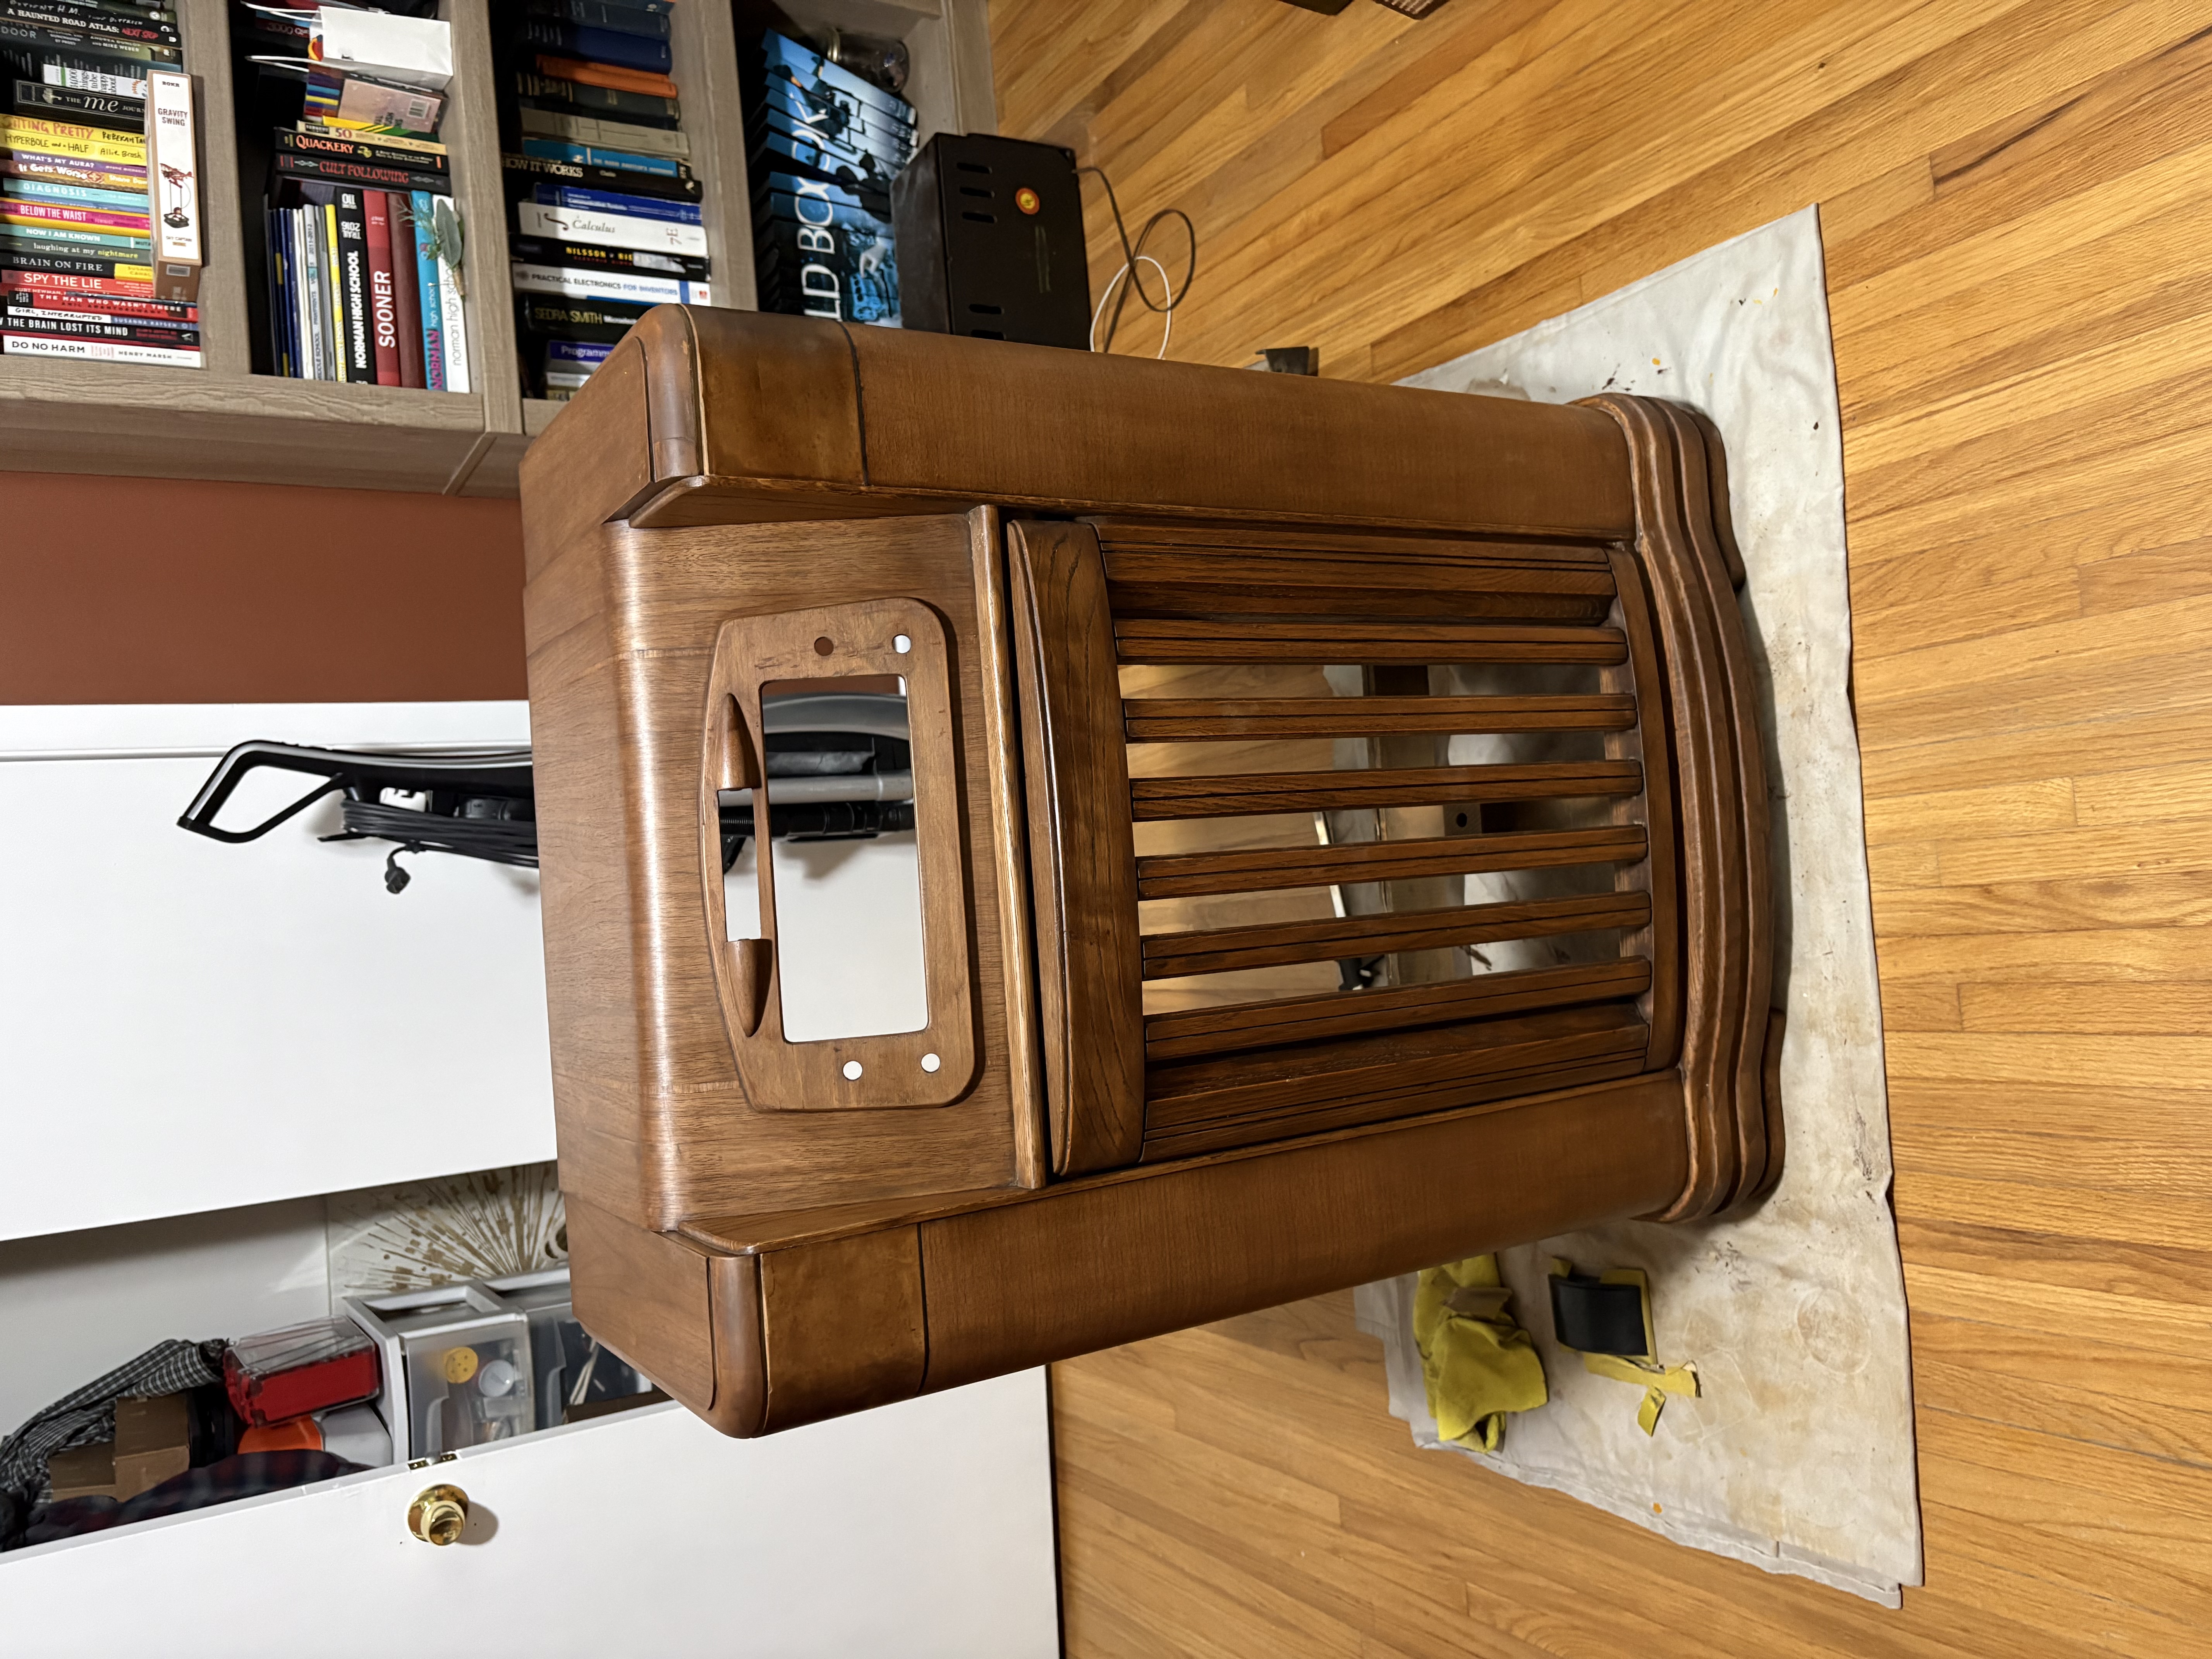
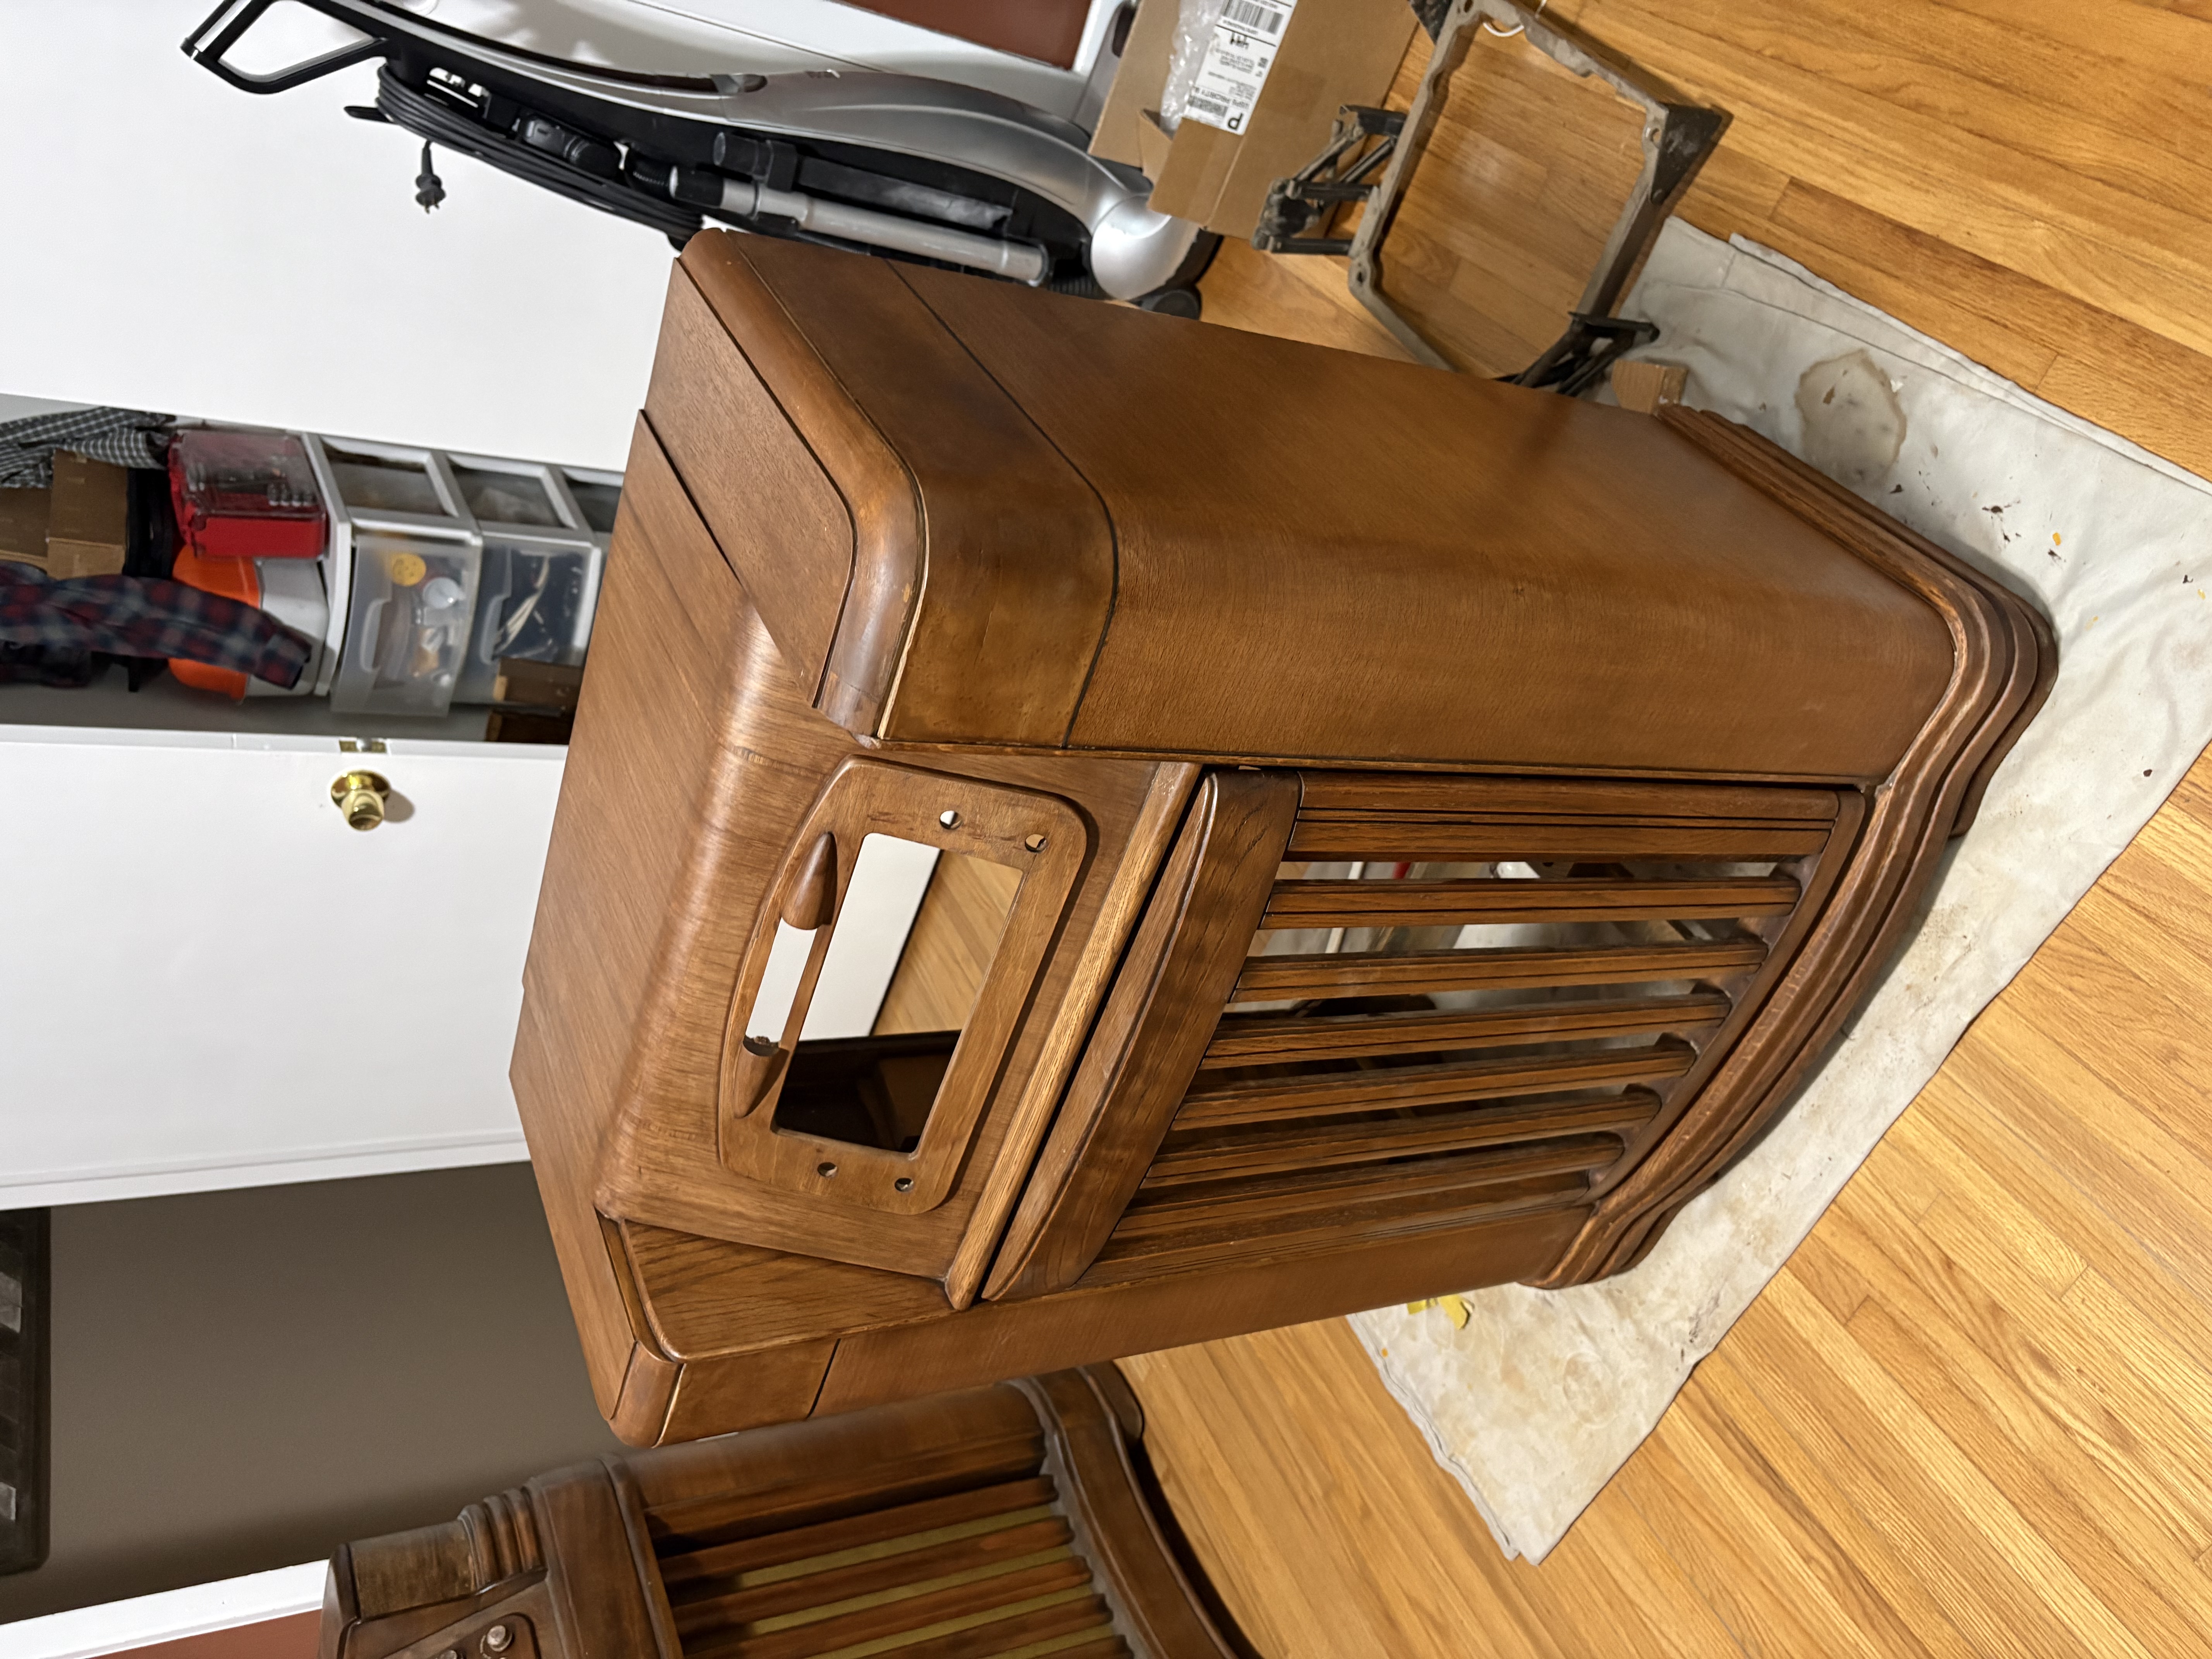
I will say, I’ve been worried that this finish is darker than the original. However, I searched the Phorum for threads of other 47-1230 restorations and was able to find photos of a darker one that is said to be original. I’d say it’s almost a match to mine!
Original 47-1230 cabinet
Joseph
Philco 39-750 EZ
Philco 46-480
Philco 47-1230
Philco 48-482
Philco 49-906
(This post was last modified: 07-05-2026, 09:29 PM by jrblasde.)
Posts: 486
Threads: 28
Joined: Jan 2024
City: Tulsa
State, Province, Country: Oklahoma
Wow, I am already enamored by shellac! I put a coat on the speaker panel, and it provides such a nice sheen! This is an incredible finish, and I feel like I’ve been looking for something like this. I don’t know how to describe it other than it looks like the wood has been polished, rather than a shiny overcoat layer on top of the wood.
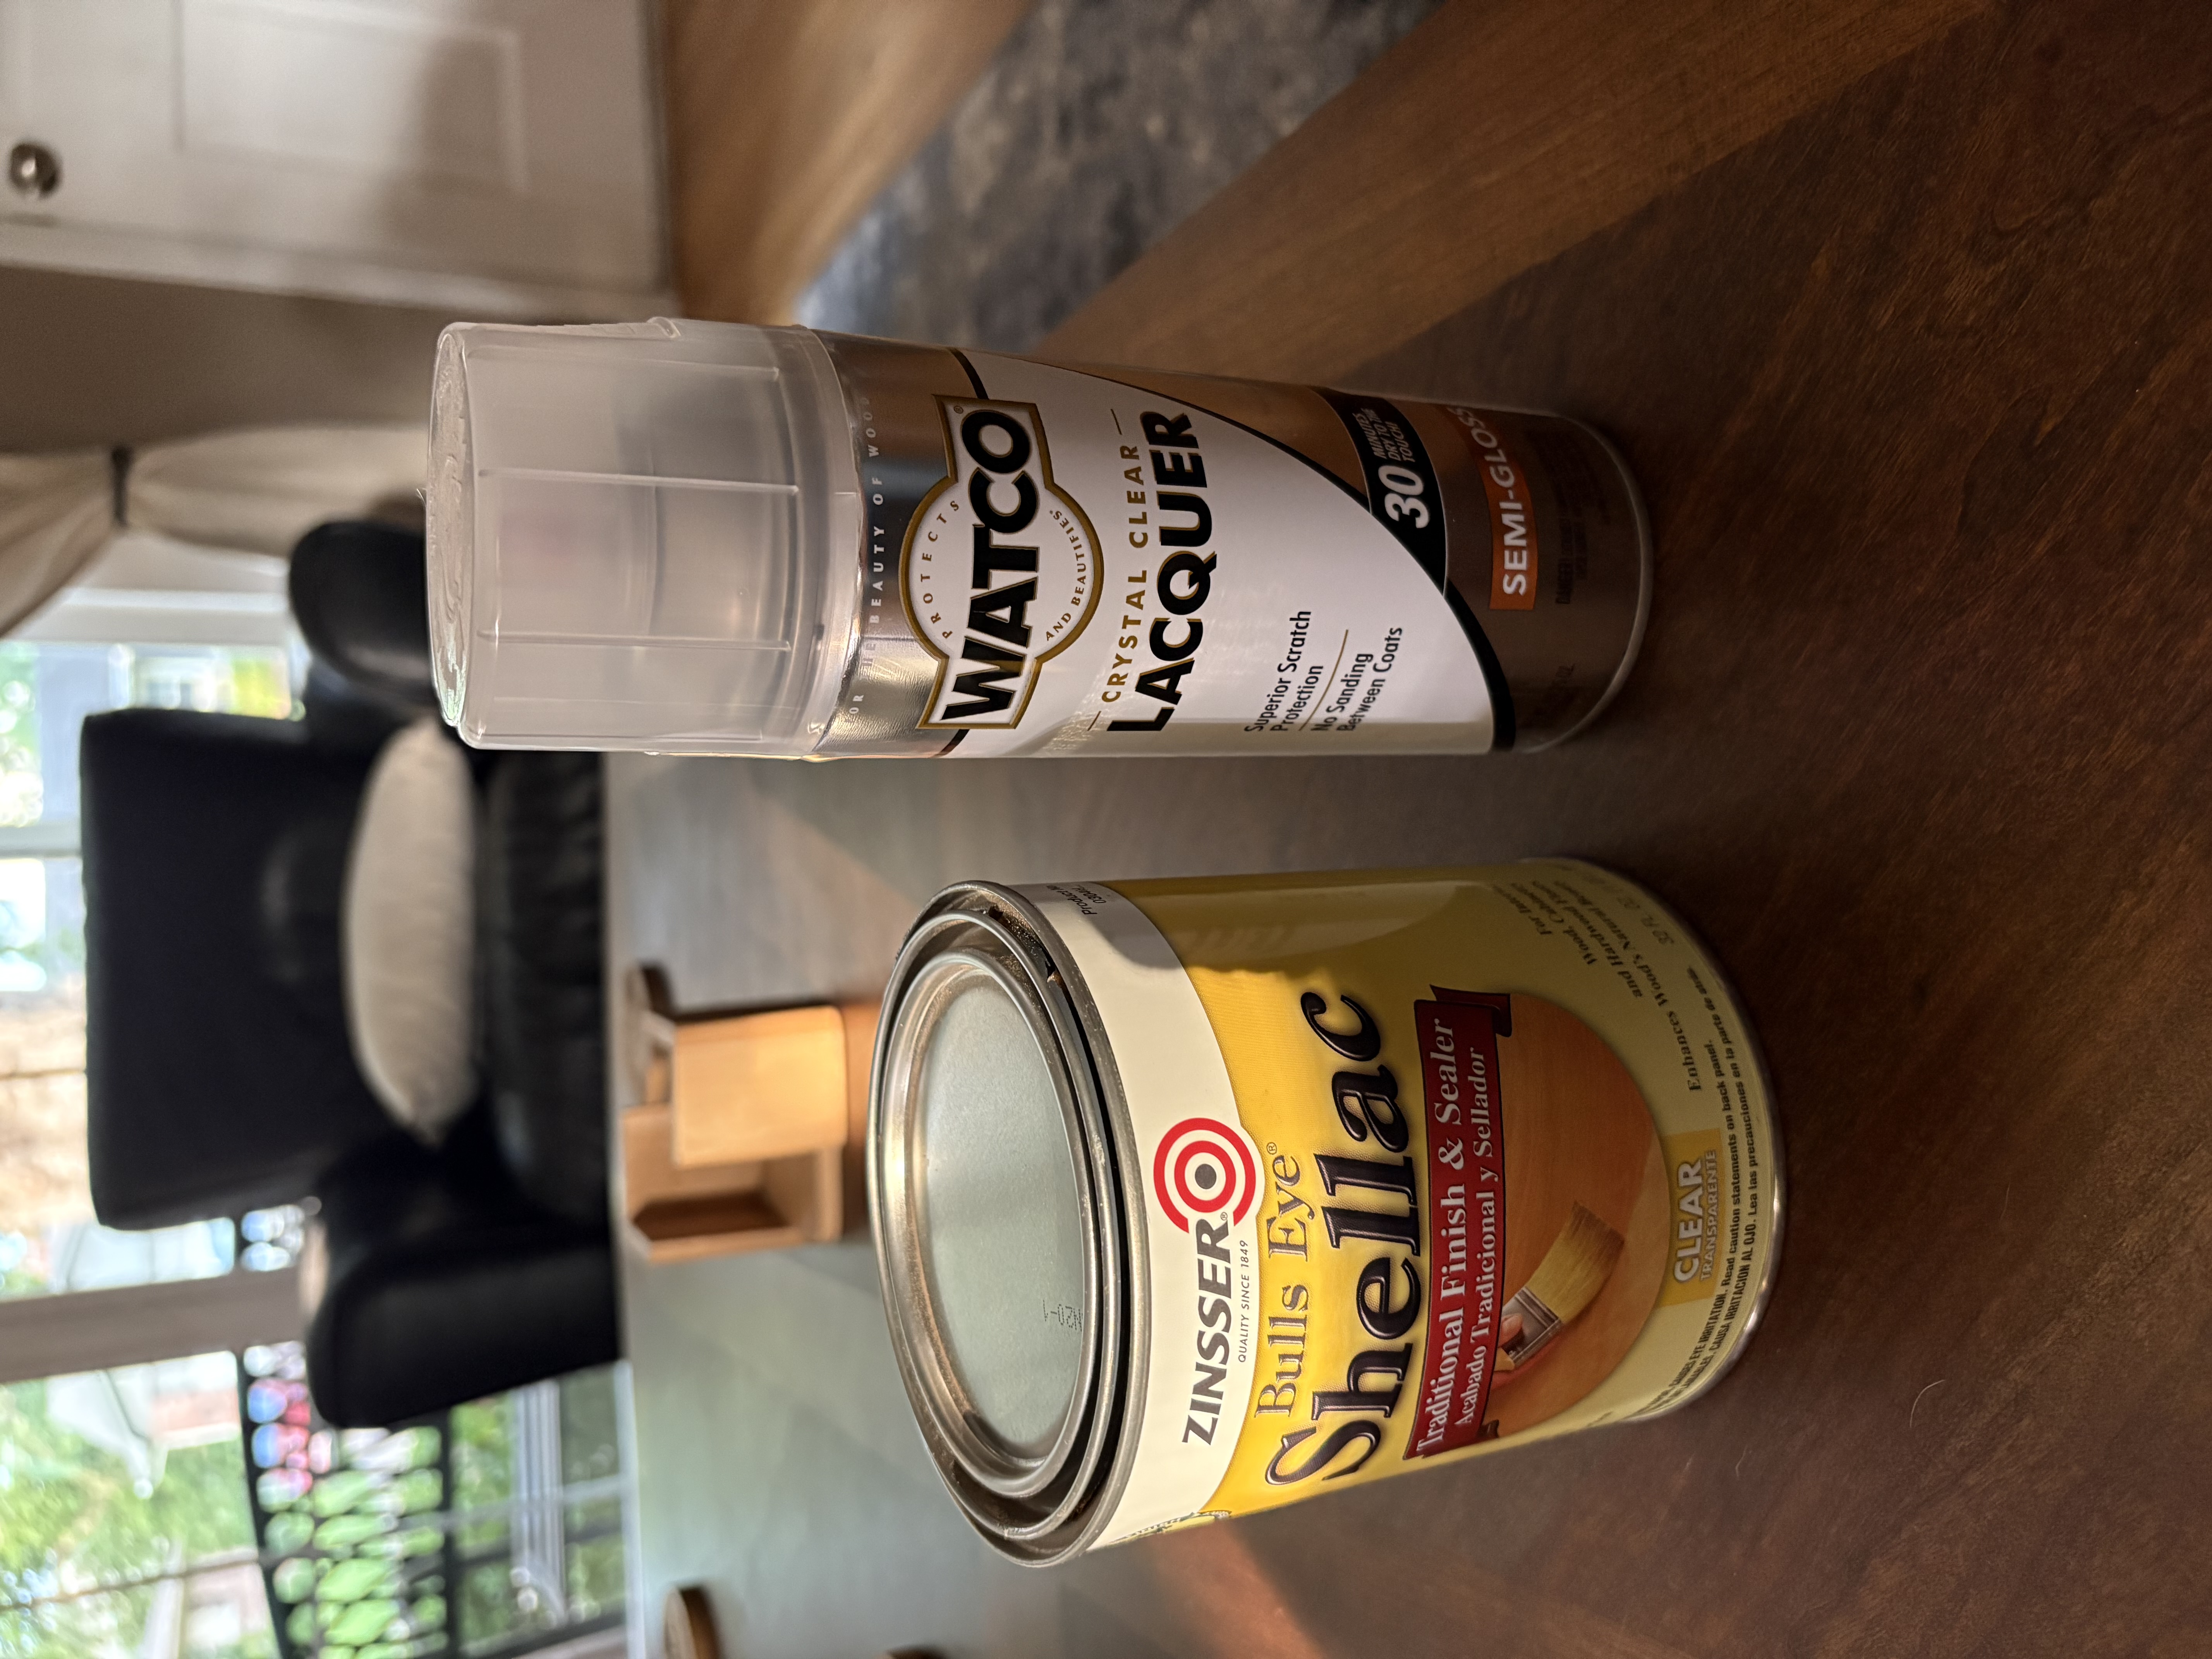
I have done a bit of research on clear coats and enamels. As previously mentioned, I should have used the wood grain filler before toner if I wanted to use it. Since I had the mis-step, I then considered shellac. I’ve never used it before but I’ve read that, with repeated coats, it can fill in wood grain pores for a smooth and level finish. In fact, I also read that it is good practice to apply shellac between toner and lacquer to keep the wet lacquer from smearing the toner.
From my reading, it sounds like I definitely want to pursue the lacquer-over-shellac technique. Shellac has inferior temperature and humidity protection when compared to modern synthetic lacquers and polyurethanes; I certainly want a lasting enamel. The instructions on this particular shellac rule out polyurethane overcoats, so I am using lacquer. I used lacquer on my 46-480, so I am familiar with it. I opted for a semi gloss. I will start out by planning to apply two coats of shellac, lightly sanding between each coat with 320 grit sandpaper. Then I’ll apply one coat of lacquer. I’ll pause to apply the water slide decals, and finally I will finish with two more coats of lacquer.
Joseph
Philco 39-750 EZ
Philco 46-480
Philco 47-1230
Philco 48-482
Philco 49-906
Posts: 486
Threads: 28
Joined: Jan 2024
City: Tulsa
State, Province, Country: Oklahoma
Joseph
Philco 39-750 EZ
Philco 46-480
Philco 47-1230
Philco 48-482
Philco 49-906
Users browsing this thread: 1 Guest(s)
|
|
Recent Posts
|
|
HiFi (Chifi) tube amp build - but my own design.
|
| It's the other forum. I'm also in DIY, but mostly read there. Honestly, I kinda jumped into this without much thought to...TV MAN — 10:43 AM |
|
Philco 71 Code 125
|
| Hello,
I am in need of a schematic for this radio. Mine has the three separate circular tube shields and a shadow me...dconant — 08:06 AM |
|
Stromberg Carlson 1500 Squeal
|
| And life just keeps getting more complicated.dconant — 07:57 AM |
|
54C Complete Teardown/Rebuild
|
| Hello Roy,
here is this one
sincerely Richardradiorich — 12:45 AM |
|
54C Complete Teardown/Rebuild
|
| Richard,
Had grabbed it already but thank you just the same. I find myself wanting to find some way to block out the...glyphmon — 12:03 AM |
|
54C Complete Teardown/Rebuild
|
| Hello roy,
here is a link to the schematic .
Sincerely Richardradiorich — 11:54 PM |
|
54C Complete Teardown/Rebuild
|
| Richard,
The Silvertone 2014 also is a transformerless set, so I am incorporating a 1:1 600 ohm audio isolation transfo...glyphmon — 11:37 PM |
|
Preliminary work on wife's Silvertone 2014
|
| Did an alignment today which was interesting. IF alignment went great, almost all was already spot-on. Adjusting on th...glyphmon — 11:35 PM |
|
54C Complete Teardown/Rebuild
|
| The main problem with adding a Bluetooth input is that this set lacks a traditional power transformer to isolate it from...radiorich — 11:19 PM |
|
54C Cabinet Refinish
|
|
I started stripping this cabinet before it got super chilly out because I knew I wasn't going to be able to work on ...glyphmon — 11:18 PM |
|
Who's Online
|
There are currently 1602 online users. [Complete List]
» 2 Member(s) | 1600 Guest(s)
|
|
|

|
 
|