Posts: 16,533
Threads: 573
Joined: Oct 2011
City: Jackson
State, Province, Country: NJ
Yes, I use my heat gun. Gut'em, stuff'em, pot'em.
I first grab a lead with needlenose pliers, heat it on low (or else it might burn it) 'till it melts and bubbles, pull one side, heat another side, pull it, and then push out the roll if it did not pull with the second lead.
I thought of using the colored hot glue for potting but then called the Hobby Lobby and their glue sticks are 1/4" diameter while my gun is 1/2". So I settled for my usual milky white; still looks good.
People who do not drink, do not smoke, do not eat red meat will one day feel really stupid lying there and dying from nothing.
Posts: 3,160
Threads: 59
Joined: Apr 2011
City: Lexington, KY
I have both sizes of glue guns...... I saw some of the mini glue guns for only $3 at Hobby Lobby. That's where I found the amber colored wood glue sticks in a large size. I found some brown mini glue sticks on Amazon, a dozen for $6.
At Hobby Lobby I also bought some beeswax and heavy brown paper to make a square cardboard capacitor that is missing in my Majestic Treasure Chest radio...... the filter caps were replaced, but they discarded the original square cardboard capacitor.... which for some reason bugs the crap out of me whenever I look at, or think of that chassis 
John KK4ZLF
Lexington, KY
"illegitimis non carborundum"
Posts: 16,533
Threads: 573
Joined: Oct 2011
City: Jackson
State, Province, Country: NJ
It's called OCD, John 
People who do not drink, do not smoke, do not eat red meat will one day feel really stupid lying there and dying from nothing.
Posts: 2,118
Threads: 112
Joined: Jun 2010
City: Medford OR (OR what?)
I use any hot glue (clear) to hold the cap in place and then fill the end with the original wax - or other colored wax.
OR in some cases, I use the original wax ends. This requires a specific method of disassembly and won't work for all types of paper-cap construction, but the results look like the original.
"I just might turn into smoke, but I feel fine"
http://www.russoldradios.com/
(This post was last modified: 01-26-2017, 01:33 PM by Phlogiston.)
Posts: 16,533
Threads: 573
Joined: Oct 2011
City: Jackson
State, Province, Country: NJ
yes it would be easy. Usually the wax comes out (in my cases) as a block or large chunks so it would not be difficult to fill the space with a little of the hot glue, let it dry and then put in some small chunks of the wax and melt it with a heat gun.
People who do not drink, do not smoke, do not eat red meat will one day feel really stupid lying there and dying from nothing.
Posts: 16,533
Threads: 573
Joined: Oct 2011
City: Jackson
State, Province, Country: NJ
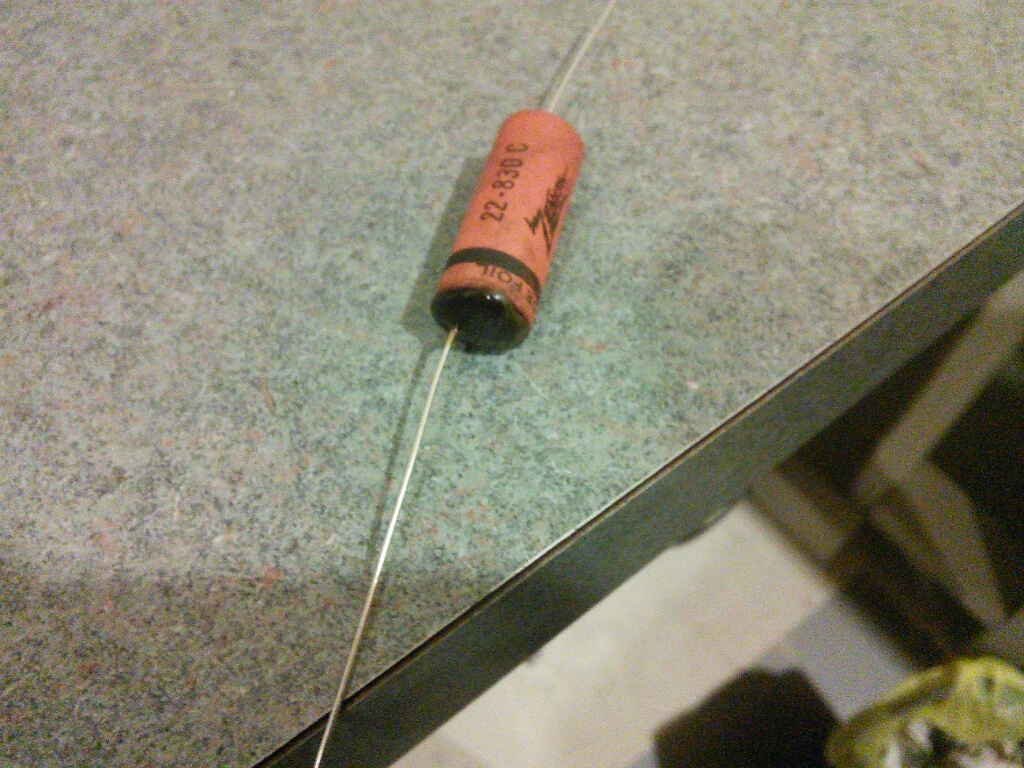
Here it is. Own native wax over plastic.
People who do not drink, do not smoke, do not eat red meat will one day feel really stupid lying there and dying from nothing.
Posts: 16,533
Threads: 573
Joined: Oct 2011
City: Jackson
State, Province, Country: NJ
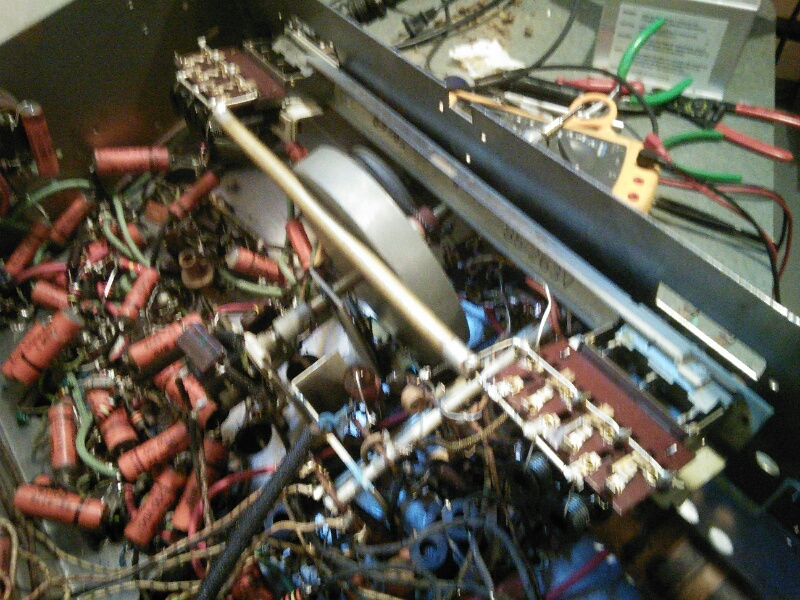
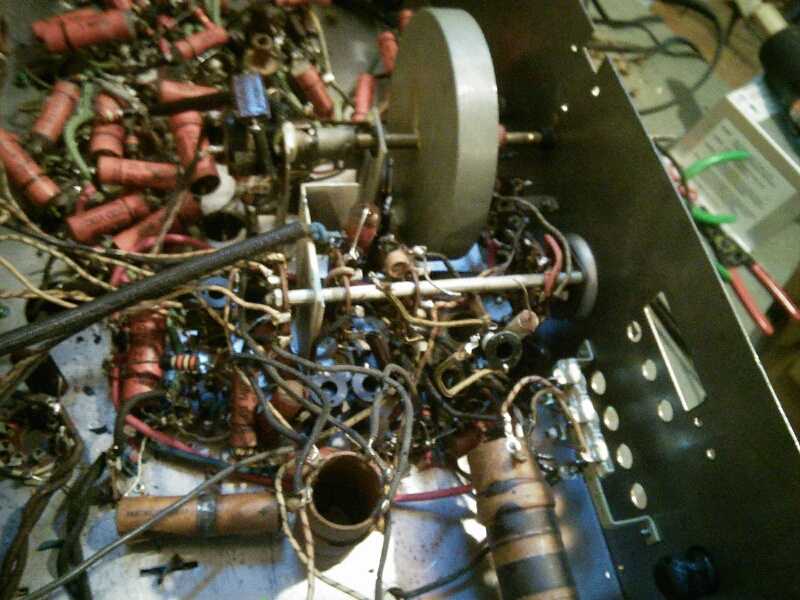
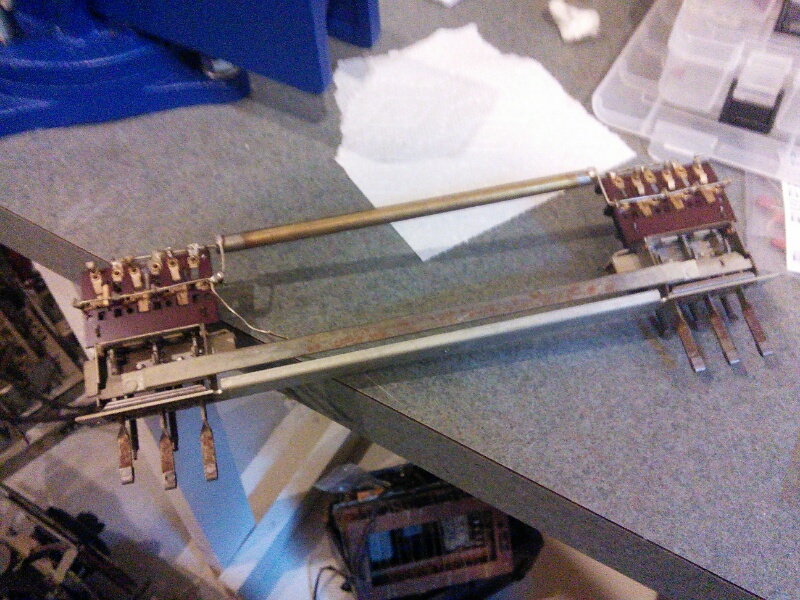
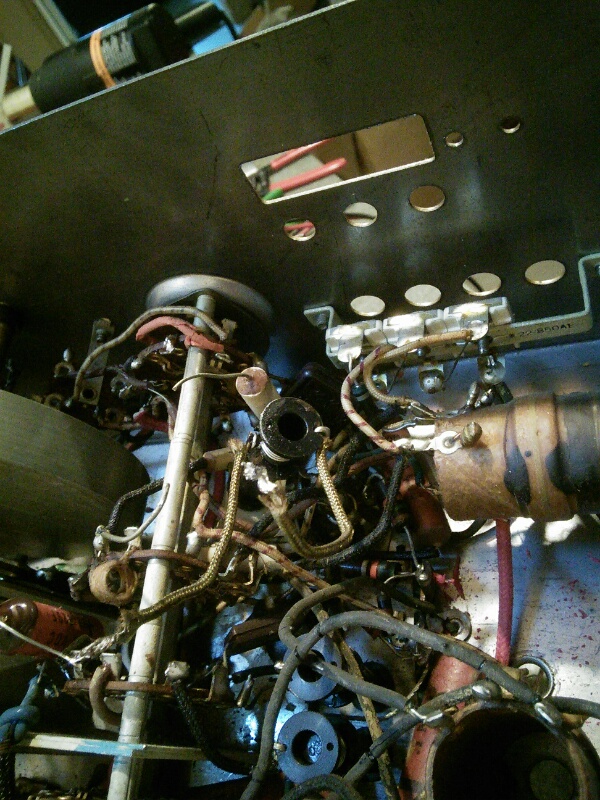
These below are the pics with and without buttons assembly with something that looks like a coax cobductor in a GNDed tube.
Had to take it off to get to some caps.
Speaking of which: some tubular caps (look different from the usual ones: not potted with wax for instance) are 20pF or 55pF ones. Are they mica or what kind could theybe?
They do seem to measure ok.
People who do not drink, do not smoke, do not eat red meat will one day feel really stupid lying there and dying from nothing.
Posts: 1,114
Threads: 14
Joined: Feb 2013
City: Irvington, NY
The small pF value tubular caps are most likely early style ceramics. They were usually temperature compensating types such as N750, and first appeared in the early 1940's.
Posts: 16,533
Threads: 573
Joined: Oct 2011
City: Jackson
State, Province, Country: NJ
So far they are OK.
I am not replacing them.
Boy this one is a PITA, the royal kind.
Even with the assembly removed, I was only able to restuff 2 caps there today (the last ones) as the access sucks there. Spent 6 hrs.
Good news is, all caps have been restuffed and connected.
Still lots of wiring to replace, sone with difficult access.
People who do not drink, do not smoke, do not eat red meat will one day feel really stupid lying there and dying from nothing.
Posts: 1,475
Threads: 69
Joined: Nov 2012
City: Kansas city, MO.
Sounds like your making progress Mike. Changing wires can be a pain at times.
Least I know what to expect now, when I start on mine. 
Posts: 16,533
Threads: 573
Joined: Oct 2011
City: Jackson
State, Province, Country: NJ
People who do not drink, do not smoke, do not eat red meat will one day feel really stupid lying there and dying from nothing.
Posts: 1,475
Threads: 69
Joined: Nov 2012
City: Kansas city, MO.
 I believe you.
Posts: 1,475
Threads: 69
Joined: Nov 2012
City: Kansas city, MO.
How is it going with the Zenith "Spinet"?
Posts: 16,533
Threads: 573
Joined: Oct 2011
City: Jackson
State, Province, Country: NJ
Mike
The last weekend, though I finished the recap, I found myself out of solder and so could not continue. I still have some wiring to replace, mostly the one that goes from under the chassis to the top to the keys' assemblies and such.
So hopefully this weekend I will be able to proceed, now that I restocked my solder supply. 
Plus it is going to be a warm weekend and it hopefully will be more pleasant to work in the basement. 
I usually combine working on the radio with transferring my vinyl collection to the tapes of which I have just bought another 150 pieces (found a company that is selling cassettes with BASF chrome super tape in them at $0.45 each which is incredible price; you also need to buy the cases separately plus J-cards but still runs you about $1.30 apiece compared to even old store prices of $2-$3 or today's ebay prices of $4-$5 for a good grade) - I have a nice deck, Nakamichi ZX-9 so the quality of records justifies the time and money spent.
So while I am restuffing the caps, I am listening to nice classic collection 
So, mixing pleasure with another pleasure.
People who do not drink, do not smoke, do not eat red meat will one day feel really stupid lying there and dying from nothing.
Posts: 16,533
Threads: 573
Joined: Oct 2011
City: Jackson
State, Province, Country: NJ
Not a lot of action this fin de semana, but I finished the recap (found a cap I missed) and am done with wiring other than three shielded wires going to the keypad assembly, as I need to get some shielded wire.
Oh my.This is one tedious SOB chassis.
BTW does anyone know that the PDP-11 computer had an assembly command called SOB which stood for "Subtract One and Branch".
DEC folks had some good sense of humor.
People who do not drink, do not smoke, do not eat red meat will one day feel really stupid lying there and dying from nothing.
Users browsing this thread: 1 Guest(s)
|
|
Recent Posts
|
|
1949 Motorola 5A9M
|
| This would be the second portable in the "other radios" forum where I have a similar one in my collection. I h...Arran — 12:41 AM |
|
Looking for any info: 1977 Ford-Philco Console Hi-Fi Turntable and Radio
|
| Hi PittsburgTost.
The record changer looks like a Garrard or BSR (Likely Garrard). The spindles just pull out and pu...MrFixr55 — 11:57 PM |
|
Looking for any info: 1977 Ford-Philco Console Hi-Fi Turntable and Radio
|
| Hello PittsburghToast ,
Welcome aboard and it looks like gary may have something for you !
now if I dig through my se...radiorich — 11:35 PM |
|
Model 80 Antenna Issue?
|
| You are kind of on the right path. You can touch the grid cap of the Detector/Oscillator 36 tube. I'm expecting a respon...RodB — 08:48 PM |
|
Looking for any info: 1977 Ford-Philco Console Hi-Fi Turntable and Radio
|
| Welcome to the Phorum, PittsburghToast! I found an old thread that my interest you regarding the quality and worth of P...GarySP — 08:48 PM |
|
Looking for any info: 1977 Ford-Philco Console Hi-Fi Turntable and Radio
|
| Welcome to the Phorum!
:wave:
We do not have anything on that unit in our digital library. There is a Sam's Photof...klondike98 — 08:47 PM |
|
Model 80 Antenna Issue?
|
|
I’ve replaced all the caps and resistors and the radio is working but minimal volume unless I put my hand near the re...Hamilton — 08:24 PM |
|
Looking for any info: 1977 Ford-Philco Console Hi-Fi Turntable and Radio
|
| Hi there! this is my first time posting. I recently picked up this Ford-Philco Console record player and radio at a yard...PittsburghToast — 07:28 PM |
|
philco predicta
|
| I found that where I have the 140v B+ there is 50v and the tuner receives 235v through the orange cablecgl18 — 04:14 PM |
|
Philco 91 code 221
|
| Chassis grounds thru rivets is another good place to look. Oh and the stator screws on the tuning cap where the leads at...Radioroslyn — 08:11 AM |
|
Who's Online
|
| There are currently no members online. |

|
 
|


![[-] [-]](https://philcoradio.com/phorum/images/bootbb/collapse.png)


