

Welcome Guest! Be sure you know and follow the Phorum Rules before posting. Thank you and Enjoy! (January 12, 2025) x


Philco 47-1230 Cabinet Restoration
#16

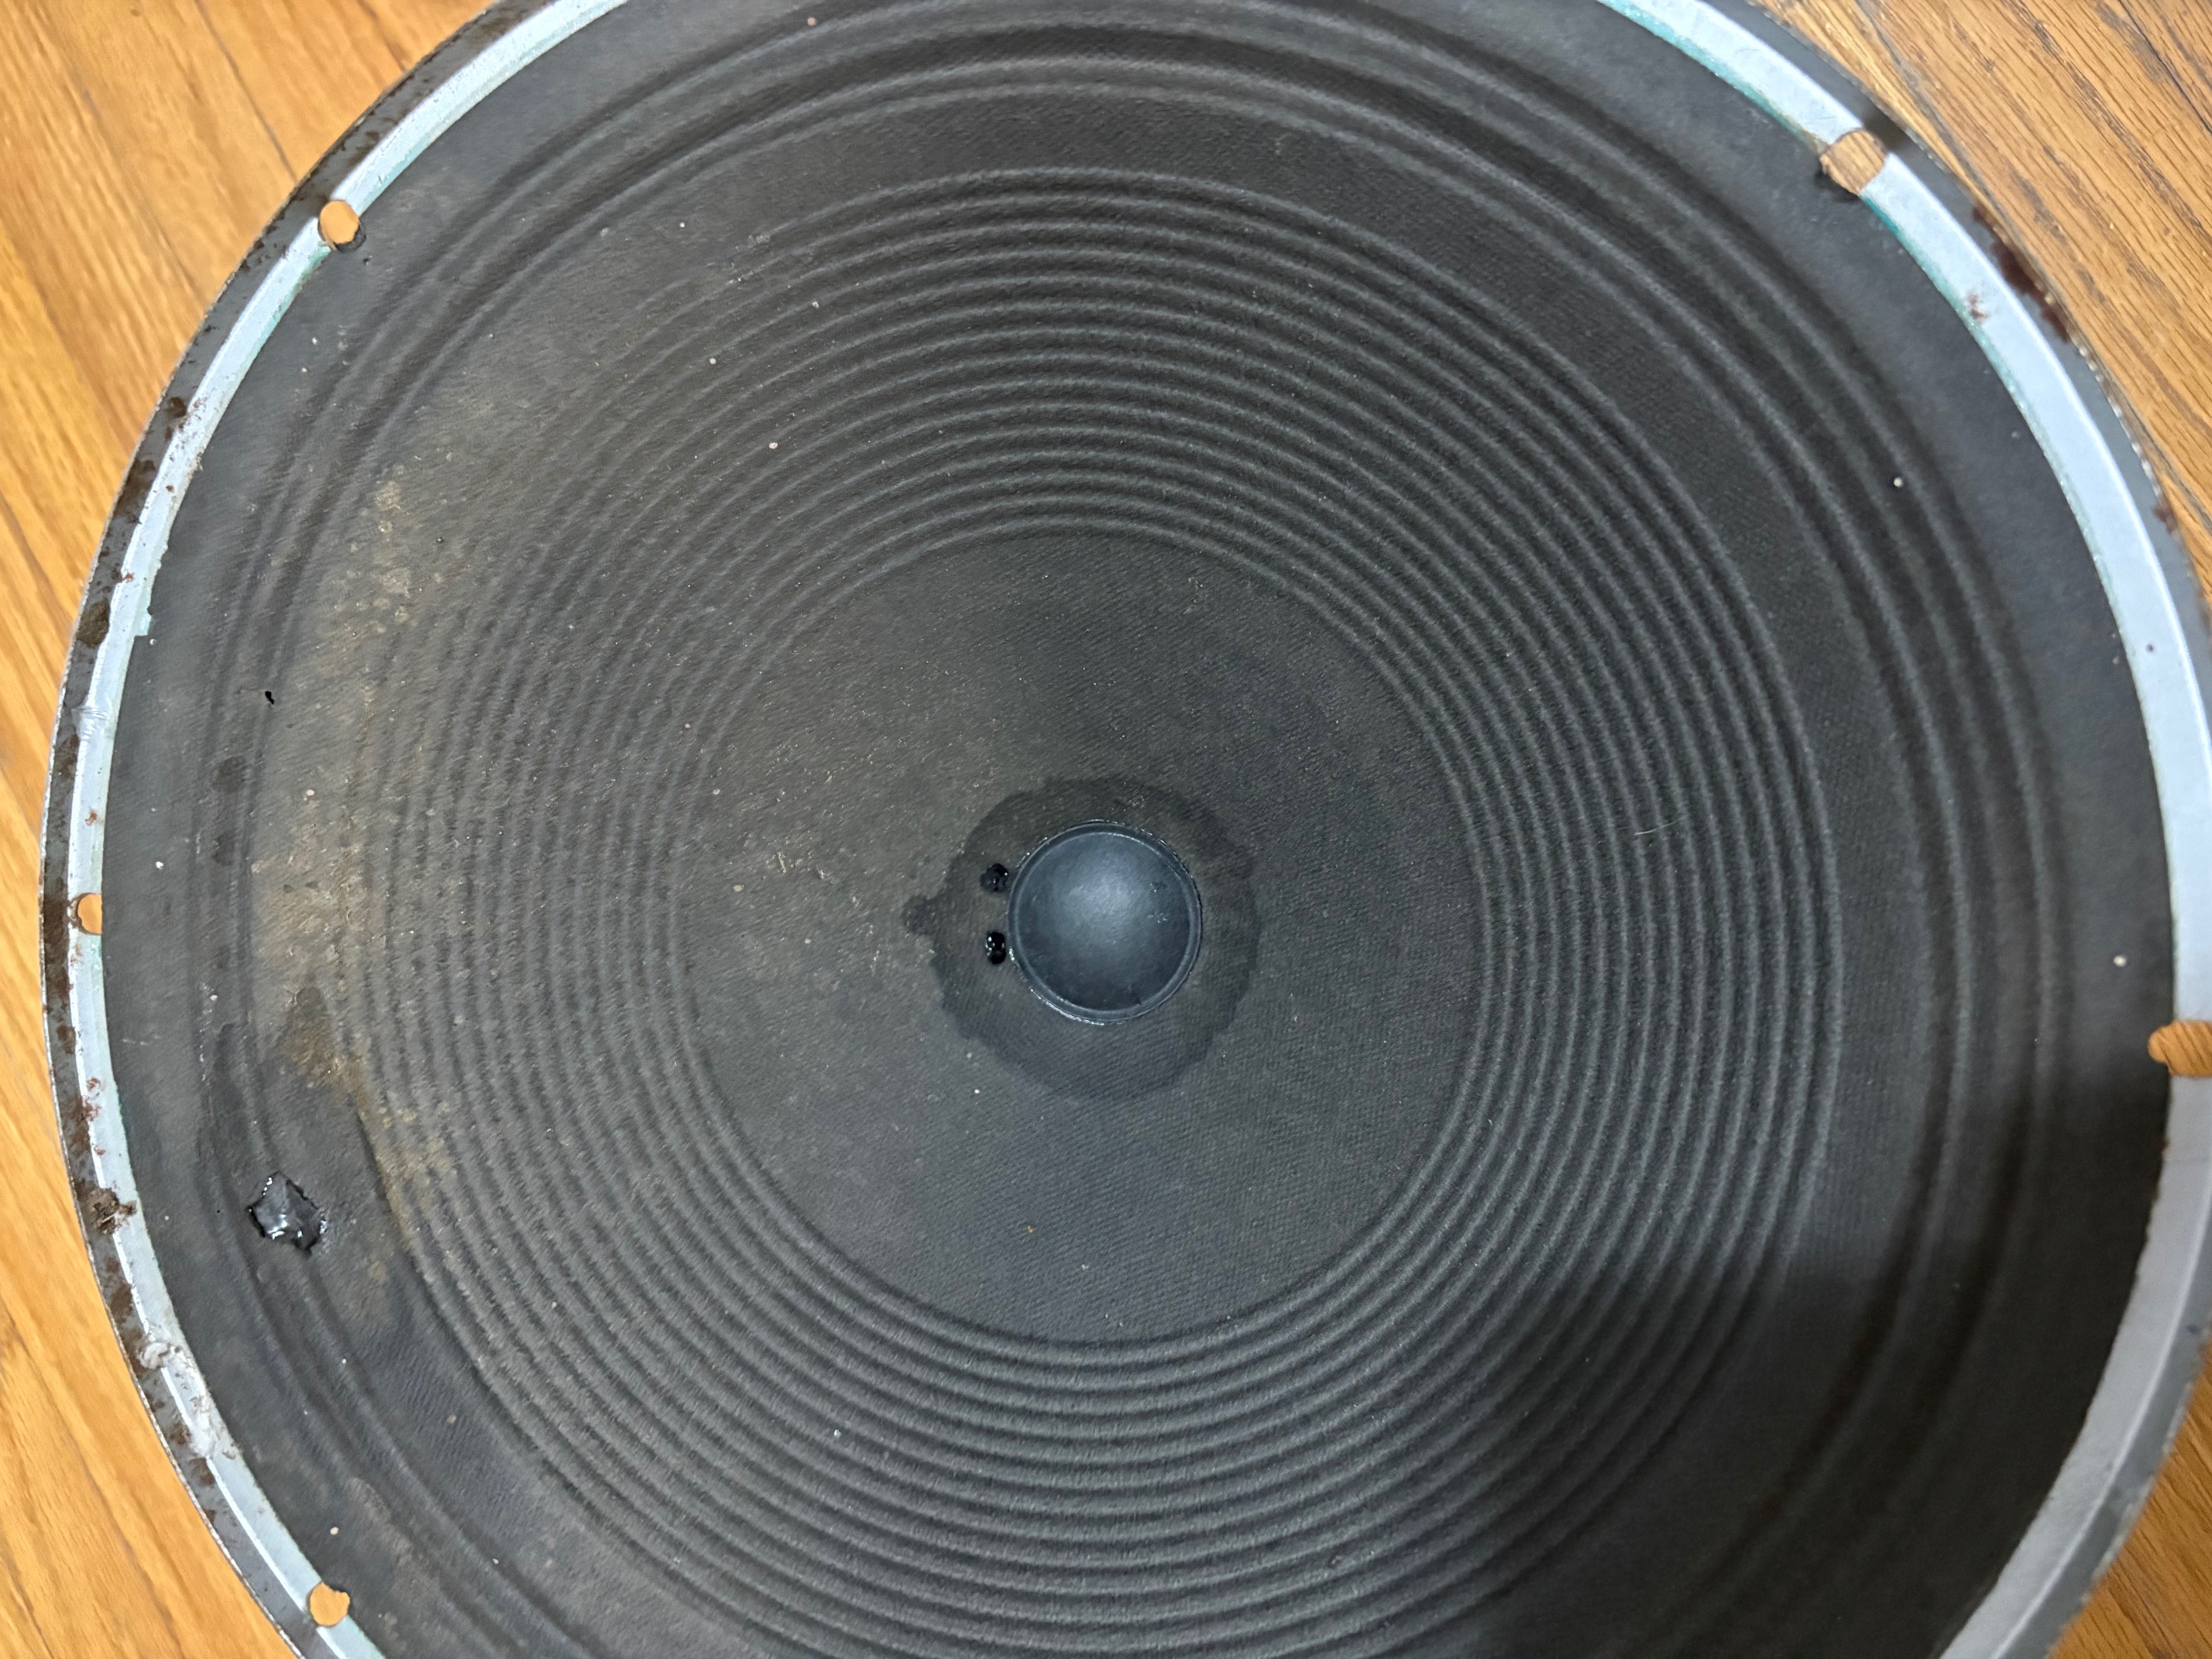
I've stayed busy lately with a few radios, but I've likely spent the most time on the cabinet for this 47-1230. I've toiled away with more veneer repairs, but first we'll talk about the speaker repairs. I took this one to Speakerworks as well. Here's a photo of it with a small patch at the top of the cone and a new dust cap. 
   

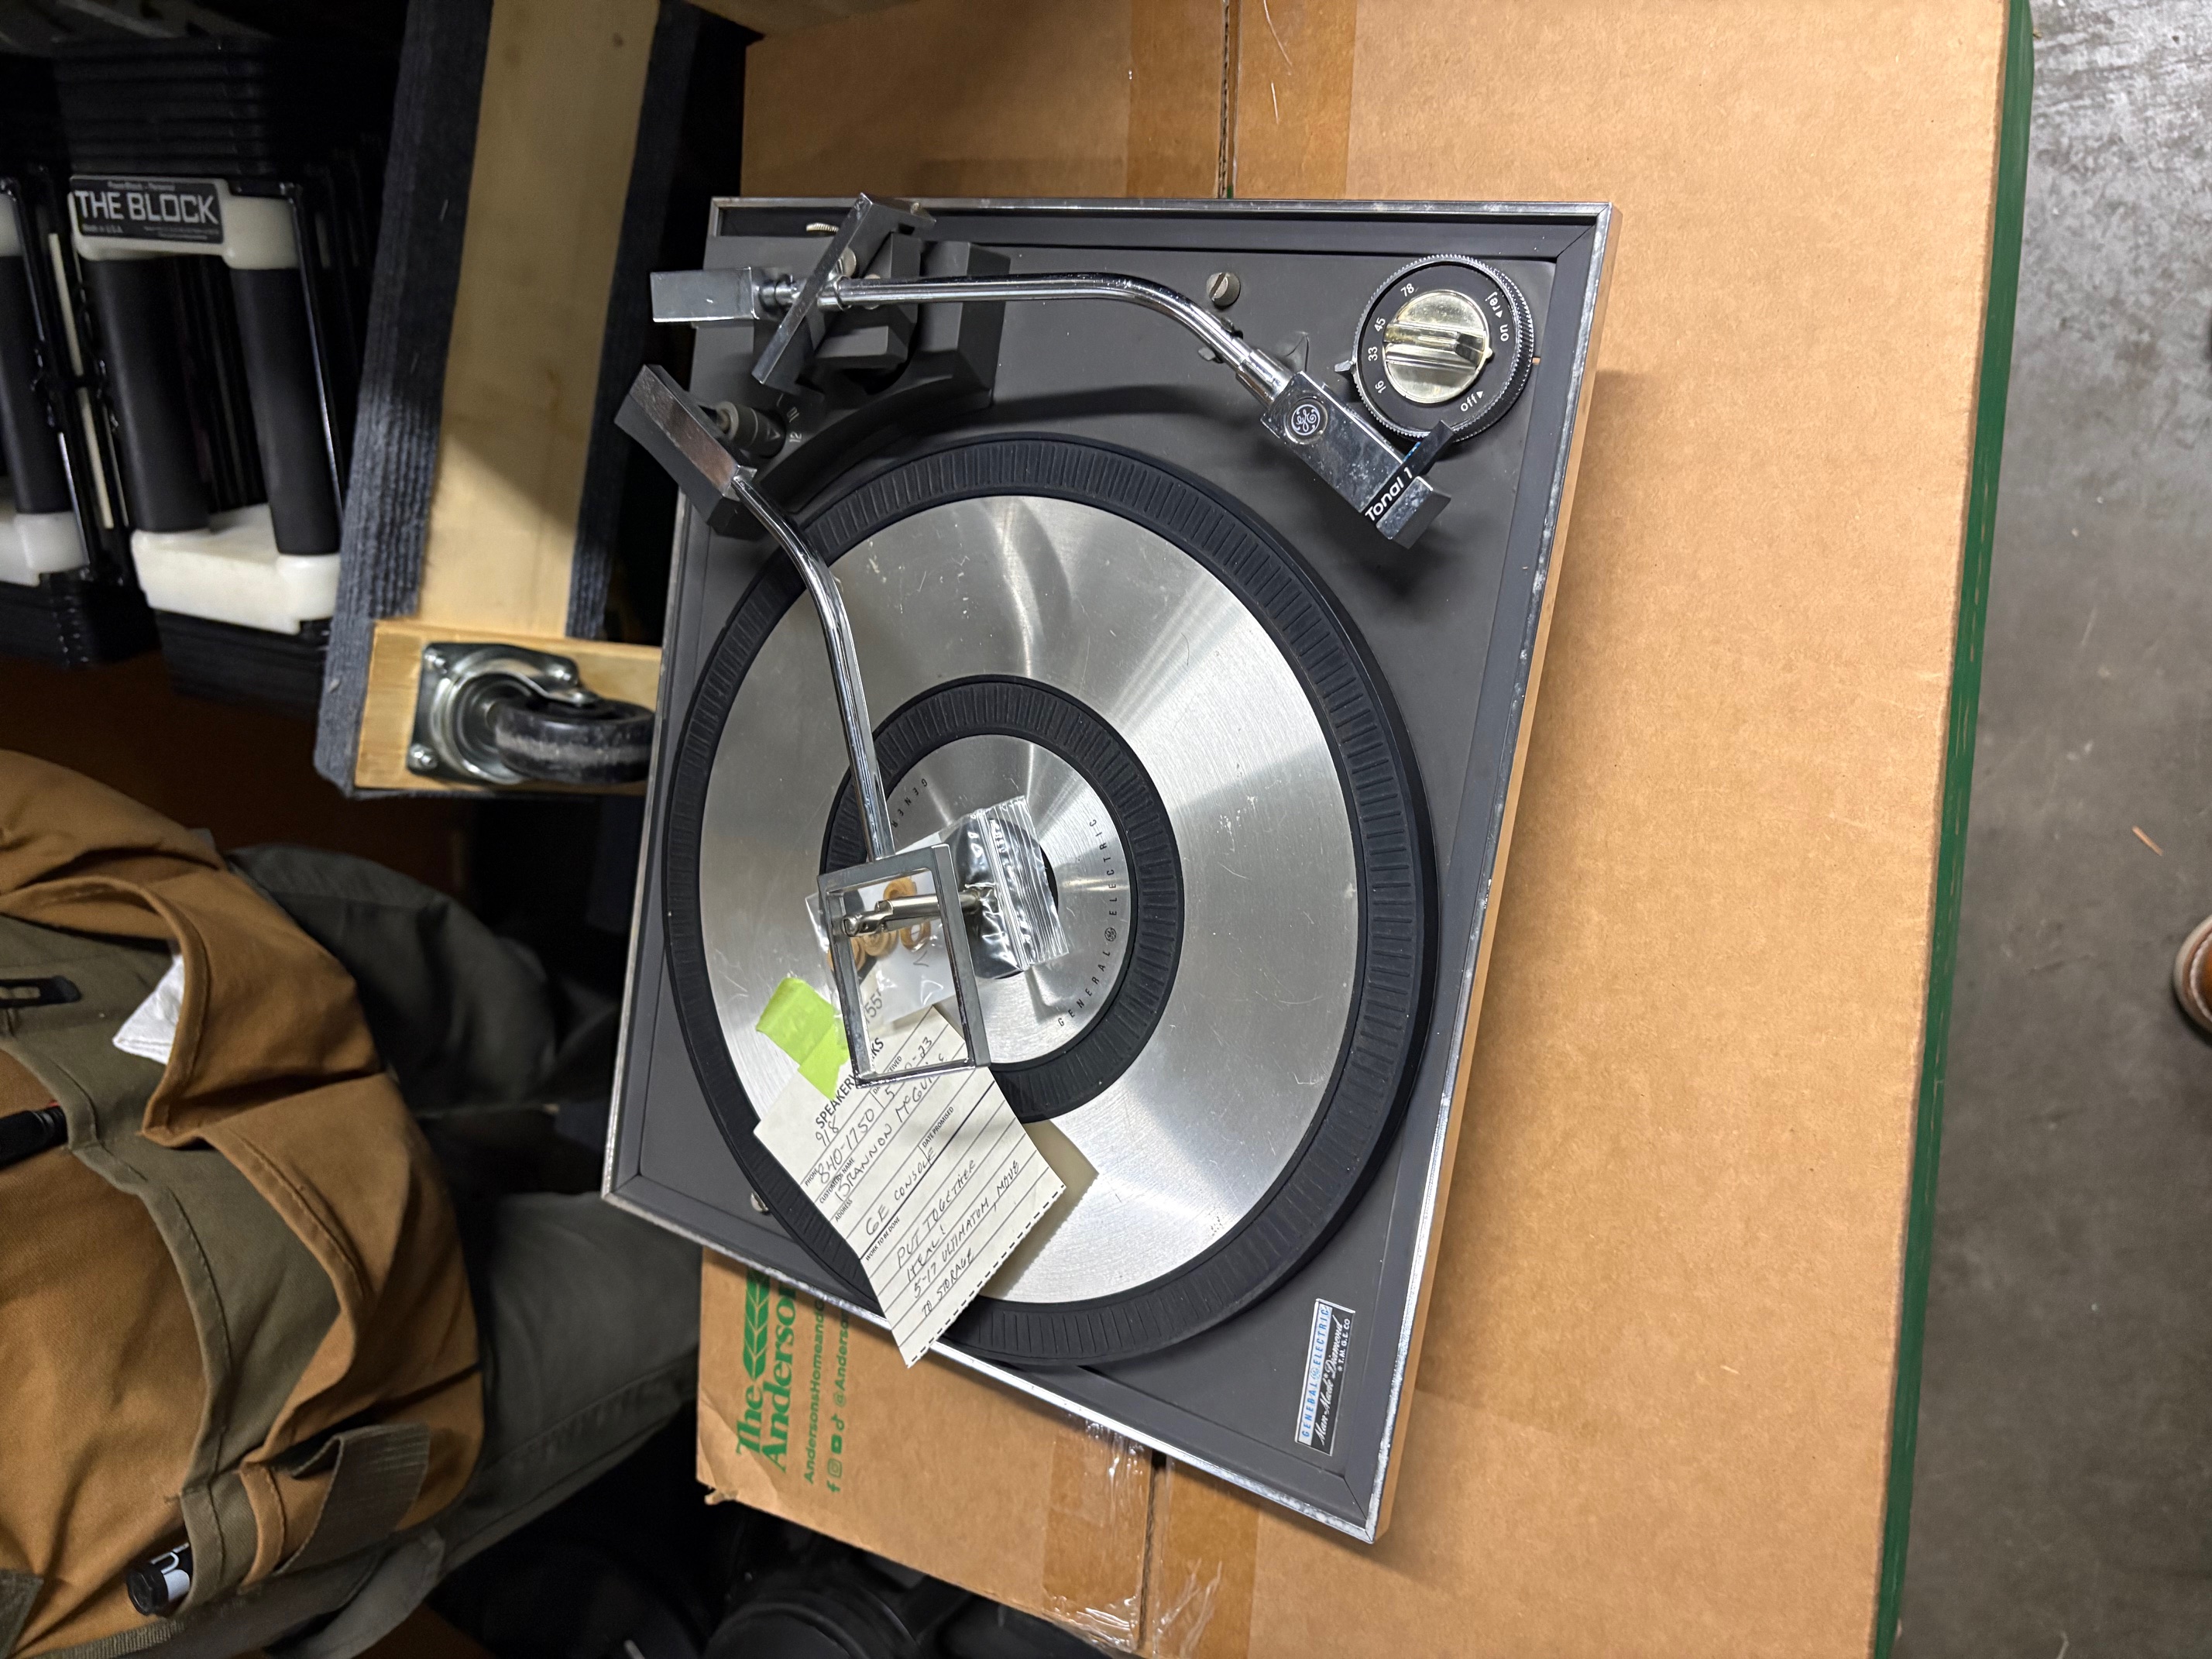
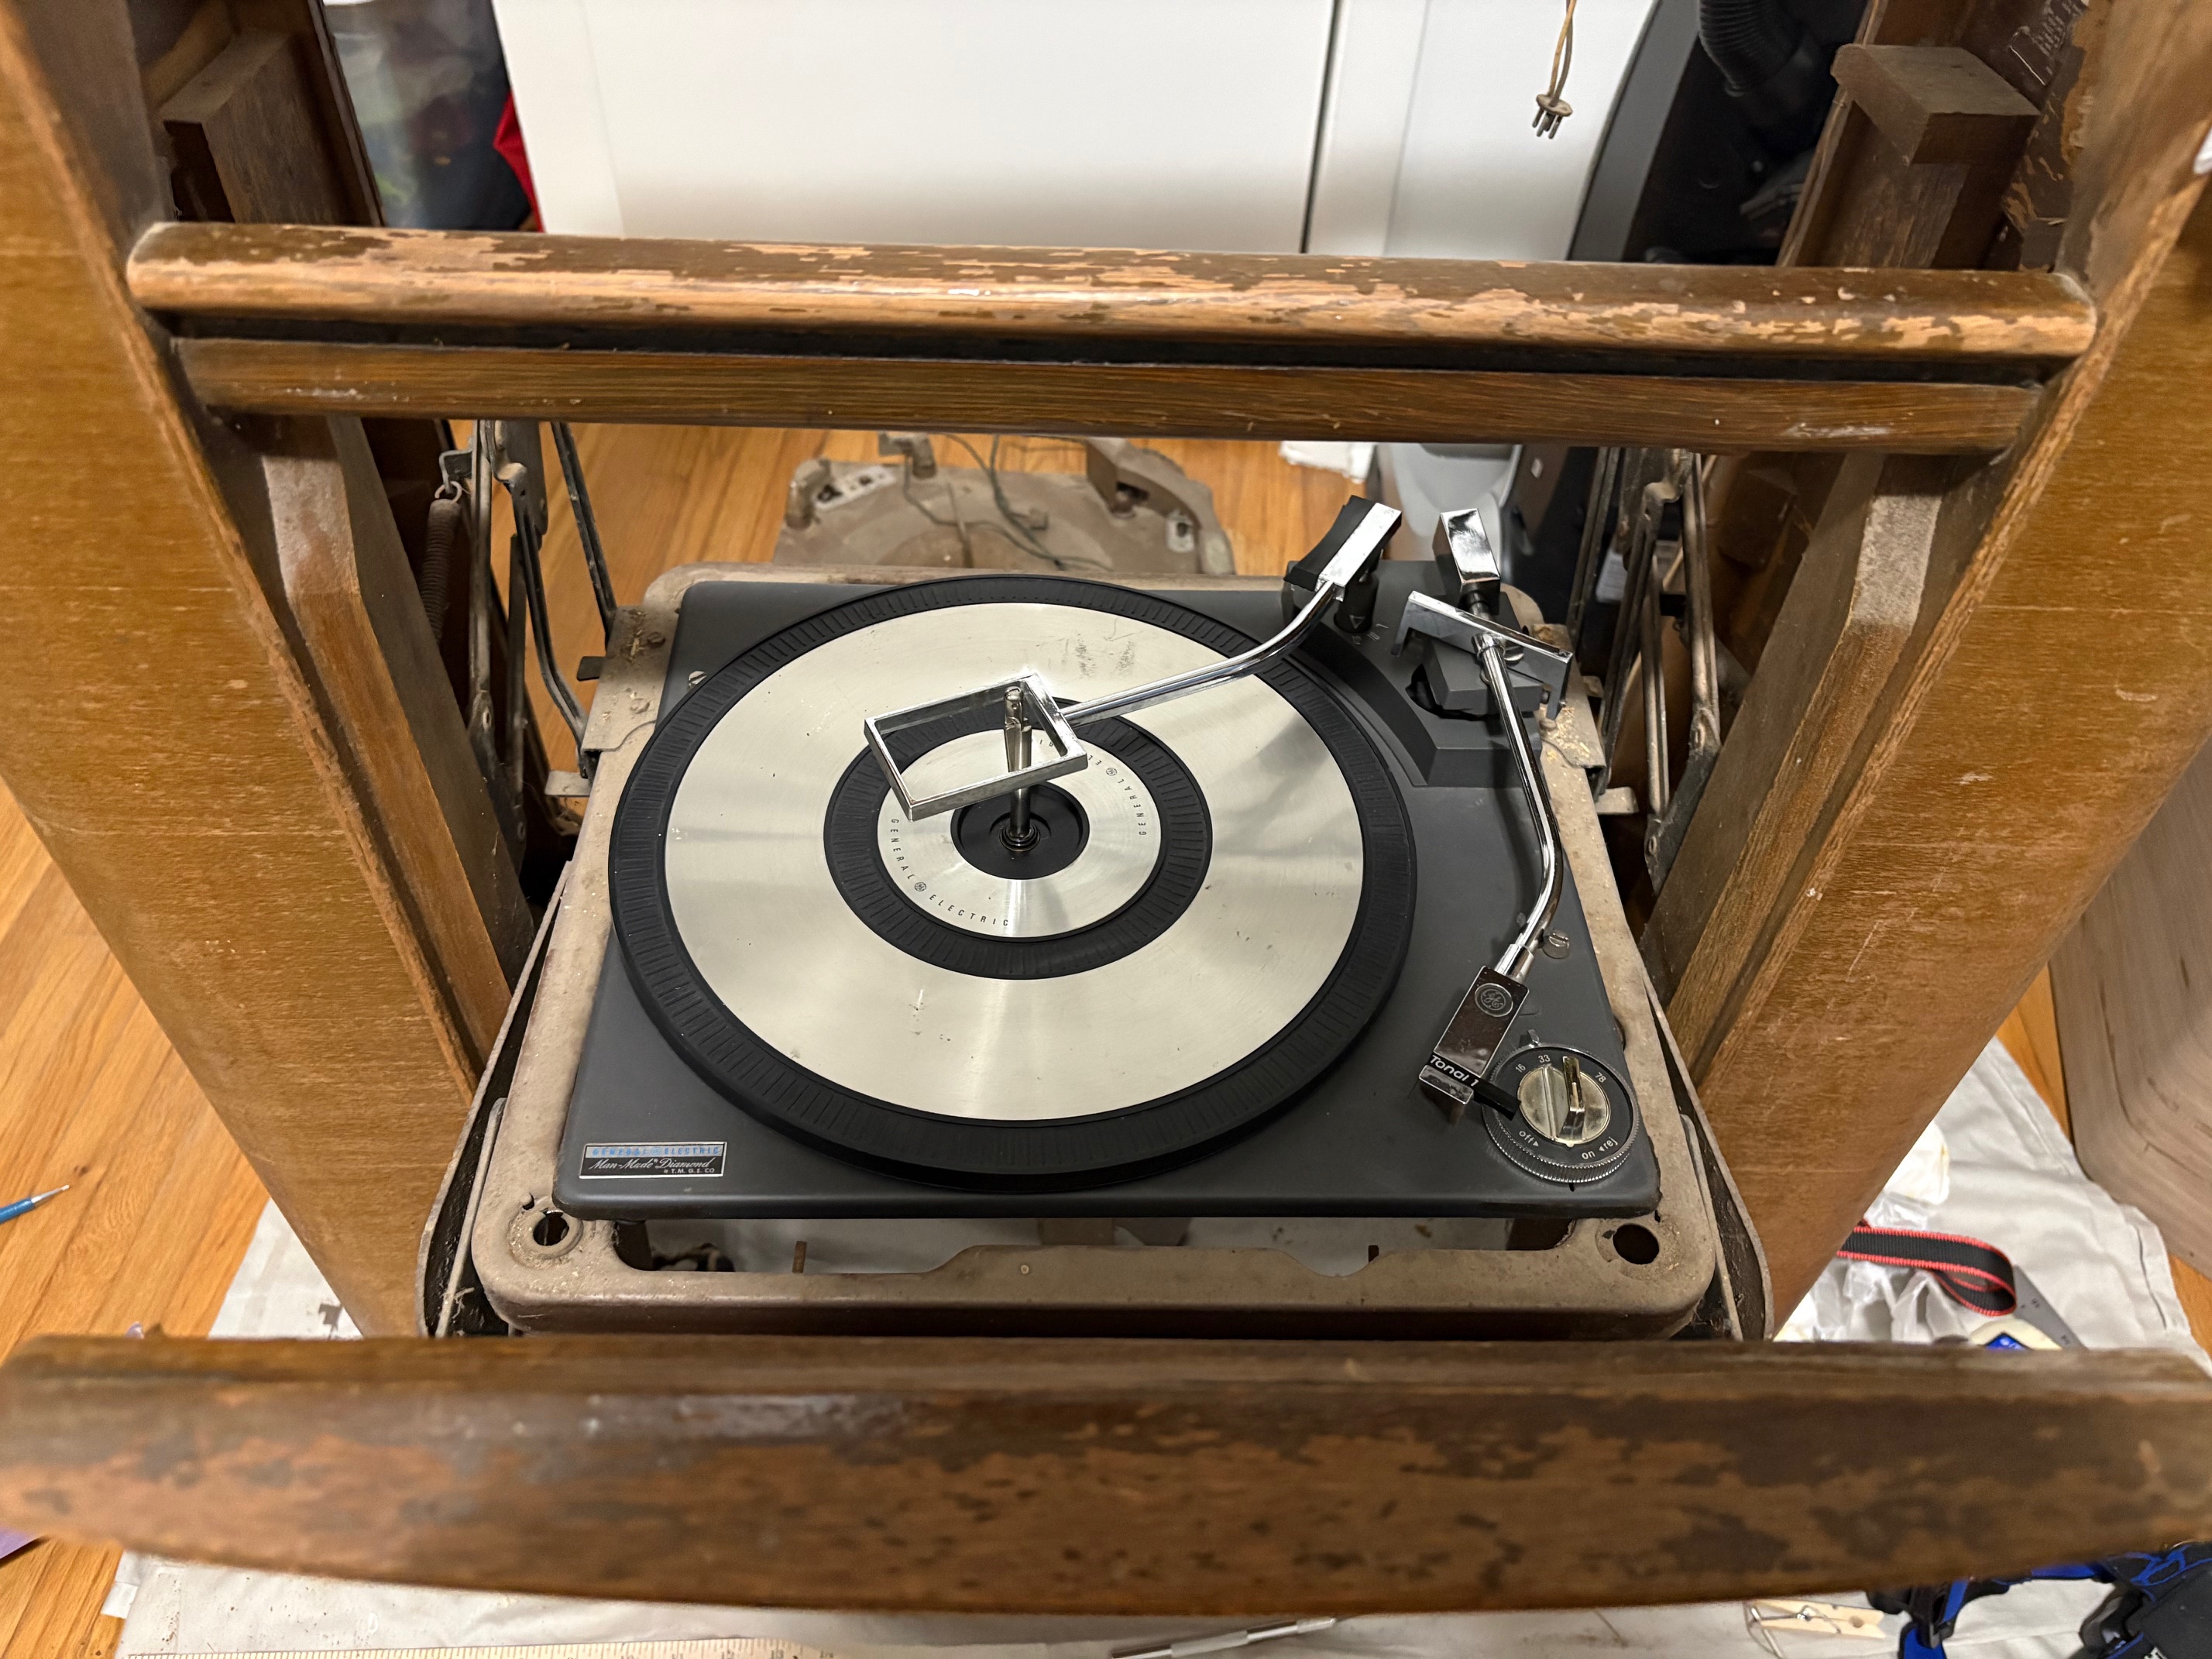
I got to talking away with David (the store owner) about our ongoing projects, and he asked me what I'd be working on that would have a 12" driver in it. I was showing him some photos of the console, and he asked me about the turntable. In particular, he wanted to know if I was going to restore it. I told him no, that I was instead thinking of finding a 1950 or newer turntable to install so I could also play 33's and 45's. To just my luck, David had been sitting a newer turntable that he'd rebuilt for a customer who never came to pick it up! This is a 1970's GE Made Made Diamond turntable (the Man Made Diamond series was made in the 1960s and 1970s, but I conclude that this one is definitely from the 1970s because they featured a metal tone arm for the stylus in earlier models, but went to chrome-colored plastic arms in the 1970s). It's a bit newer than what I was originally looking for, but I think it will do well! I decided to settle for this one for a few reasons, actually:
  1. It measures 14" wide by 12" deep, which is just about an inch smaller in either direction than the D-10A which came from the factory in the console.
  2. It plays 16, 33 1/3, 45, and 78 rpm records.
  3. It has an automatic player, just like the D-10A.
  4. The GE turntable does not have a built in pre-amp, so I can feed the output to the triode section of the 7A7F used as a preamp for the existing turntable (note that the D-10A features a dynamic pickup as well, so I'm substituting like for like).
  5. This is a stereo turntable. I realize that the Philco is mono, but I can sum the output using a stereo-to-mono transformer (EDCOR makes these, for instance). I actually thought it advantageous to use this newer stereo turntable because the stylus will be designed to move up and down in addition to the left-to-right movement used on mono-only turntables. Playing stereo records on a turntable with a mono cartridge can damage the disks and the cartridge, and I don't want that!
  6. David agreed to sell it to me for the price of the parts he put into it.

Here are some photos of the turntable. You can see I removed the chrome-colored plastic trim, because it didn't match the style of the Philco. I will need to fashion a flange plate to adapt it to the existing tray, but that won't be too difficult.


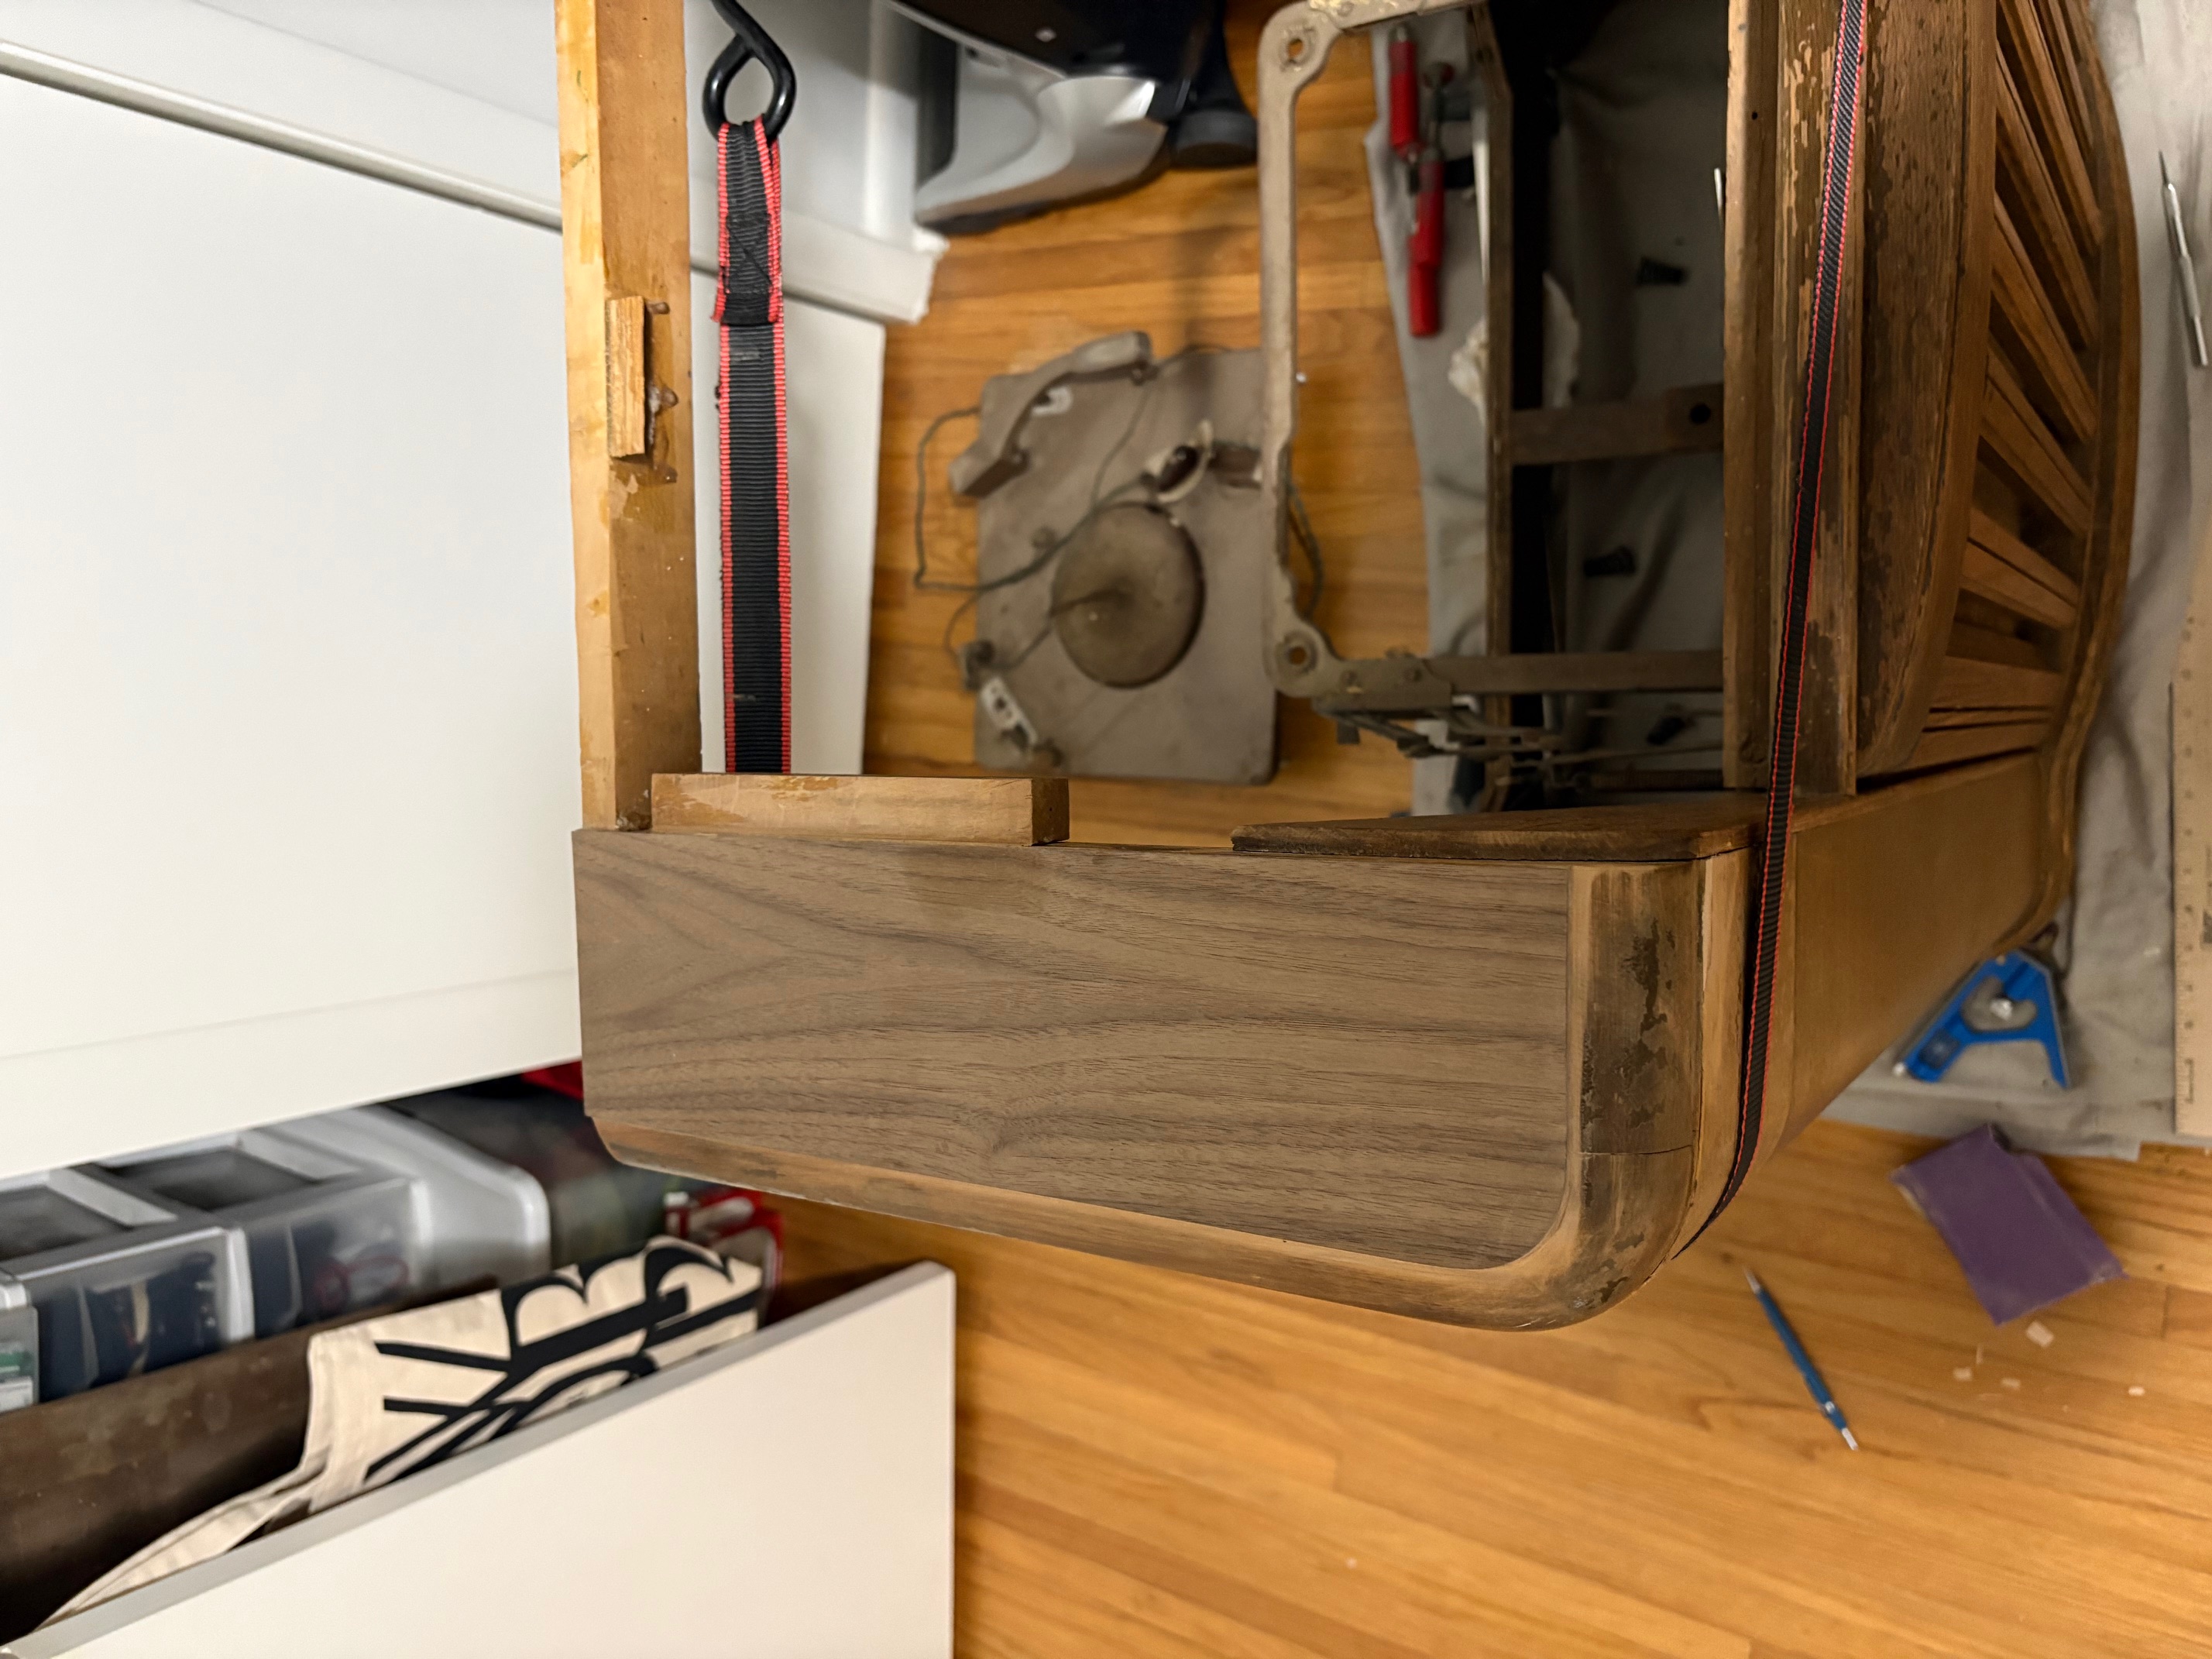
Back to the discussion of veneer work. Here's a quick photo of the top panel I re-veneered, reinstalled in the console. I've dry-fitted it here, because I need to do a few more repairs before permanently installing it.
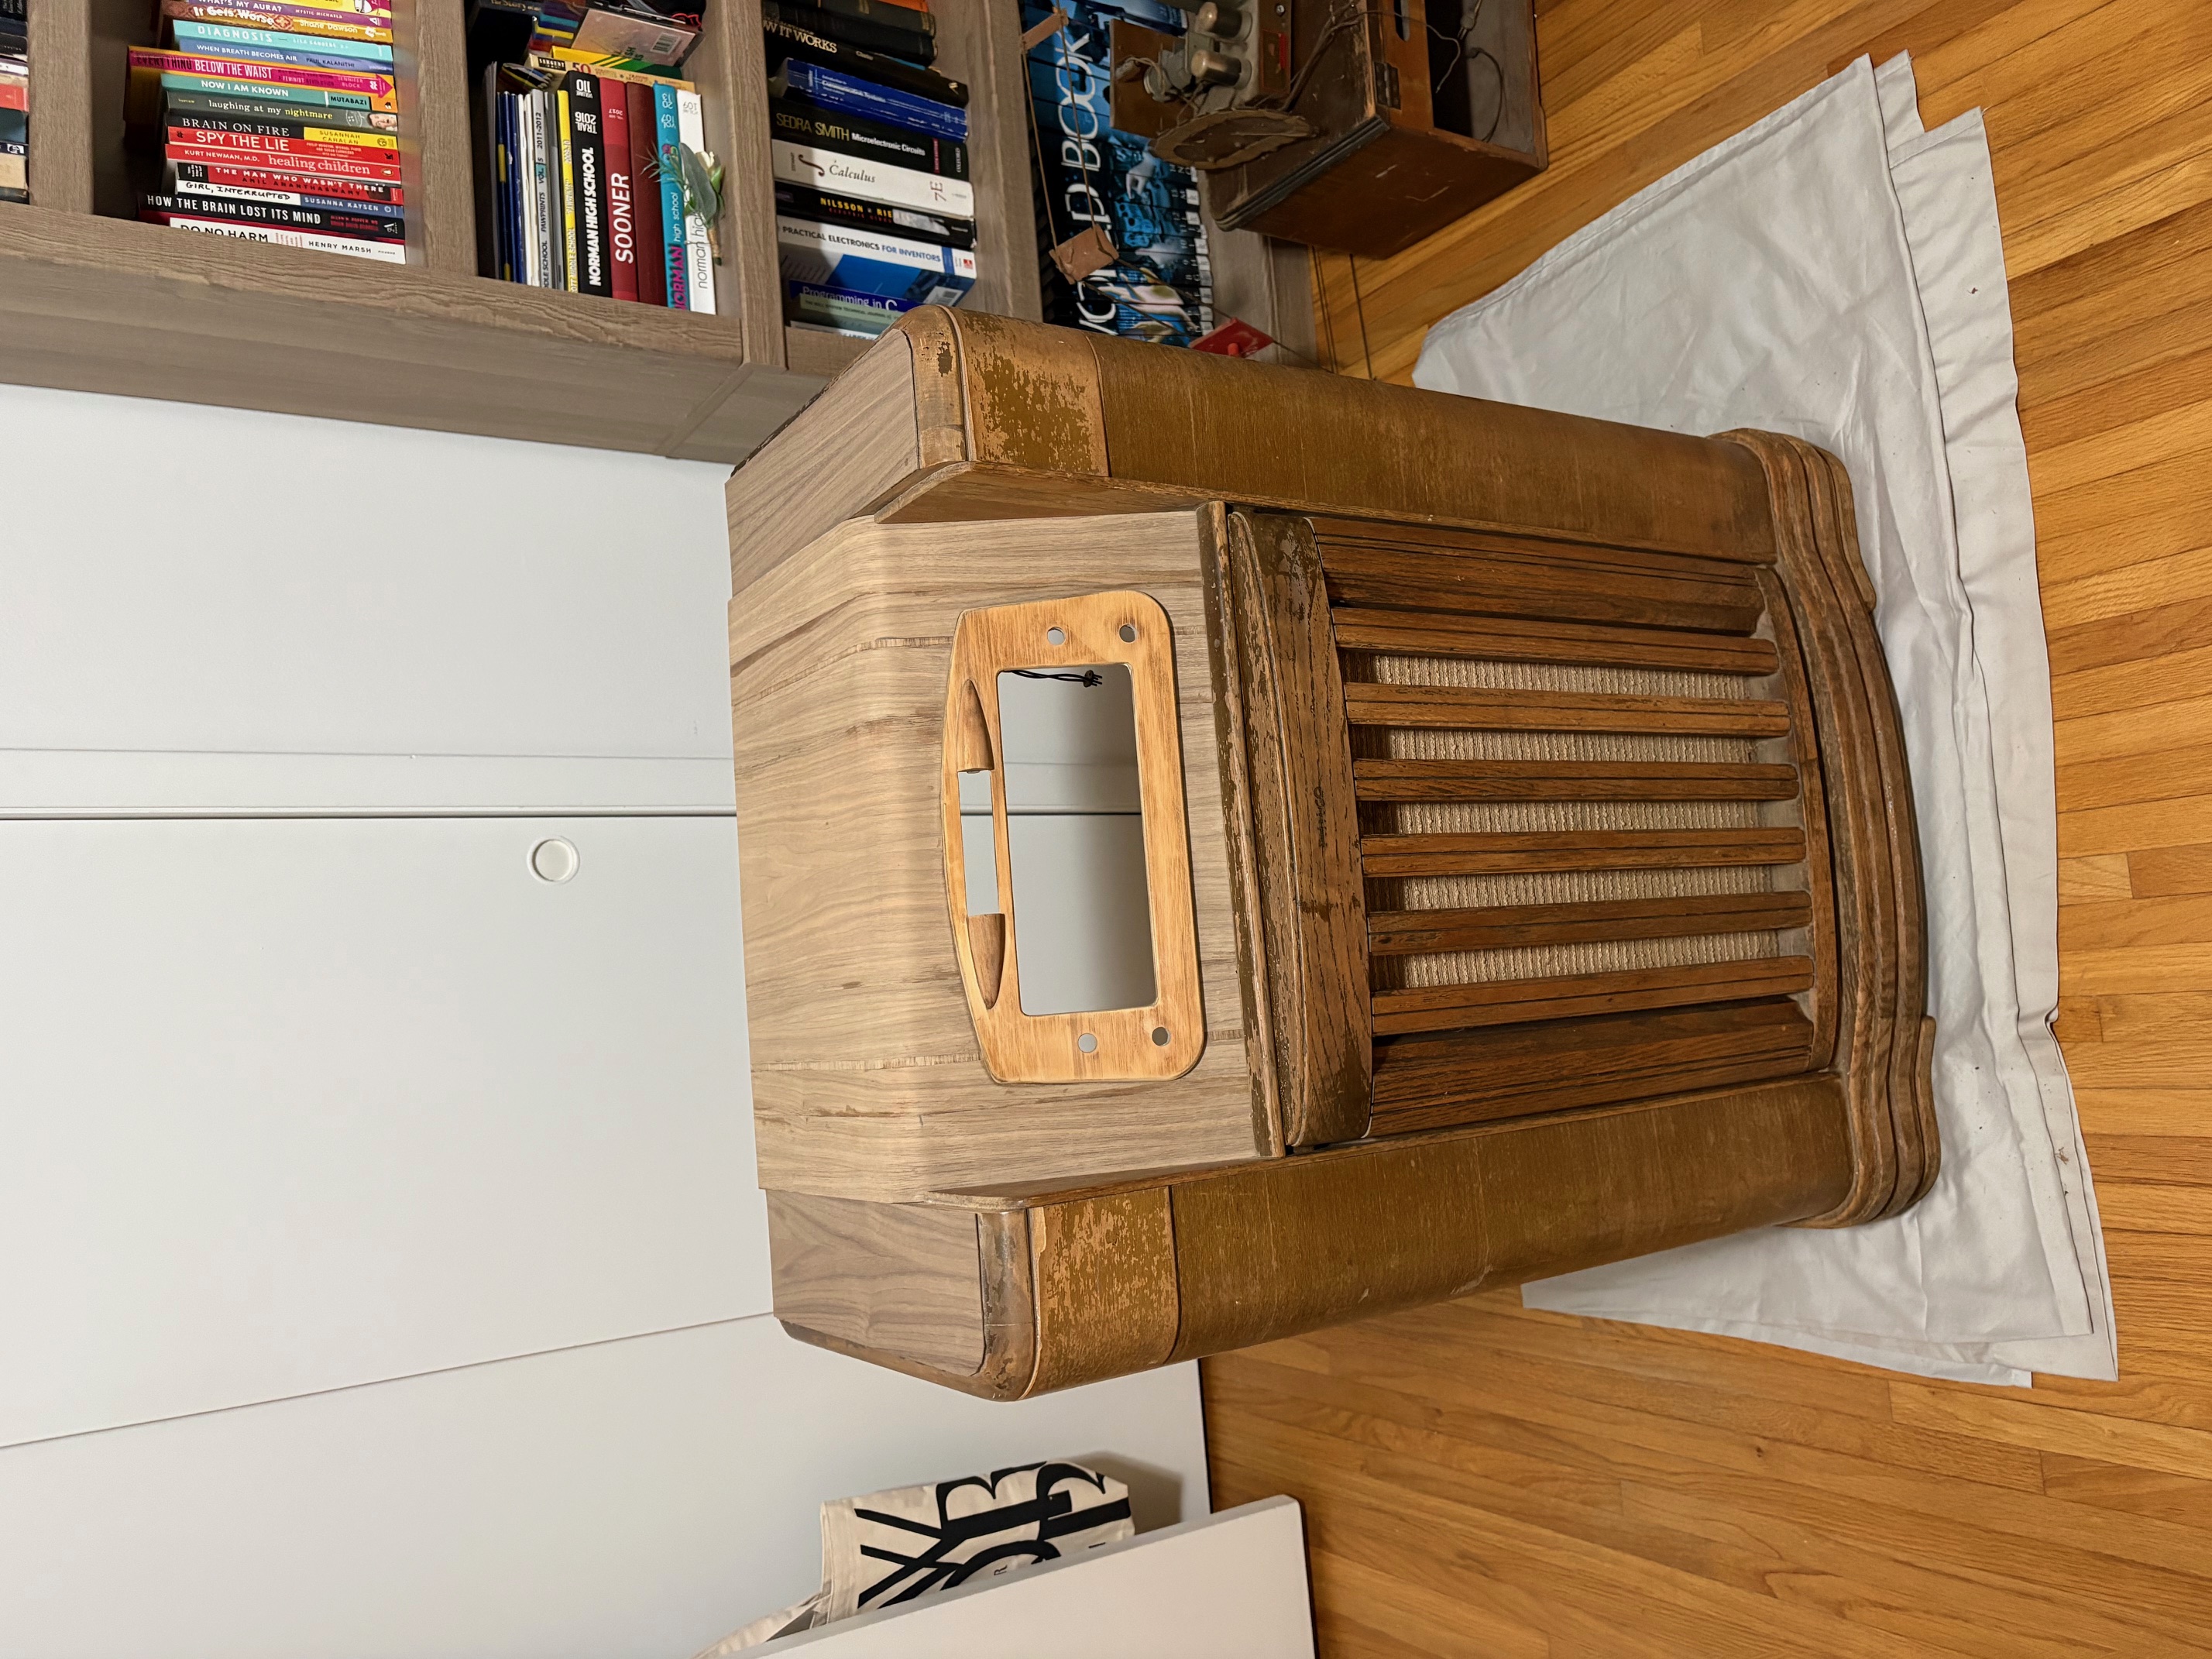
   

I've also replaced the veneer on the top left and right shoulders. You can see the new veneer on both shoulders in the picture above, but here's a photo of the left shoulder after I've finished refining the shape. I've still got to file the right shoulder down to the exact size.
   

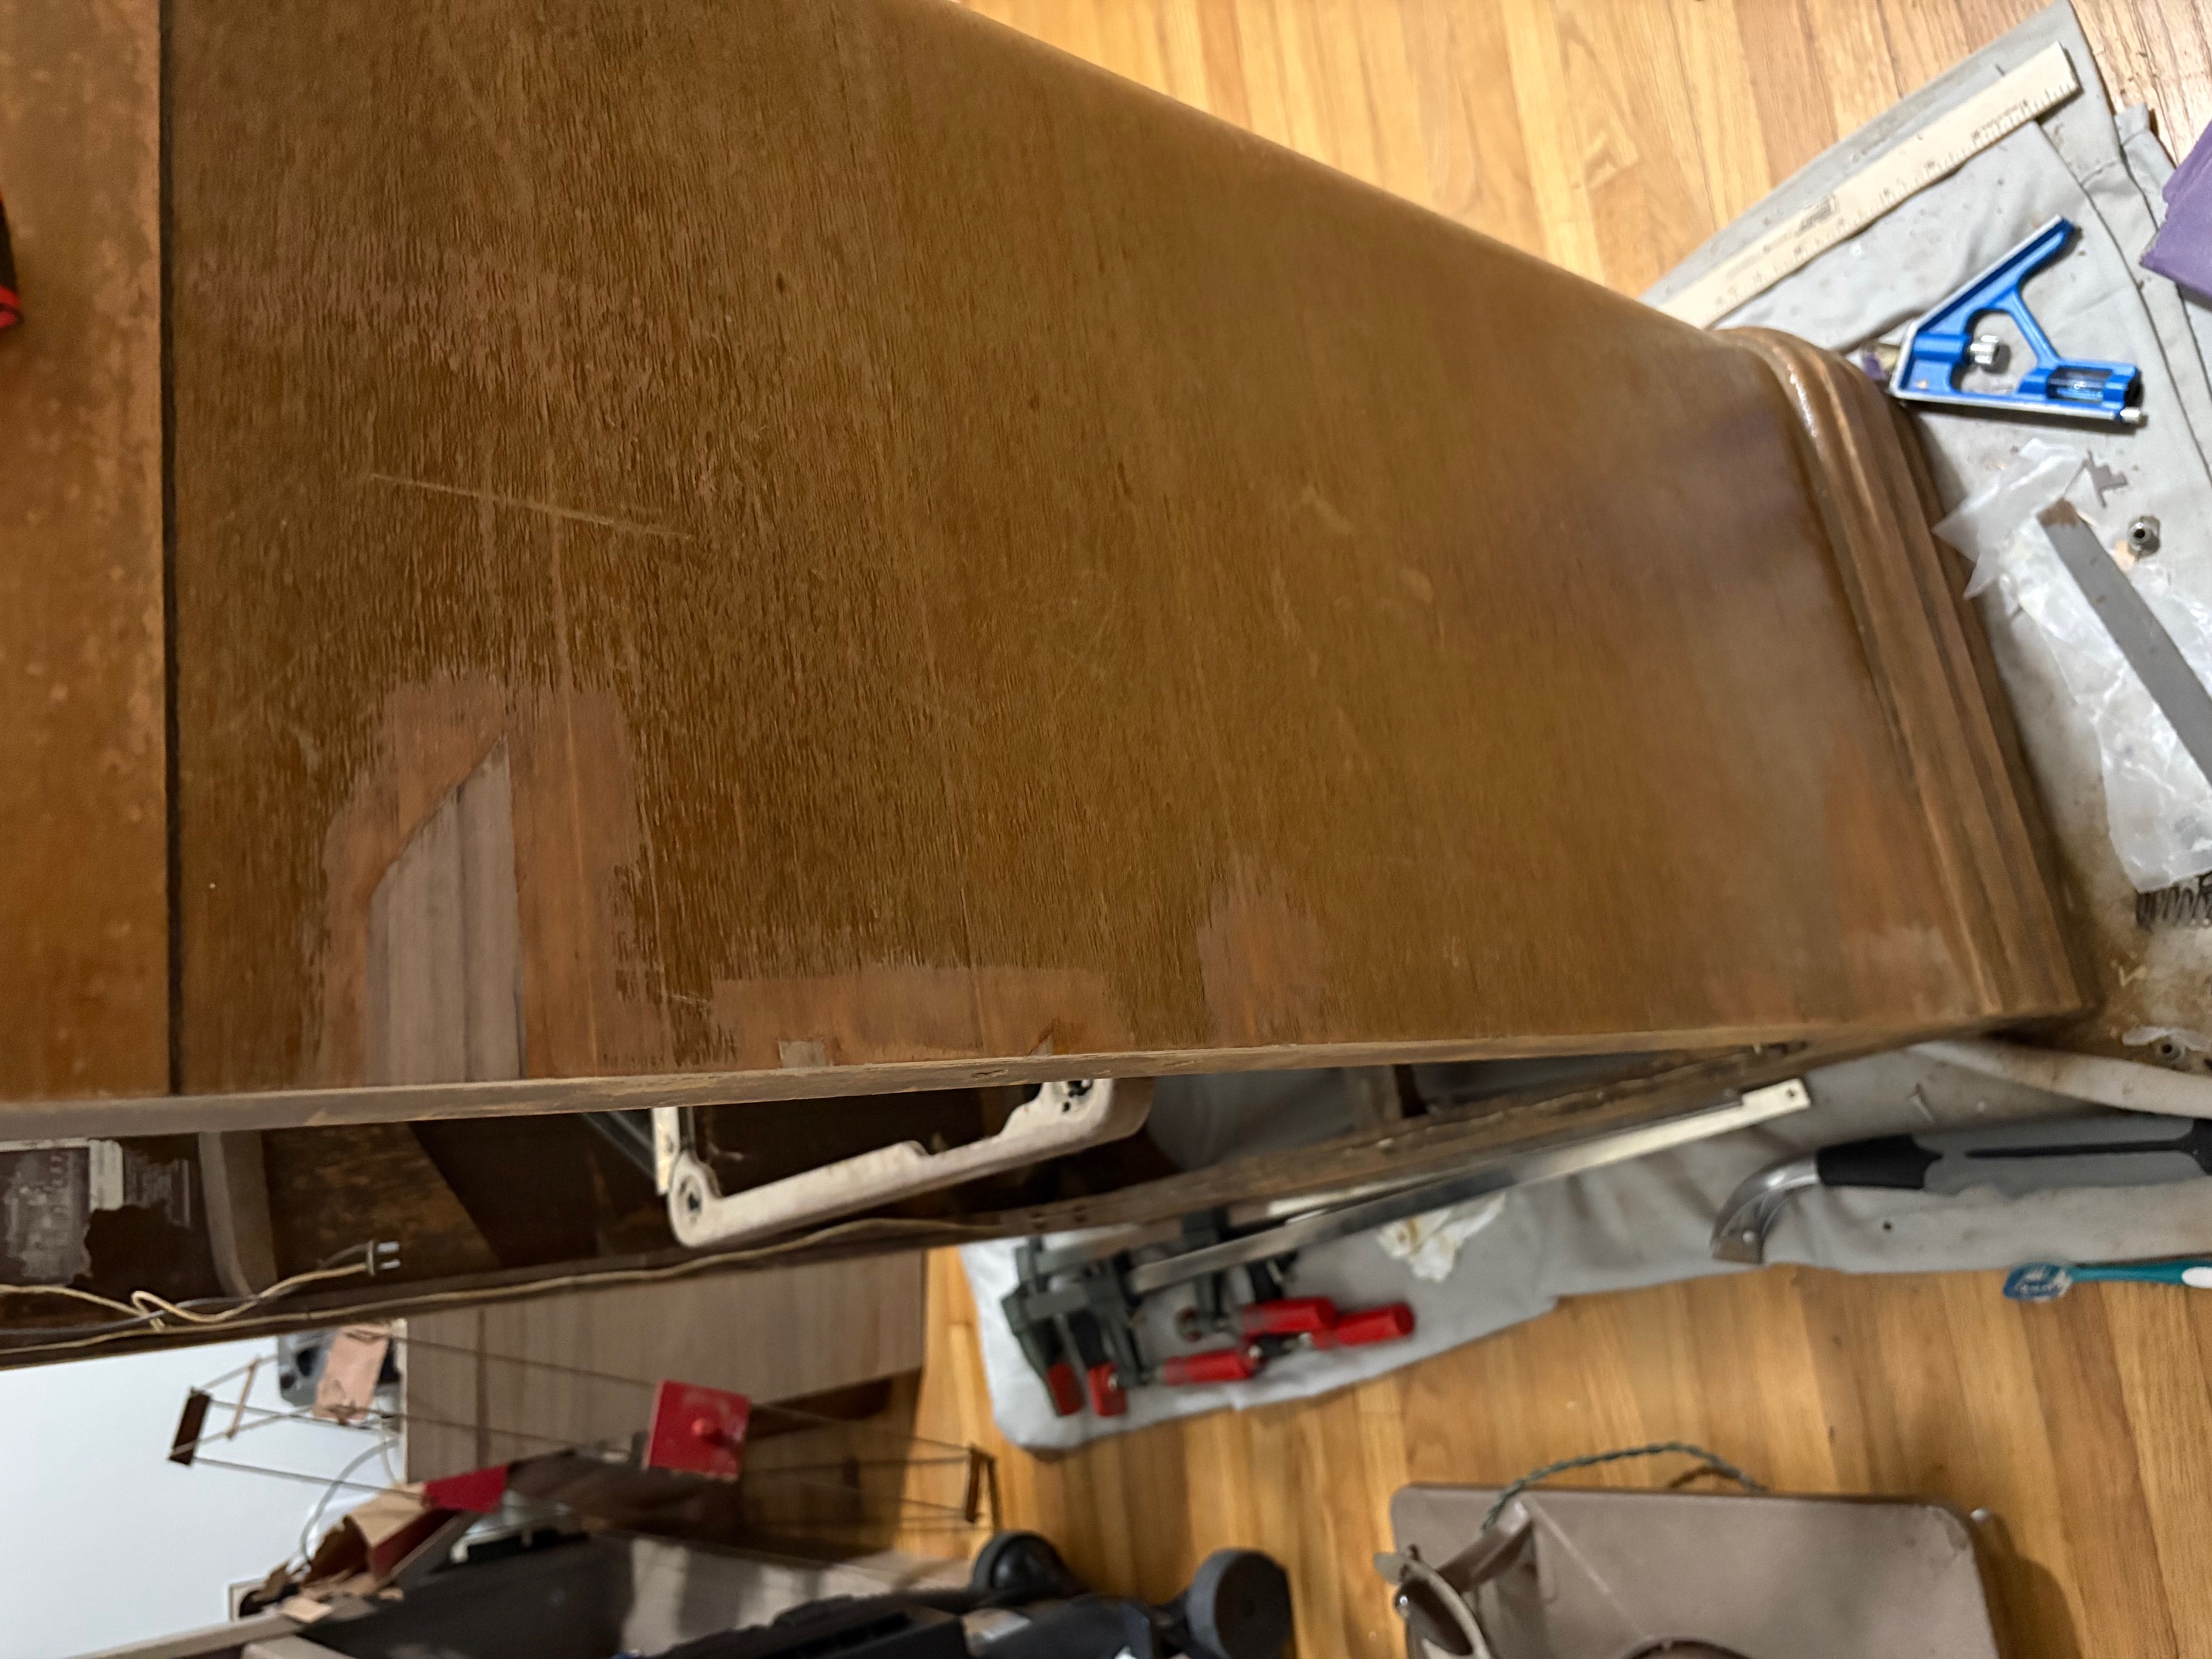
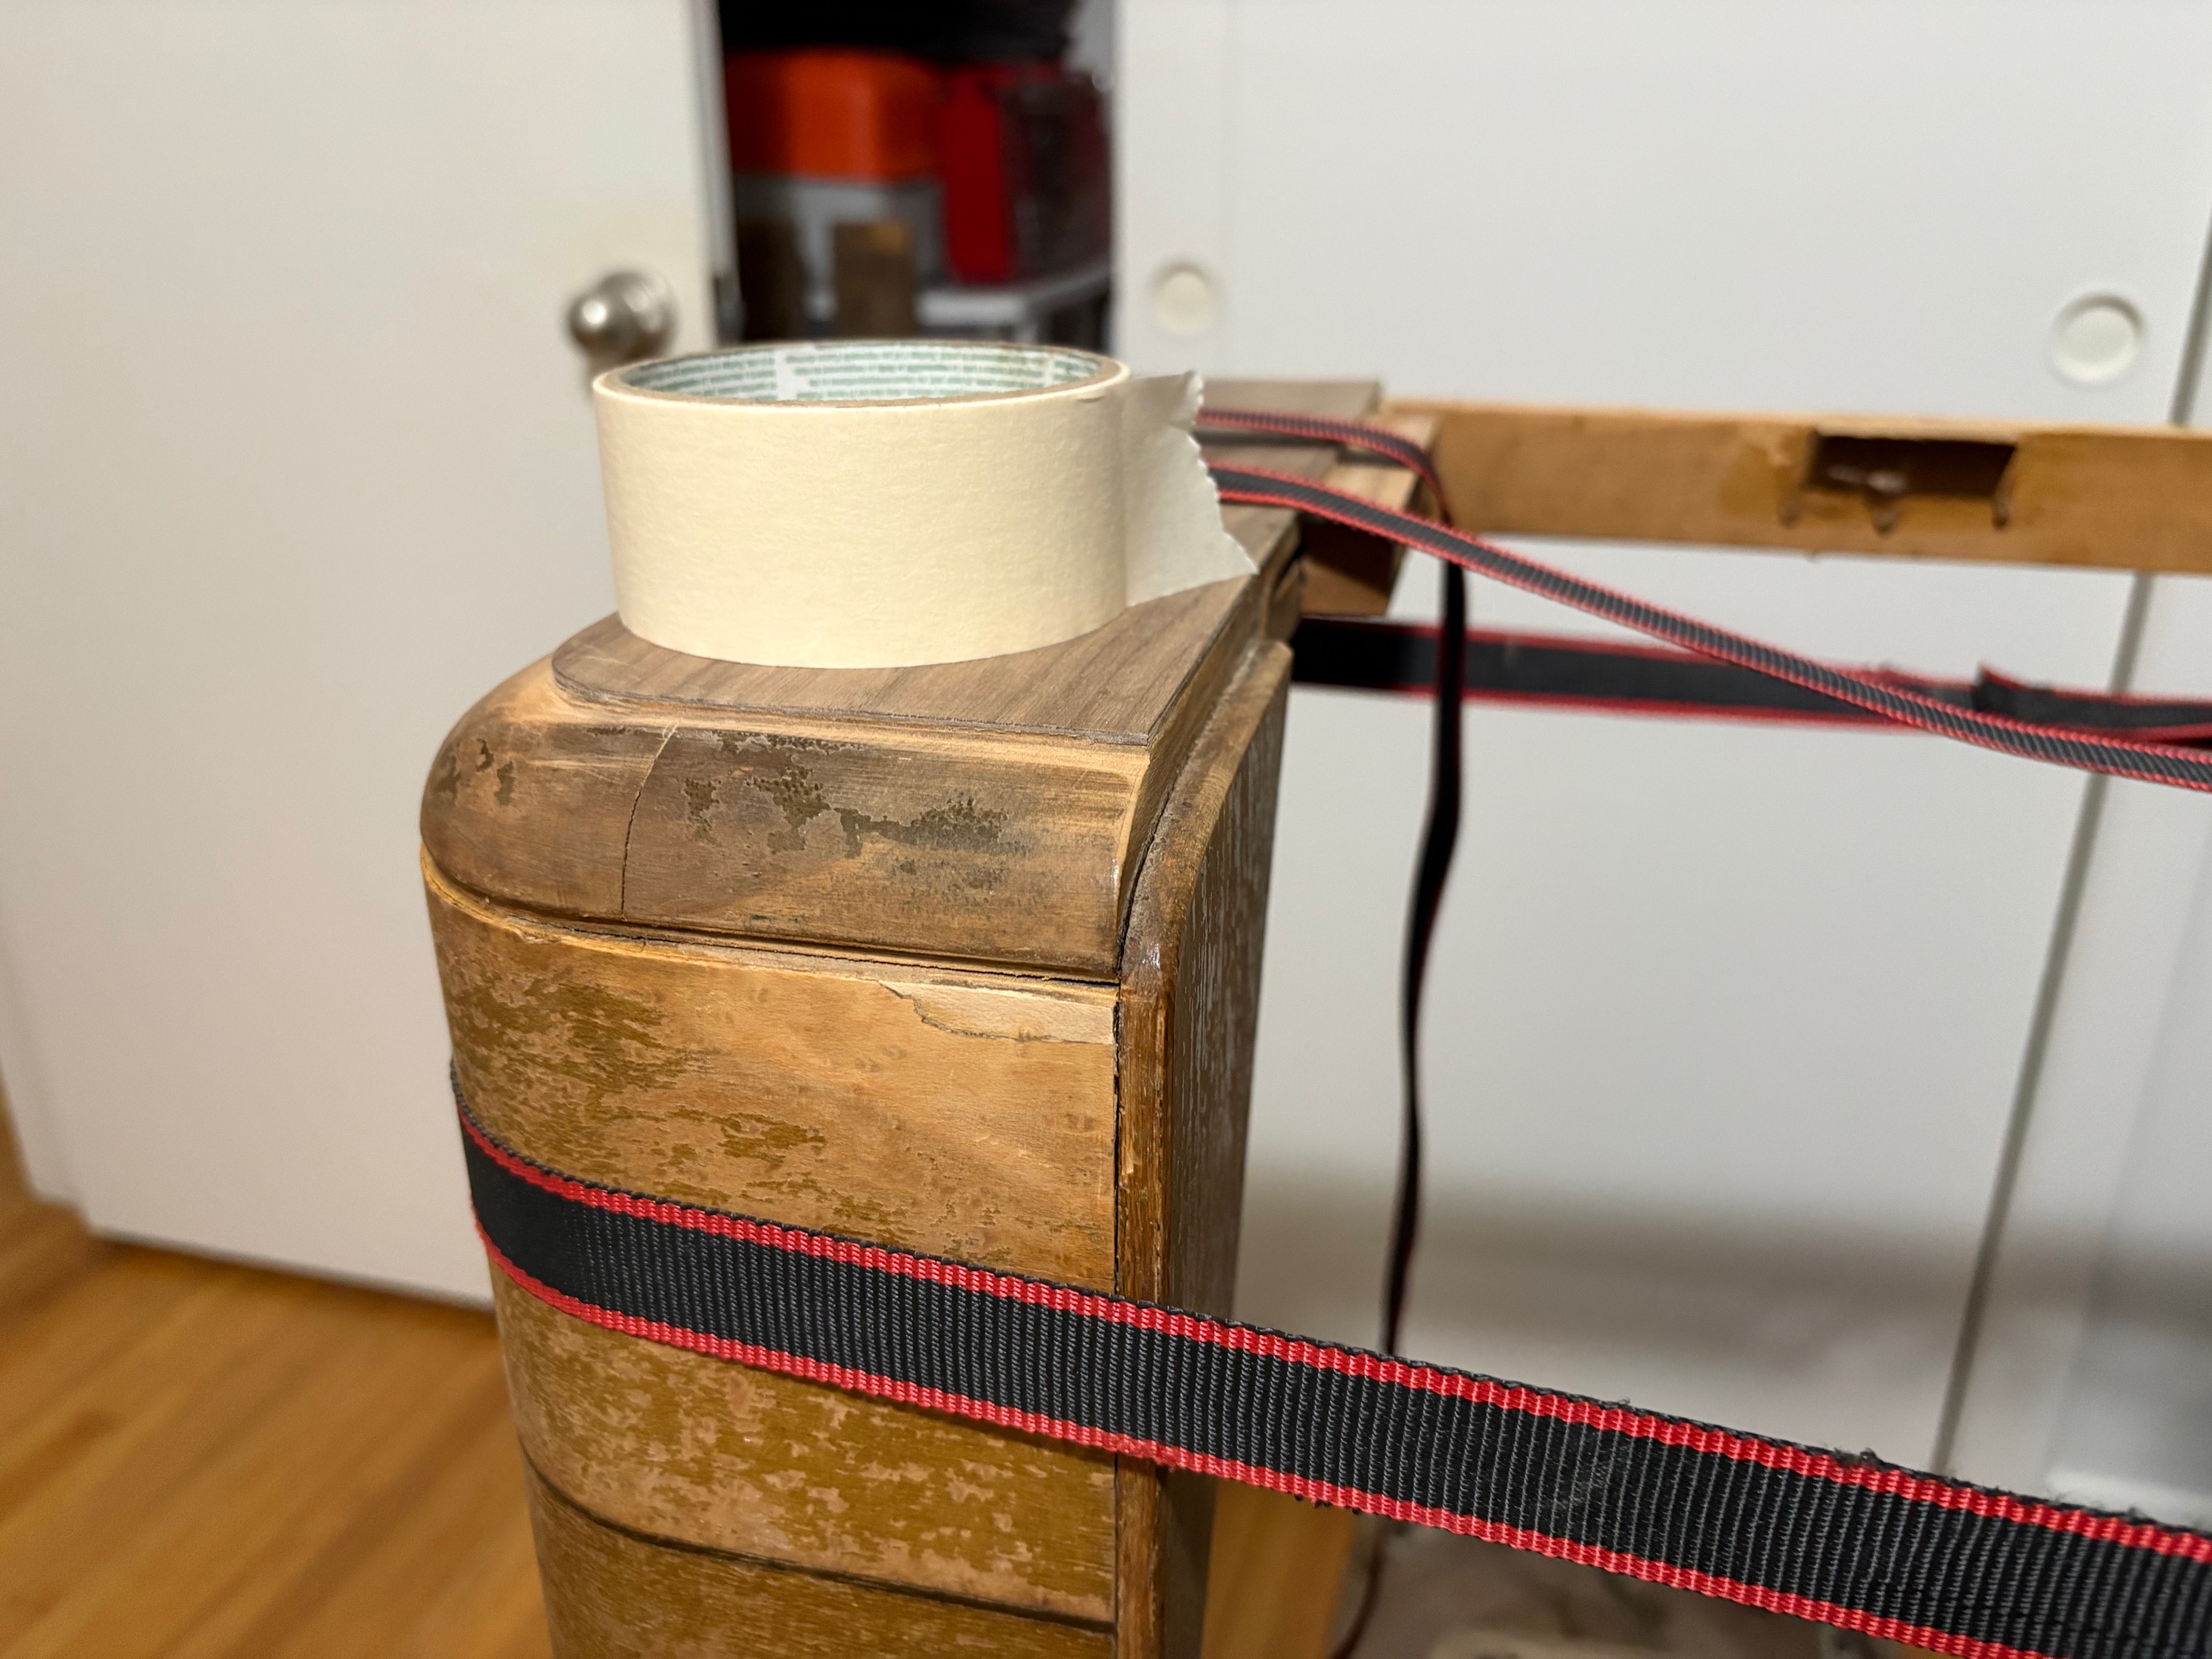
I'm also done repairing the veneer on the left panel. I'm just getting started on the right panel (which is the worse of the two, but here's a couple of photos of the repairs to the left panel. I will note that the difference in color between new and old veneer is obvious, but I have had GREAT success with a new two-part wood bleach I found. It strips the purple-grey color from the new veneer, leaving it much better matched to the old. I still need to entirely strip the console, and then I'll hit it with the wood bleach. But I tested it out with a small bit of veneer I kept from the top, and I was happy with the results.


Joseph

Philco 39-750 EZ
Philco 46-480
Philco 47-1230
Philco 48-482
Philco 49-906
#17

That top will turn out to be fantastic. Are you going to put any stain on or leave it natural?
#18

My plan is to stain it all, to match the original.

Joseph

Philco 39-750 EZ
Philco 46-480
Philco 47-1230
Philco 48-482
Philco 49-906

#19

Joe;
Some of the scraps from the old veneer on top may be a closer colour and grain match to the old stuff. I think the reason for the difference is that the original stuff was French walnut, but the new is black walnut, French walnut is more reddish brown, where black walnut has a brown-grey colour to it. Tinted lacquer is good for hiding flaws, and repairs when you need to, so is wood dye, or even fabric dye. What I tend to do is cut a patch shaped to look like the rays of the original veneer, a short of arrow head shape, and then cut a slot in the veneer to fit the patch by tracing around the patch. I really need to figure out how to upload, and post photos on here to show how I do certain things, though with things like stringing dial cords it would be hard to illustrate with photos.
Regards
Arran
#20

Arran:

    My original plan was to reuse the scraps salvaged from the top panel, for the repairs on the sides. I still have those pieces. But when the time came to do so, I realized that the scraps of veneer were so crumbly that they were breaking apart when I tried to cut patches out of them. But you may be right—I may not have the exact same species of walnut. I had a 1’ x 8’ roll of Sauer’s American walnut (a.k.a., black walnut) from woodcraft. The good news is that it lightens up extremely well with this new two-part wood bleach. I’m trying to match the grain as closely as possible, and my hope is that I’ll be able to match the color. I need to figure out where I can find French walnut locally!

Joseph

Philco 39-750 EZ
Philco 46-480
Philco 47-1230
Philco 48-482
Philco 49-906
#21

I do also have a nice auburn wood dye, with which I had great success in reddening this same veneer when I worked on my 48-482.

Joseph

Philco 39-750 EZ
Philco 46-480
Philco 47-1230
Philco 48-482
Philco 49-906
#22

Joe;
Sometimes it's not just the species they used but the cut, Philco cabinets in the late 1930s and 1940s used a lot of quarter cut, or quarter sawn French walnut (or satin walnut?) and the grain is more parallel rather then having a pattern similar to fir plywood. The best analogy I can give is it's like the difference between quarter sawn oak verses plain sawn oak boards in a hardwood floor, the quarter sawn has a straighter grain, but also has those flecks across that some erroneously call "Tiger Oak". The strips are also narrower, like maybe 5'' across.
I have bought veneer from a hardwood supplier before, but the last time I got some, and I got a lot of it, was from a guy in Fleabay who sold surplus veneer left over from fitting boats, and private aircraft cabins. I don't know if he's still on fleabay, but he had no problem combining shipping, and even threw in some Santos rosewood veneer so I could fix up some Canadian G.E KL-500s I have. One that I got off of him was some Australian, or Queensland walnut, something that was used in a lot of Rogers and DeForest Crosley cabinets, I suspect that may have been using eucalyptus as well, which is lighter in color, but have no confirmed that.
A lot of G.E cabinets, in the U.S and Canada used Sapele veneer, which looks like mahogany, I'm hoping to contact a local snowboard company to see if they have any, they make boards with fancy marquetry in them and I only need small chucks for that job. My main issue in all this is I don't have a workplace set up for cabinet repair at the moment, which I plan to change. I have been thinking of making a knockoff of a Setchell Carlson "Jet" as I have an RCA chassis, and speaker that would work well for it. What I need though is a wood drum from a child's drum set for the speaker part, I could make something in that shape but it would save a lot of work to use something already the size and shape I need
Regards
Arran
#23

I must have looked at twenty or so pictures of veneer, but I see what you mean now. I had no idea that there were so many different ways to cut sheets of veneer! I don’t recall seeing any different cuts of walnut at the Wood Craft here in Tulsa, but I also didn’t know to look into it at the time. I’ll have to stop in today after work to see if I can get a small bit of quarter sawn French walnut. If not, I’ll keep doing what I have been. Quarter sawn looks to have a very straight grain, which the original veneer on this console does have. I’ve been deliberately cutting patches from straight-grained areas of the new veneer, so not should be okay.

Joseph

Philco 39-750 EZ
Philco 46-480
Philco 47-1230
Philco 48-482
Philco 49-906
#24

One project today was to apply new veneer on the face of a 1937 Fairfield Morse. I was curious what thickness you used. I think mine was really too thin 1/42 inch. It split so easily I decided to lay down a second layer and order a veneer saw. Trying to cut with an x-acto knife just blew it out.
#25

Wood Craft did have smaller sheets of quarter sawn walnut! We were unable to confirm if it’s French walnut, but it most certainly is more of a reddish color (the lighting in this photo isn’t doing it much justice). I’m thinking this will be much more suitable for patching the side panels. I’ll even remove the couple of patches I made to the left panel, and replace them with cuts from this new sheet. I’m not going to redo the top panel where the radio dial goes, though. I think it looks just fine since I had entirely redone its veneer.


Joseph

Philco 39-750 EZ
Philco 46-480
Philco 47-1230
Philco 48-482
Philco 49-906
#26

bridkarl, I used 1/64” veneer with 10 mil paper backing. The backing helps immensely with reducing splitting.

Joseph

Philco 39-750 EZ
Philco 46-480
Philco 47-1230
Philco 48-482
Philco 49-906
#27

   
Ok. I ordered some backed veneer. That will give me three layers of veneer which should give me a good strong front. I'm just looking to have a functional radio that looks ok. This is more a learning exercise in veneer than trying to win a prize. Anything is better than how this started -see...
#28

It’s a learning experience for me as well! In fact, I just test fitted a patch of this new veneer. I feel like it will be a good match! I’ll cut out that larger patch I made above, with the flat cut veneer, and I’ll replace it with some of this new veneer.


Joseph

Philco 39-750 EZ
Philco 46-480
Philco 47-1230
Philco 48-482
Philco 49-906
#29

    I just ordered this veneer saw for $40.
There's another type available but this can be used without any adjustments.
I think your patch should work well.Sort of what I did on my Philco. Not sure the top came out right, but at least it's secure. I think I overdid it on the grain filler. The Pagoda came the other day - this will be a task.

           
#30

Very nice saw! I never knew that there were specialized saws for veneer. No doubt that you’ll enjoy it!

I’ve also fitted a new patch for the larger repair on the left side of the console. Overall I feel that Arran was right, that the cut of grain makes a big difference. I’ve also taken the advice of consistently using angled cuts rather than square pieces. I think these will blend better.


Joseph

Philco 39-750 EZ
Philco 46-480
Philco 47-1230
Philco 48-482
Philco 49-906


Users browsing this thread: 1 Guest(s)
[-]
Recent Posts
Philco P45-6365 Universal Transformer Instruction Manual
Can anyone guide me to where this may be found?GRG — 03:00 PM
54C Complete Teardown/Rebuild
I don't think that I have encountered a 12Z3 before, curious how it uses one of those but includes a #43, which is a 25 ...Arran — 02:17 PM
HiFi (Chifi) tube amp build - but my own design.
It's the other forum. I'm also in DIY, but mostly read there. Honestly, I kinda jumped into this without much thought to...TV MAN — 10:43 AM
Philco 71 Code 125
Hello,  I am in need of a schematic for this radio. Mine has the three separate circular tube shields and a shadow me...dconant — 08:06 AM
Stromberg Carlson 1500 Squeal
And life just keeps getting more complicated.dconant — 07:57 AM
54C Complete Teardown/Rebuild
Hello Roy, here is this one sincerely Richardradiorich — 12:45 AM
54C Complete Teardown/Rebuild
Richard, Had grabbed it already but thank you just the same.  I find myself wanting to find some way to block out the...glyphmon — 12:03 AM
54C Complete Teardown/Rebuild
Hello roy, here is a link to the schematic . Sincerely Richardradiorich — 11:54 PM
54C Complete Teardown/Rebuild
Richard, The Silvertone 2014 also is a transformerless set, so I am incorporating a 1:1 600 ohm audio isolation transfo...glyphmon — 11:37 PM
Preliminary work on wife's Silvertone 2014
Did an alignment today which was interesting.  IF alignment went great, almost all was already spot-on.  Adjusting on th...glyphmon — 11:35 PM

[-]
Who's Online
There are currently 1298 online users. [Complete List]
» 1 Member(s) | 1297 Guest(s)
Avatar

>