Posts: 1,106
Threads: 88
Joined: Jun 2011
City: Tacoma
State, Province, Country: Washington
Here is the radio when I bought it:
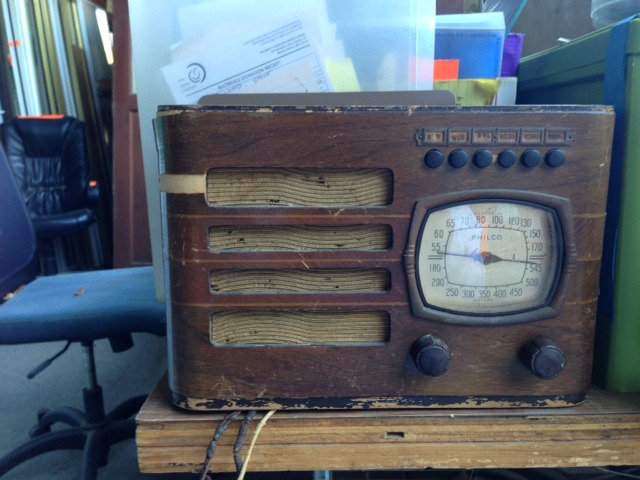
By the time the post office got it to me, it was much worse. The grill slats had all separated and had to be glued back together, and the rest of the veneer looked like it had been worked over by Wolverine before his first cup of coffee.
Here it is after a lot of regluing, stripping the rest of the flayed veneer and removing the trim pieces. I also lightly sanded it to smooth out the rough surface from the old glue.
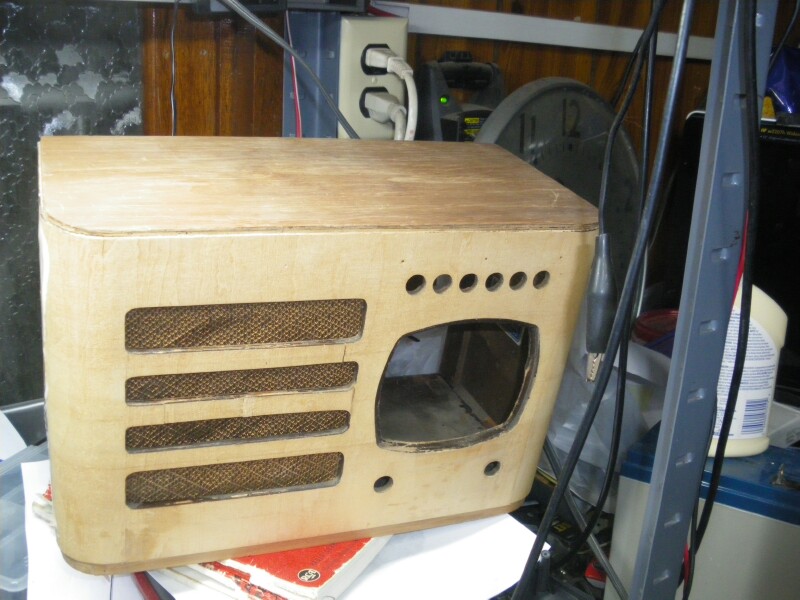
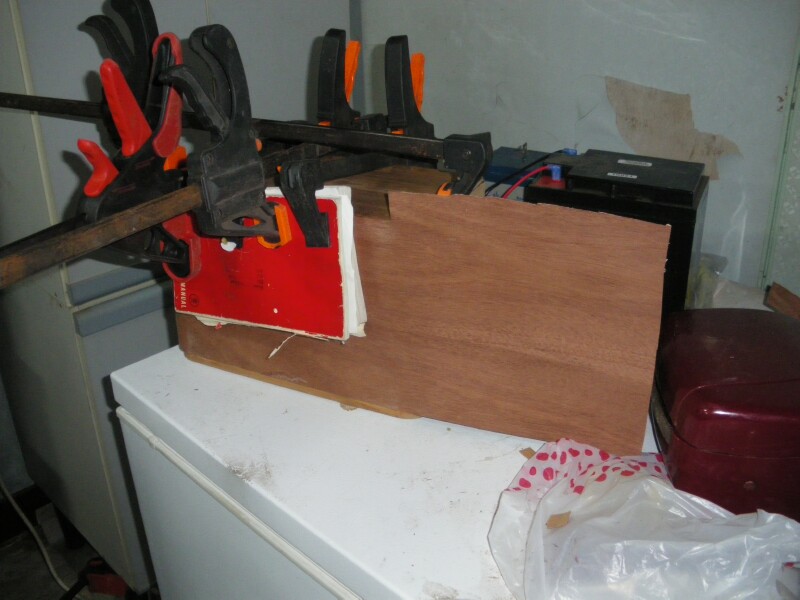
Now, I've started the process of putting on the new veneer. I've done a couple stupid things here..
For starters, I put on a new grill cloth, and then proceded to glue the cardboard frame back into the cabinet. It looks good, but OOPS! Now I can't get to the back of the grill slats to make the appropriate cuts in the new veneer. This will be interesting.
Next, though I did actually make sure that I had the straight side of the veneer set to the bottom edge of the front, it seems that while applying the first glue and clamping everything to apply the veneer to the side of the cabinet, it moved just a TINY bit, so now the veneer will not line up properly at the bottom.  I noticed this within the first two minutes, but it was already too late, the glue had set enough that I could no longer move the veneer back into alignment.  Not at all sure how I'll deal with this. Perhaps I can kill two stones with one bird, and run the veneer to the edge of the grill, then I can try to cut out the grill slots and get the veneer back in alignment for the rest of the application.
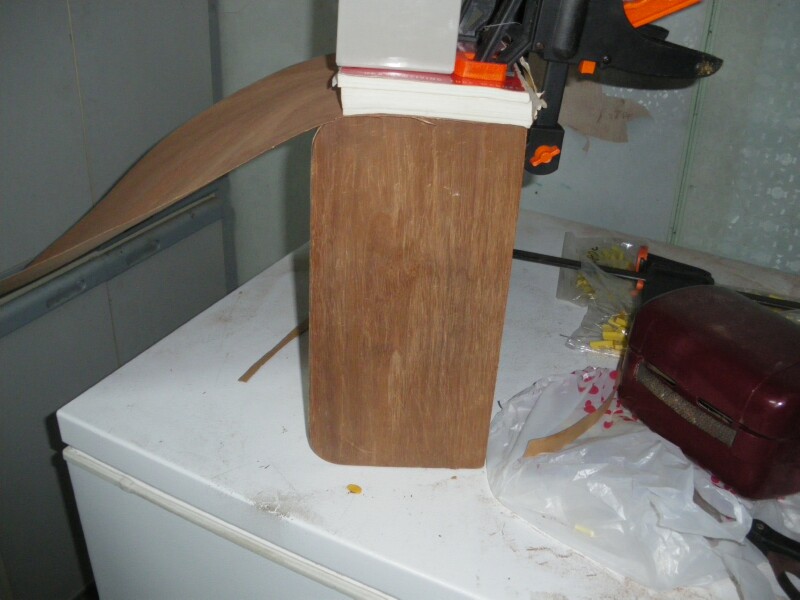
Now, I need a bit of advice: What is the best way to make the veneer form smoothly to the curved corners?
Thanks for any help anyone can provide.
Posts: 244
Threads: 11
Joined: Oct 2011
City: Black Mountain, NC
Maybe a heat gun and a wet towel over the wood to steam it.
Cossor 3468
GE 417A
Philco 118H
Radiola 17/100
Scott 800B6
Silvertone 6130
Stromberg 535M
Truetone D1952
Posts: 16,561
Threads: 573
Joined: Oct 2011
City: Jackson
State, Province, Country: NJ
Geez, Brenda, I got one in exactly that shape with some extra miniature tubes inside for 5 bucks in Kutztown from a guy selling stuf out of his van. I only bought it for the speaker. Now that I see what you are doing I feel a pang of remorse...l.maybe I should restore it.
Nah!
I will use the veneer to fix the recently acquiered 20's chipping one.
Posts: 1,106
Threads: 88
Joined: Jun 2011
City: Tacoma
State, Province, Country: Washington
Tonight's progress...
This first pic is of what was left of the old veneer. I think you can see it wasn't worth trying to save.
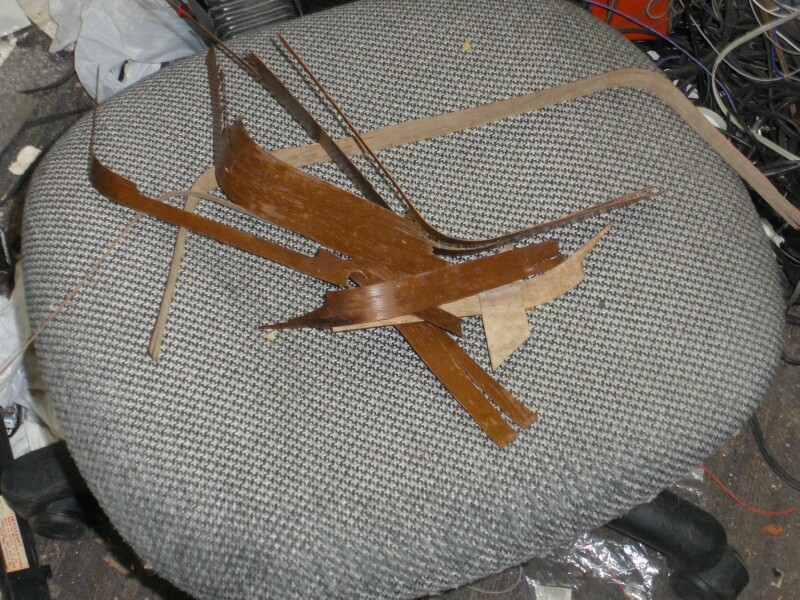
And here is how far the application of the new veneer has progressed:
Tomorrow, I'll probably finish the application phase, then I can turn to smoothing the edges and cutting out the necessary holes. Wish me luck on that part. 
Posts: 2,353
Threads: 92
Joined: May 2010
City: Clayton, NC
Buena suerte!!.
 
Posts: 16,561
Threads: 573
Joined: Oct 2011
City: Jackson
State, Province, Country: NJ
Удачи!
(BTW the old veneer night come useful sometime for small patches and such).
Posts: 1,106
Threads: 88
Joined: Jun 2011
City: Tacoma
State, Province, Country: Washington
Posts: 143
Threads: 11
Joined: Dec 2013
City: Ithaca NY
Brenda:
Nice job so far despite your minor foibles...!
I would not know how to tackle such a thing at all. My experience is more with the electronics rather than the woodworking.
I need to study up on cabinet work like this as I have several
radios here that need similar work to what you are doing.
I will be following your progress attentively...
Herb S.
Posts: 16,561
Threads: 573
Joined: Oct 2011
City: Jackson
State, Province, Country: NJ
Yeah, me too! When it comes to any woodworking activity, as we say im Russian, I have hands that grow from the butt.
Posts: 1,106
Threads: 88
Joined: Jun 2011
City: Tacoma
State, Province, Country: Washington
LOL.. 
I actually have no woodworking skills at all. This is all new territory for me. I have these grand visions of how nice something should look if I can just do such and such, but the implementation doesn't live up to the vision. 
Posts: 1,106
Threads: 88
Joined: Jun 2011
City: Tacoma
State, Province, Country: Washington
Well.....
Tonight, I finished applying the veneer. Let's put it this way, the first 3/4 of the application didn't go too badly. On the other hand, the last curve and side.. not so much. I used a bit too much glue, and as a result there is some waviness on the side. Fortunately, it doesn't show much from the front.
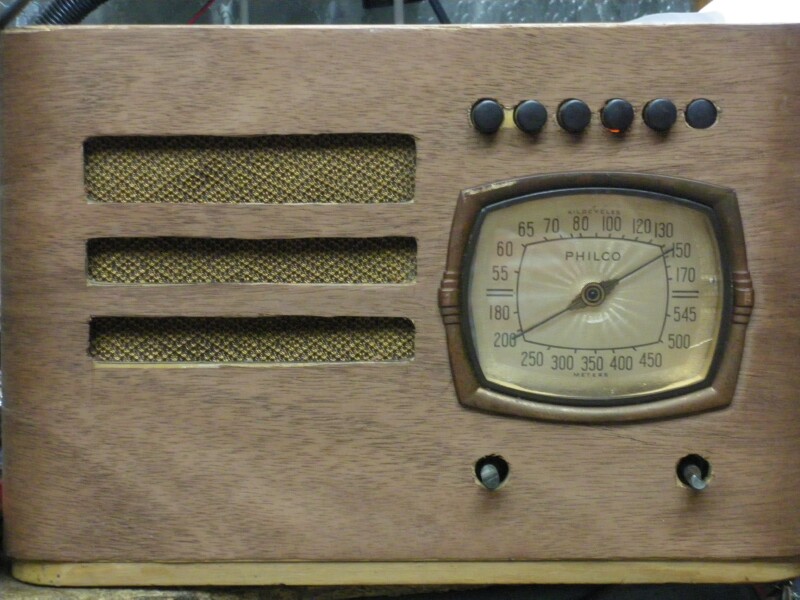
Mistakes were made:
While cutting the holes for the knobs, buttons and dial escutcheon, I made a bit of a mess of things, as you can see from the above pic. I'm going to try to clean them up a bit. I also erred by installing the escutcheon upside down. That's a PITA one to redo, as it has clips that one must manipulate underneath some tabs. I still have one more slot in the speaker grill to cut out.
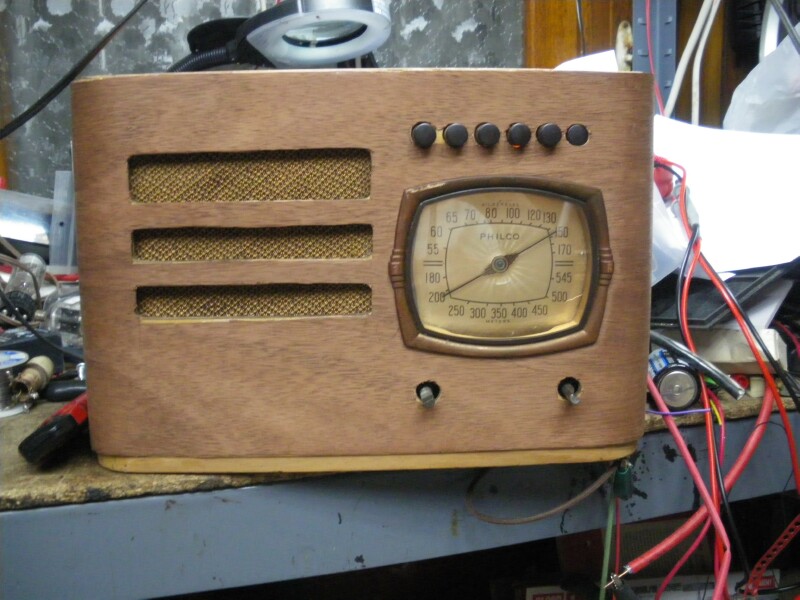
This has all been a first attempt at doing a fairly (at least to me it is) complex veneer repair. And that was after fixing all the cabinet problems like separated joints and the "backbones" for the curved corners. I guess all in all, it's not TERRIBLE, just not quite what I had envisioned. Tomorrow, I'll cut out that last slot, clean up the divots, fix the escutcheon and stain the cabinet. I'll post another pic after that's done.
Posts: 594
Threads: 41
Joined: Aug 2010
City: Shepherdsville, KY
Well Brenda
I have found what I see in my mind is not the same as what turns out. But for some reason I keep trying. Since this is your first, you are doing o k. Just think what you are learning.  I have found using an old iron to put veneer on helps. That is what I used to put veneer on the curved part on a 16B cabinet. I used tri-bond two and an electric iron. So keep up the good work. 
Joe
Joe Bratcher near Louisville, KY
Posts: 16,561
Threads: 573
Joined: Oct 2011
City: Jackson
State, Province, Country: NJ
so far so good, I could only dream to be able to do that much. And then there is finish....
Posts: 143
Threads: 11
Joined: Dec 2013
City: Ithaca NY
Brenda:
Nice job. New skills always take time to perfect.
Will look even better once it is finished.
I need to tackle a re-veneer job on one of my cabinets,
may start on that soon...
Herb S.
Ithaca NY
Posts: 736
Threads: 26
Joined: Jun 2013
City: Hayward, California
Hi Brenda, I think your veneer is going good. With a little more work im sure you can straighten the speaker holes up with a file and just patch around any button holes that arent perfect, then do the laquer finish and I think after that it will look very nice. Good Work. Warren
(This post was last modified: 01-05-2014, 02:40 PM by Warren.)
Users browsing this thread: 1 Guest(s)
|
|
Recent Posts
|
|
Philco Model 16 wiring question
|
| Thanks Morzh. So it appears I did wire it incorrectly and I have to switch the wires between pins 2 and 4.bobclausen — 09:24 AM |
|
Philco 46-1209 strange behavior
|
| No, it's not a problem, just during certain condition it could show up.
Yes, an internal tube short could do that too.
...morzh — 09:13 AM |
|
HiFi (Chifi) tube amp build - but my own design.
|
| You sound guys are never satisfied. :crazy: :clap:RodB — 09:10 AM |
|
HiFi (Chifi) tube amp build - but my own design.
|
| I got some new ceramic octal tube sockets installed and also tried some different coupling caps.
The results:
The go...TV MAN — 08:42 AM |
|
Philco 46-1209 strange behavior
|
| I pulled the tube out and it's shorted from pin 1 to pin 2. I suppose that's the problem...sq65 — 08:12 AM |
|
1949 Motorola 5A9M
|
| bob
Nice work on battery . If you don't. Have terminals i have a few spares
Samsam — 02:12 AM |
|
1949 Motorola 5A9M
|
| hello mr Fixr,
for sure !!
I have some radios that I need to make some batteries for too.
Sincerely richardradiorich — 12:33 AM |
|
1949 Motorola 5A9M
|
| Dittos, sweet b on the battery. Love the "9 Lives" logo, remembered from my childhood. Other neat ones are t...MrFixr55 — 11:24 PM |
|
Philco 46-1209 strange behavior
|
| Hi Morzh,
Dunno if the AC EMI caps are an issue. I never liked the concept but never had an issue with these causin...MrFixr55 — 11:21 PM |
|
Philco 46-1209 strange behavior
|
| And no hum without the 7AF7? Not common but I am thinking heater - cathode short. This would introduce hum in this sta...MrFixr55 — 11:14 PM |
|
Who's Online
|
There are currently 1244 online users. [Complete List]
» 1 Member(s) | 1243 Guest(s)
|
|
|

|
 
|


 I noticed this within the first two minutes, but it was already too late, the glue had set enough that I could no longer move the veneer back into alignment.
  Not at all sure how I'll deal with this. Perhaps I can kill two stones with one bird, and run the veneer to the edge of the grill, then I can try to cut out the grill slots and get the veneer back in alignment for the rest of the application.


![[-] [-]](https://philcoradio.com/phorum/images/bootbb/collapse.png)


