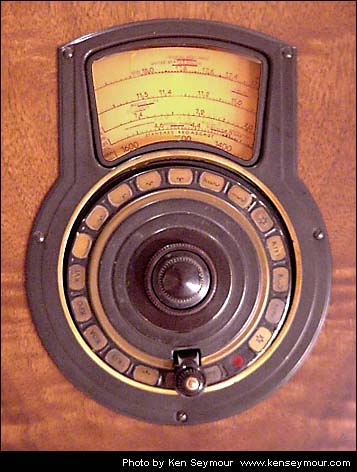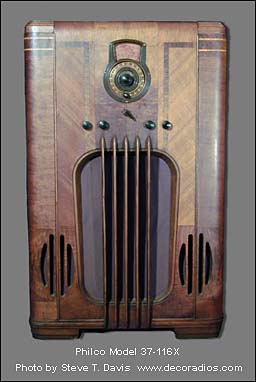

Philco introduced the Automatic Tuning dial mechanism on their top of the line models in 1937 and also used them into 1938. These models were:
The Automatic Tuning dial mechanism has two electrical switches built into it. One switch mutes the audio during the time the dial is turning and passing through stations, to eliminate popping, booming and static. The other muting switch temporarily disable the Magnetic Tuning during dial travel, so the AFC circuit would not try to lock onto passing stations.
The following three sections are taken directly from a typical Owner's Instruction pamphlet for an Automatic Tuning equipped model from 1937.
- 37-9
- 37-10, Codes 121 and 125
- 37-11, Codes 121 and 125
- 37-116, Code 122
- 37-675, Code 122
- 37-690
- 38-1
- 38-2
- 38-3
- 38-116, Codes 121 and 125
- 38-690, Code 125
The Automatic Tuning dial mechanism has two electrical switches built into it. One switch mutes the audio during the time the dial is turning and passing through stations, to eliminate popping, booming and static. The other muting switch temporarily disable the Magnetic Tuning during dial travel, so the AFC circuit would not try to lock onto passing stations.
The following three sections are taken directly from a typical Owner's Instruction pamphlet for an Automatic Tuning equipped model from 1937.
 Automatic Dial Tuning
This system enables you to select your favorite station in an instant, and to be sure it is automatically tuned in properly. The "Dial Tuning" brings you to the correct position for the station desired and the "Magnetic Tuning" automatically completes the exact tuning-in of the station for perfect tone. (The Magnetic Tuning Switch must always be turned to "In" when using Automatic Dial Tuning.)
Dialing A Station
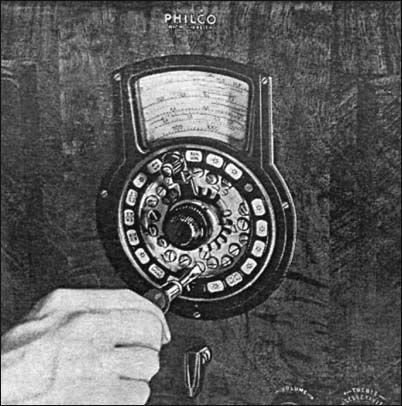
To dial a station turn the dialing handle until it is over the window of the station wanted, press the knob in firmly, then (keeping it pressed in) turn the handle down to the bottom stop position, but in such direction that the small red circle does not have to pass through the bottom position, then release the knob and you have your station.
 (Since the dial cannot be turned past the bottom position in either direction, the red circle is provided as a guide to which direction to turn the dial to get to your station. A simple rule is: Note the position of the red circle before dialing and always turn the dial in such direction that the red circle will not pass the bottom position.) After a little practice you can readily see which way to turn before starting to dial.
Selecting and Placing Favorite Stations on the Dial
A set of sheets containing call letters of all standard U.S. and Canadian broadcasting stations is furnished with the receiver. Select your six to eight favorite stations (the ones you listen to most frequently) and with a pair of scissors cut out the little sections containing the call letters of these stations from the sheets.
 To insert these station name tabs in the proper places, first turn the set "ON," tuning range selector in position 1, and Magnetic Tuning to "OUT." It will then be necessary to remove the metal plate over the "finger" or handle used to dial the stations. This is done by removing the tuning knobs and three screws in this plate, and lifting off the plate over the handle. This will expose a circle of "control screws" which are used to locate your favorite stations.
After replacing the station selector knob, tune the dial to the station desired, then insert the blade of a screwdriver in the control screw nearest the bottom position of the circle, press it in, and twist it back and forth until a click is heard, indicating that the control screw has engaged the locking mechanism. Now turn the dial back and forth slightly by twisting the control screw back and forth until best reception is obtained. Release the pressure and continue twisting very slightly until the screw jumps out to its original position. Then insert the station name card in the slot below the screw. Repeat this procedure until the several desired stations are located, then insert blanks or "Starred" name cards in the remaining slots not used for stations. Finally replace the metal cover plate in its original position.
We do not advise placing more than your six to eight favorite stations on the dial, as experience has shown that more than this causes confusion and difficulty in selecting the desired one, thus defeating the purpose of the dial - quick correct selection of a desired station or program.
Servicing and Adjusting the Automatic Dial
The Philco Service Bulletin Number 273, from December, 1936, goes into more detail of setting stations and call letter tabs, as well as alignments, adjustments and troubleshooting this mechanism. The four page service bulletin is available below in PDF file format.
Page 1 - 98K Page 2 - 108K
