While some vacuum tubes are still being produced – chiefly audio tubes for guitar amplifiers and audiophiles – many more will never be made again. This means there is a finite supply of many radio tubes.
On the other hand, it seems that the people interested in the antique radio hobby are largely older folks. As these people pass away, there are less people in the hobby, so less people are purchasing the tubes which remain. In other words, barring a resurgence in the antique radio hobby, there will likely be plenty of radio tubes to go around for many years to come.
There are some tubes which can be retrofitted as solid-state devices. This has notably been done with the scarce 1L6 tube, and the solid-state version is as good or better than the original tube.
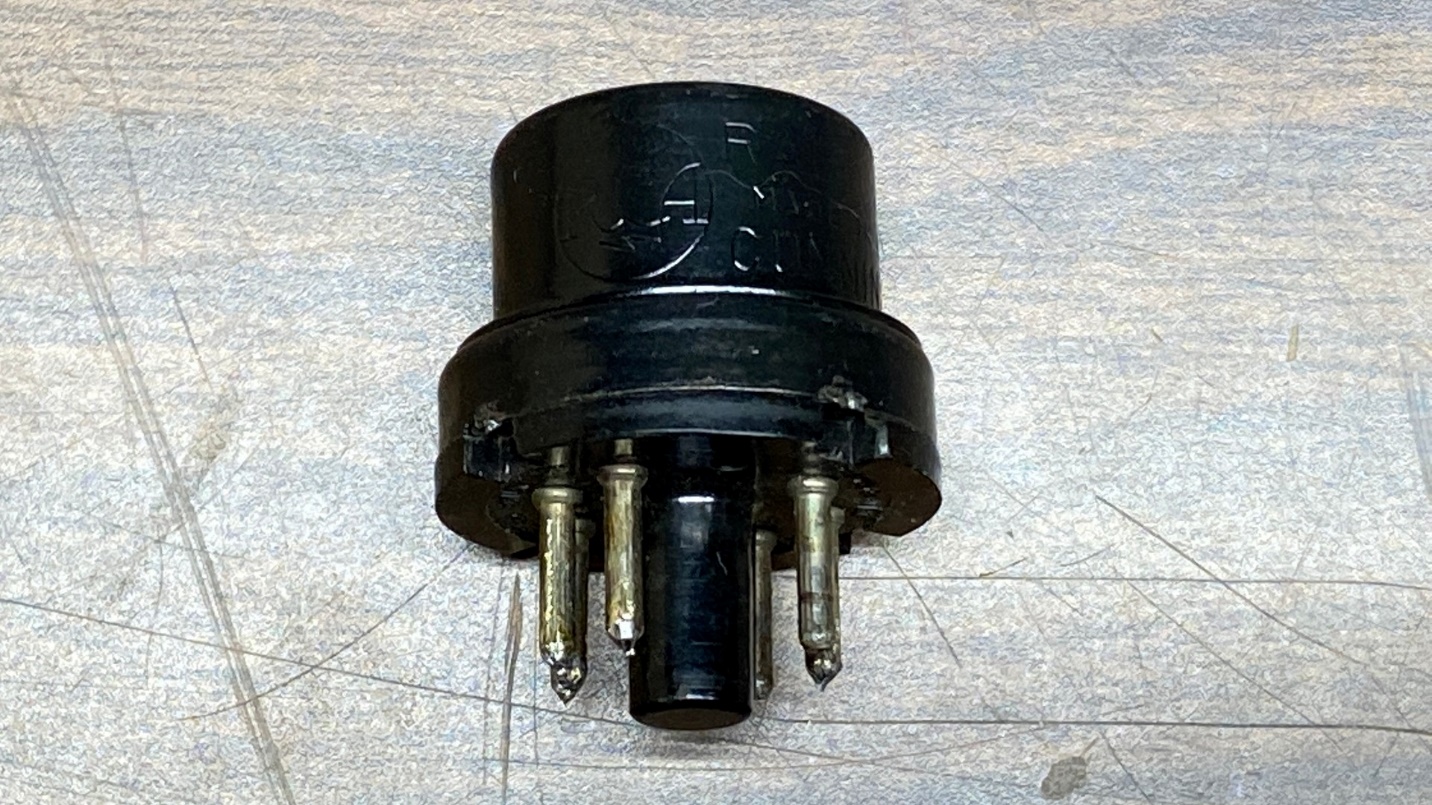
One radio tube is easily converted to solid state by the hobbyist. It is a very easy project which can be accomplished in an hour or two. The 6H6 tube was widely used as a second detector and AVC tube by many radio manufacturers, notably RCA. It consists of two diode elements within a single tube. The 6H6 was a metal tube and is quite compact in size compared to many other radio tubes.
Before we get too far ahead of ourselves, though, we should discuss what we can use to replace the original diode elements. Germanium diodes such as the 1N34A or 1N60 generally make good second detectors in radios. However, these are becoming harder to find as germanium has been replaced by silicon in most solid-state devices.
There is a silicon alternative, however – the 1N5711, a Schottky diode. It is tiny, which makes it ideal to hide inside a “top hat” 6H6. Comparing specifications, each 6H6 diode is rated at 100 PIV while the 1N5711 is rated at 70 PIV. This should not matter in most radios as the voltage present in the radio’s second detector circuitry is virtually nil. The same is true for the AVC diode.
I recently opened an old metal 6H6, broke off the internal wires which originally went into the tube pins, and installed the diodes in the tube’s base. The tiny size of the 1N5711 allowed the diodes to fit easily between the 6H6 “top hat” and the tube base and also allow the two parts of the tube to be put back together without harming the diodes. I had tried this previously with two 1N34A diodes and found that the thickness of the diodes did not always allow the two halves of the tube to be reassembled, depending upon the 6H6 used.
I pulled my RCA T7-5 off the shelf and first listened to it for a few minutes with an actual 6H6 tube. Then I turned the radio off, removed the 6H6 tube, and installed my converted 6H6. I found that the sound volume and quality was just a bit better with the 1N5711s. Your mileage may vary.
An added benefit of the conversion: It will reduce the filament current on your radio’s power transformer by 300 mA, which is the heater current rating of the 6H6. Since the radio’s power transformer is continuing to get older, every little reduction in current will help it last longer.
If you want to try this yourself, here is all you have to do:
Find an old, dead metal 6H6. Unsolder all the pins. Now pry open the four “tabs” which hold the base to the upper half. Separate the base from the top and break off all of the wires coming out from the tube which is encapsulated in the top half.
Now, follow the diagram below to connect the 1N5711s in your 6H6 tube base. Remember, when you are looking at the inside of the tube base, the tube pins will be a mirror image of what is shown in the diagram below. In other words, the pins will be counter-clockwise instead of clockwise. Make sure you place the diodes exactly as shown below, in the proper pins, or else your converted 6H6 will not work.
Once you have the diode leads in the proper pins and you have double- and triple-checked to make sure the diode leads are properly placed, carefully solder the diode leads to the tube pins at the ends of the pins. Do not use a high wattage soldering gun or iron to do this! A small pencil soldering iron, 30 or 40 watts, is quite sufficient. Clip off the excess leads and reassemble the tube halves, crimping the “tabs” back down enough to hold the base securely to the top.
And, as always, follow proper safety protocols and have fun.
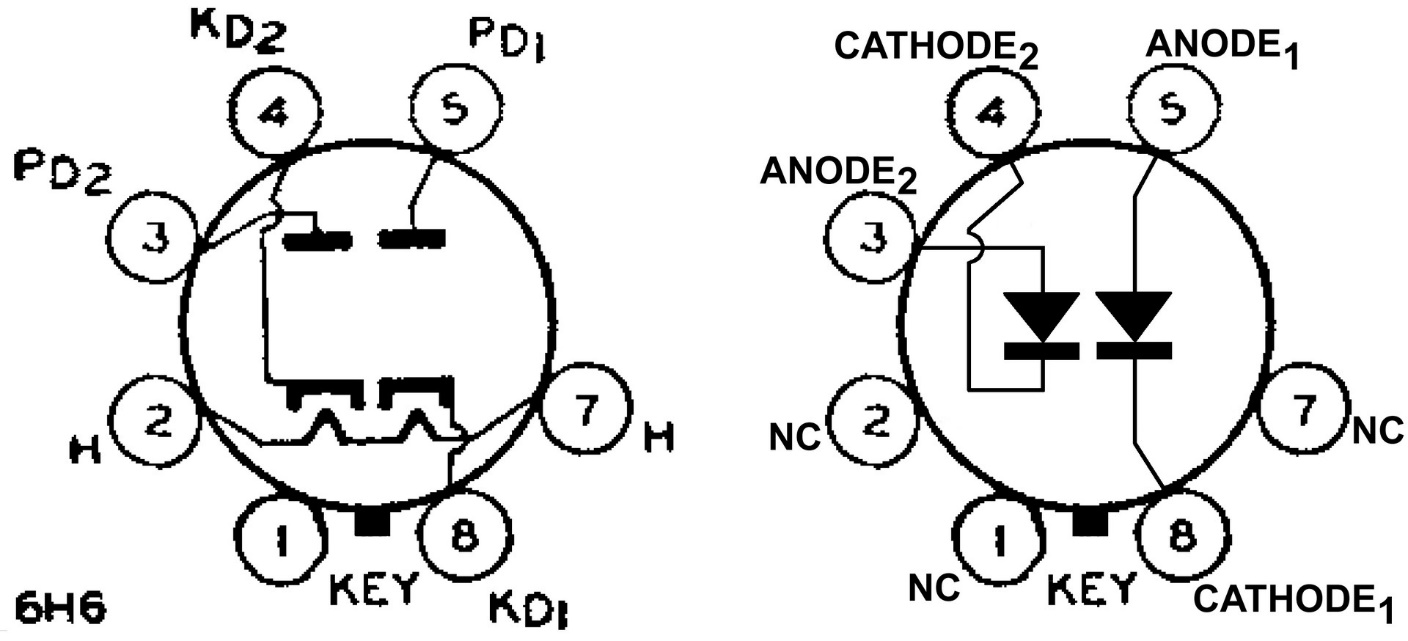
6H6 tube basing diagram (left) and how to connect the two 1N5711 diodes (right).