
Setting the main cabinet aside for the moment, I decided to prepare the front panel for finishing.
This process began with the application of sanding sealer, followed by grain filler (as shown above). Once the grain filler had dried overnight, the panel was sanded with 400 grit sandpaper (as shown below).
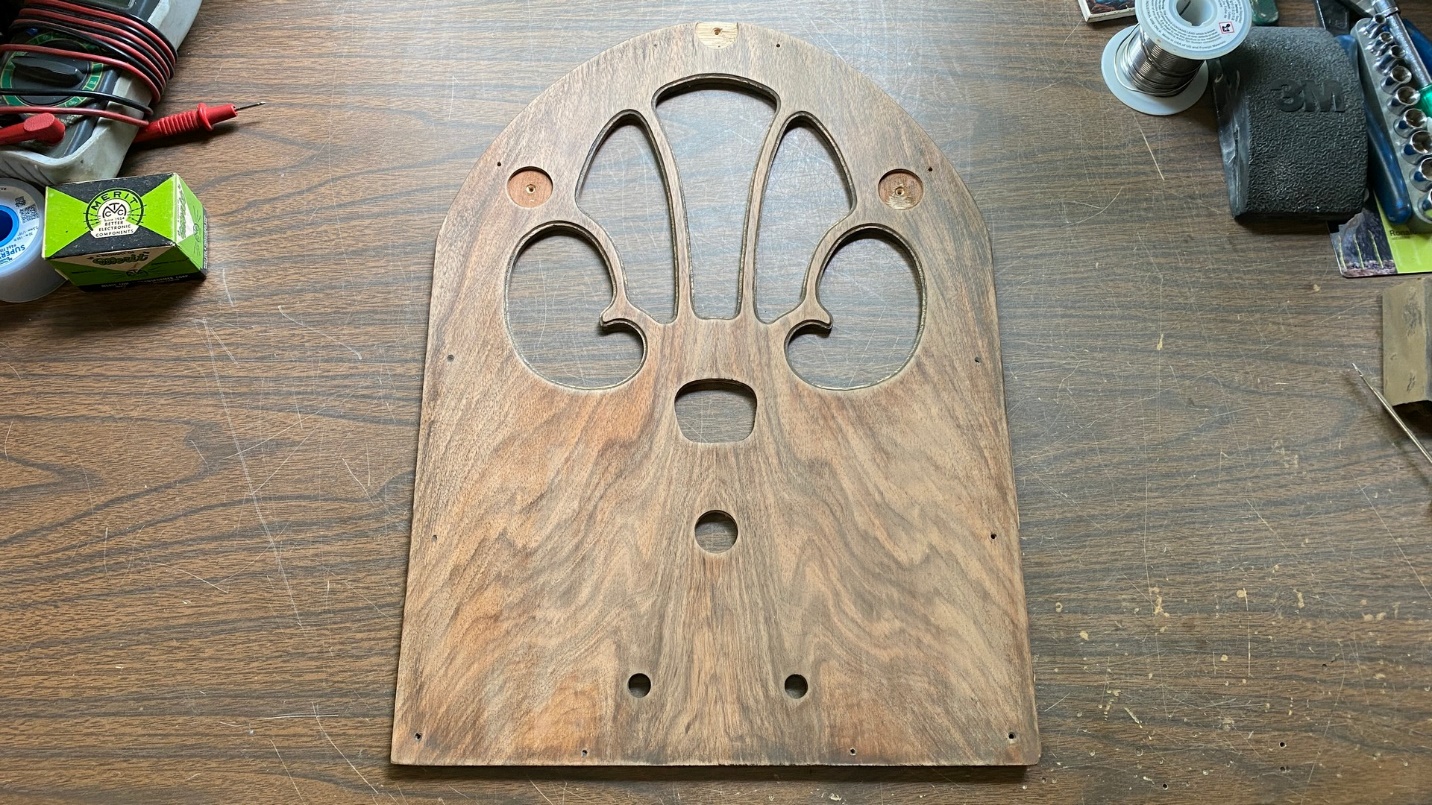
The front panel is now ready for toning lacquer.
I had a few cans of Mohawk Ultra Classic Medium Brown Walnut in the cabinet where I keep my cans of spray lacquer. I knew this was a bit darker than the Medium Walnut Tone Finish I usually use, but decided to try it out anyway.
The finish turned out pleasing, if a bit dark and reddish. You can see some of this finish in the photo below.
My normal technique is to spray on the toner (usually two coats), then follow that with three coats of clear lacquer. I then let it dry overnight, then wet sand the entire cabinet with 800 grit sandpaper. Finally, I apply two more coats of clear lacquer.
I followed the process on the main cabinet body as well as the front panel.
Now, it was time to cut new bottom trim for the cabinet.
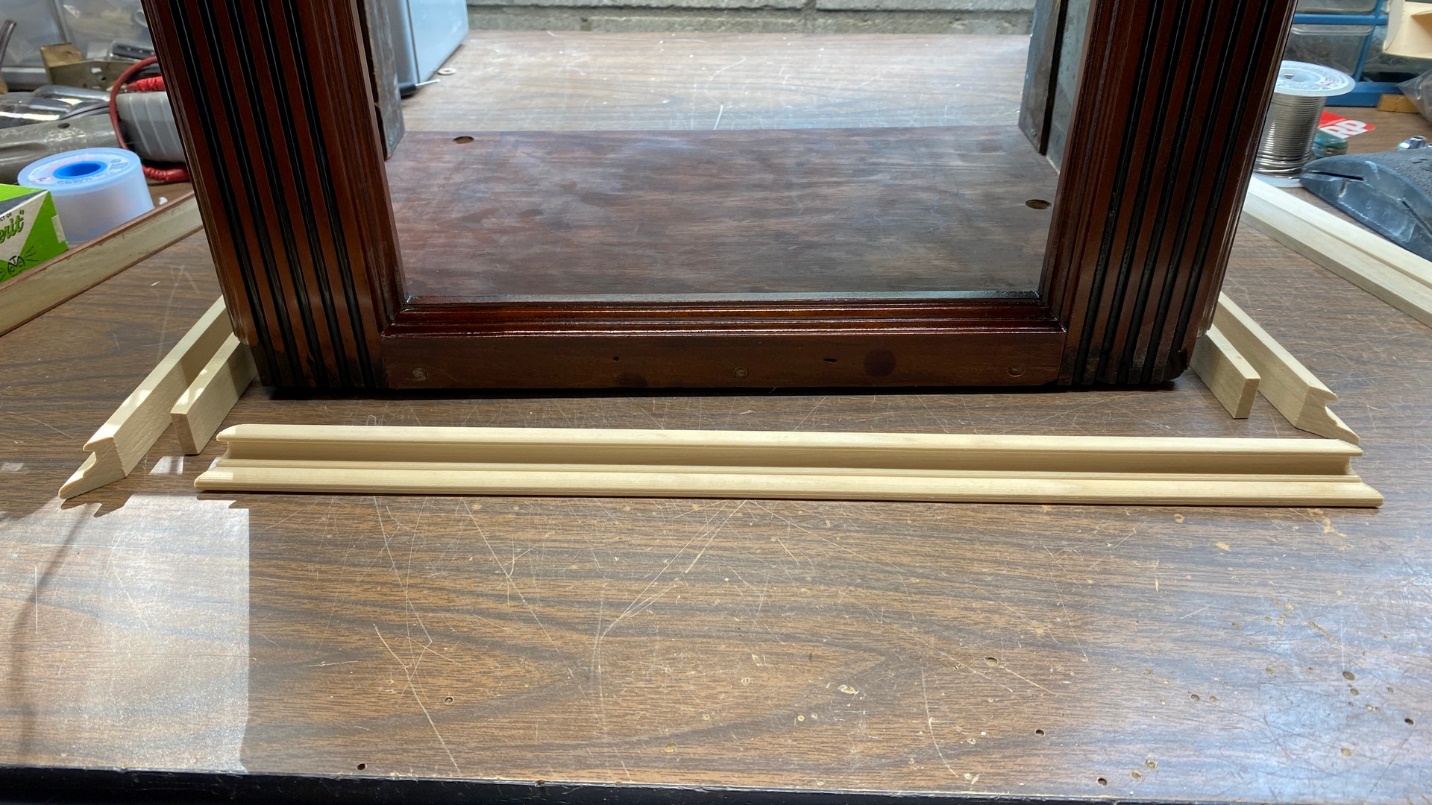
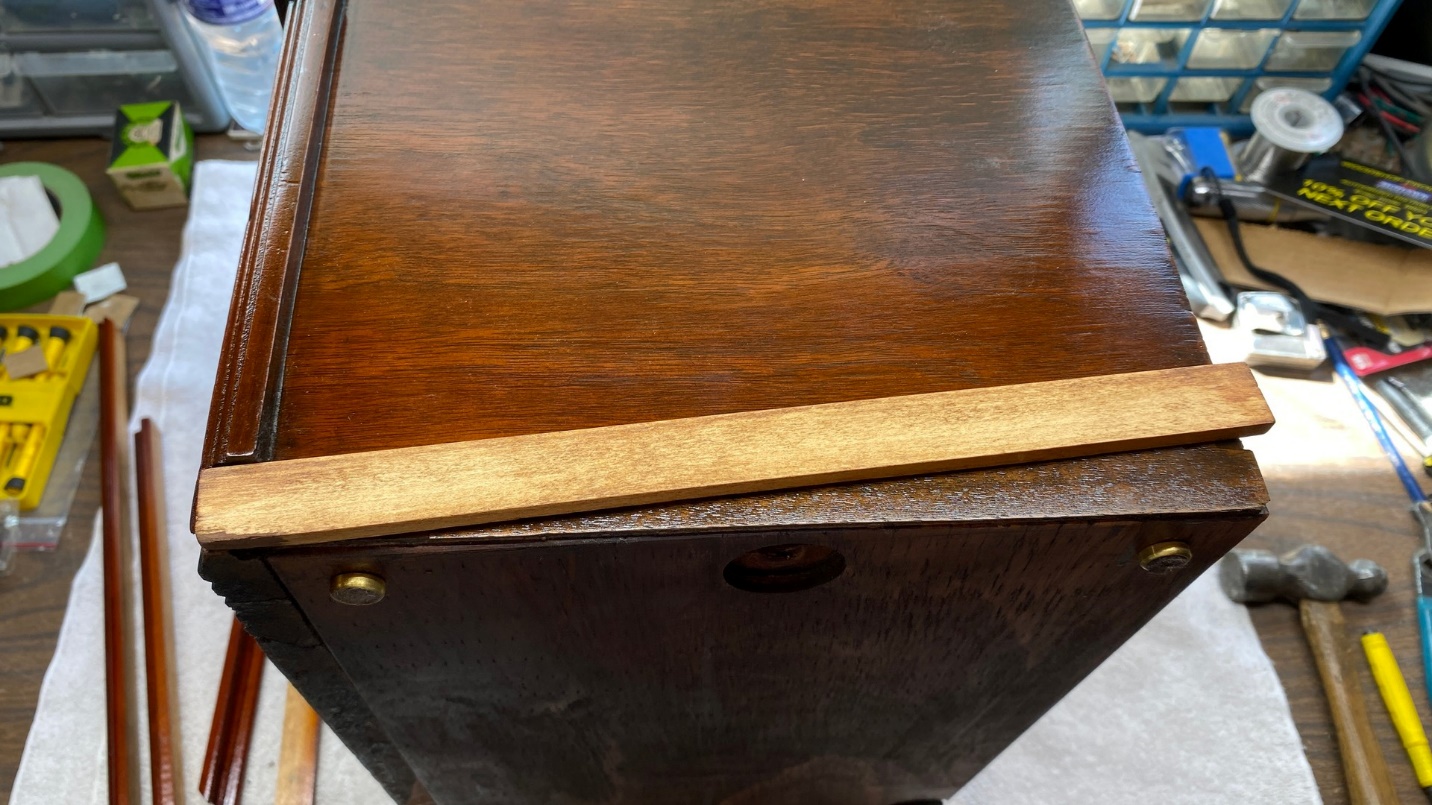
Pieces of new bottom trim have been cut for this Philco 46 cabinet.
A miter saw is required to cut this trim. I purchased a miter saw nearly a decade ago, and it has been one of the best investments I have made. It is also necessary to take accurate measurements. The old saying, “measure twice, cut once” applies here. Only in my case, I probably measured three or four times before I made my cuts.
Steve Davis made this trim; he furnishes it in pieces plenty long enough to allow you to cut off any excess. But as mentioned above, a miter saw is required to make the 45 degree angle cuts necessary where the pieces join together at the front of the cabinet.
This particular cabinet, as well as model 21 and early model 35 and 70 Baby Grand cabinets, used what is known as “two piece” trim. Notice in the photo above that there are two flat pieces which go on the sides, along with the decorative trim. Later 35 and 70 cathedral cabinets used a “one piece” type of trim which did not require any flat pieces.
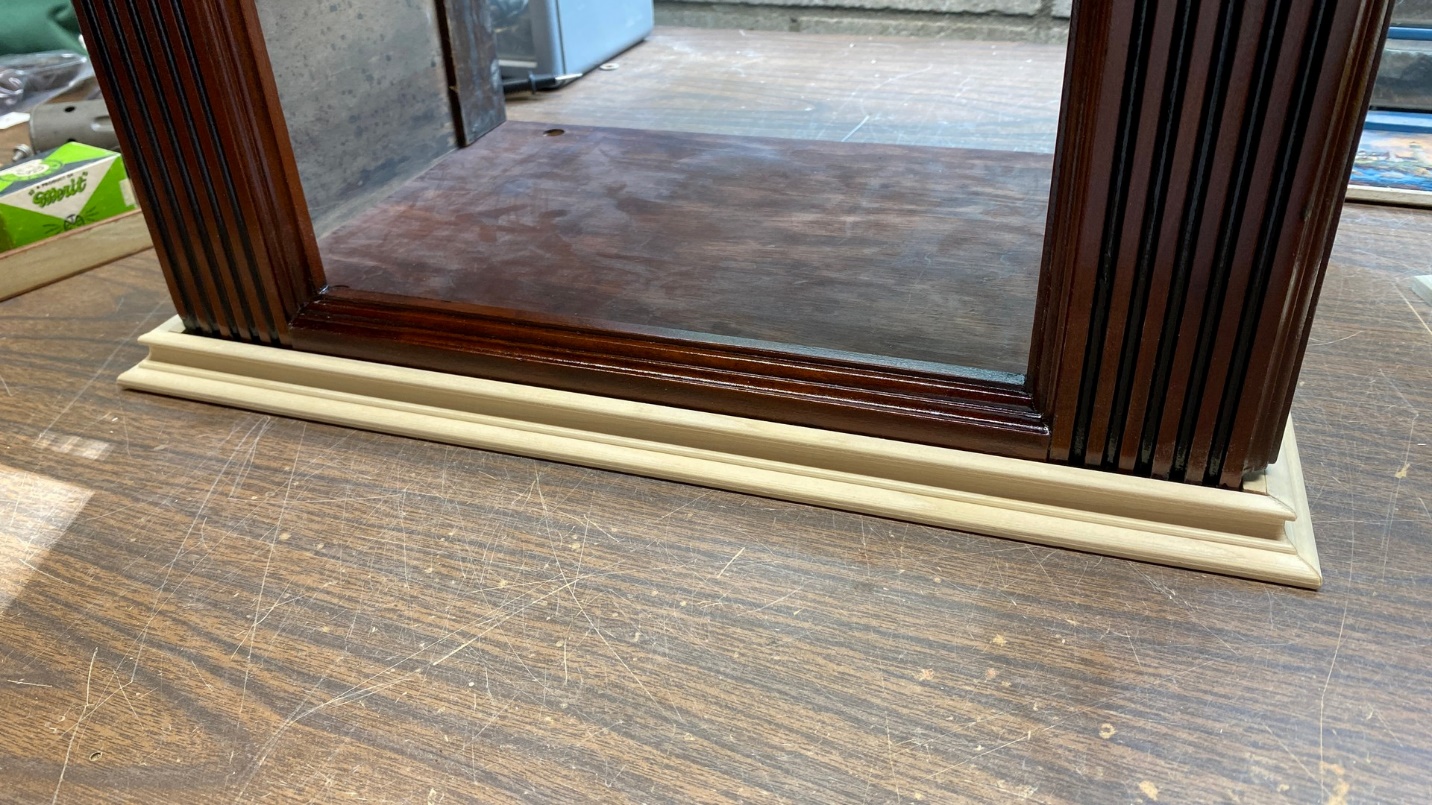
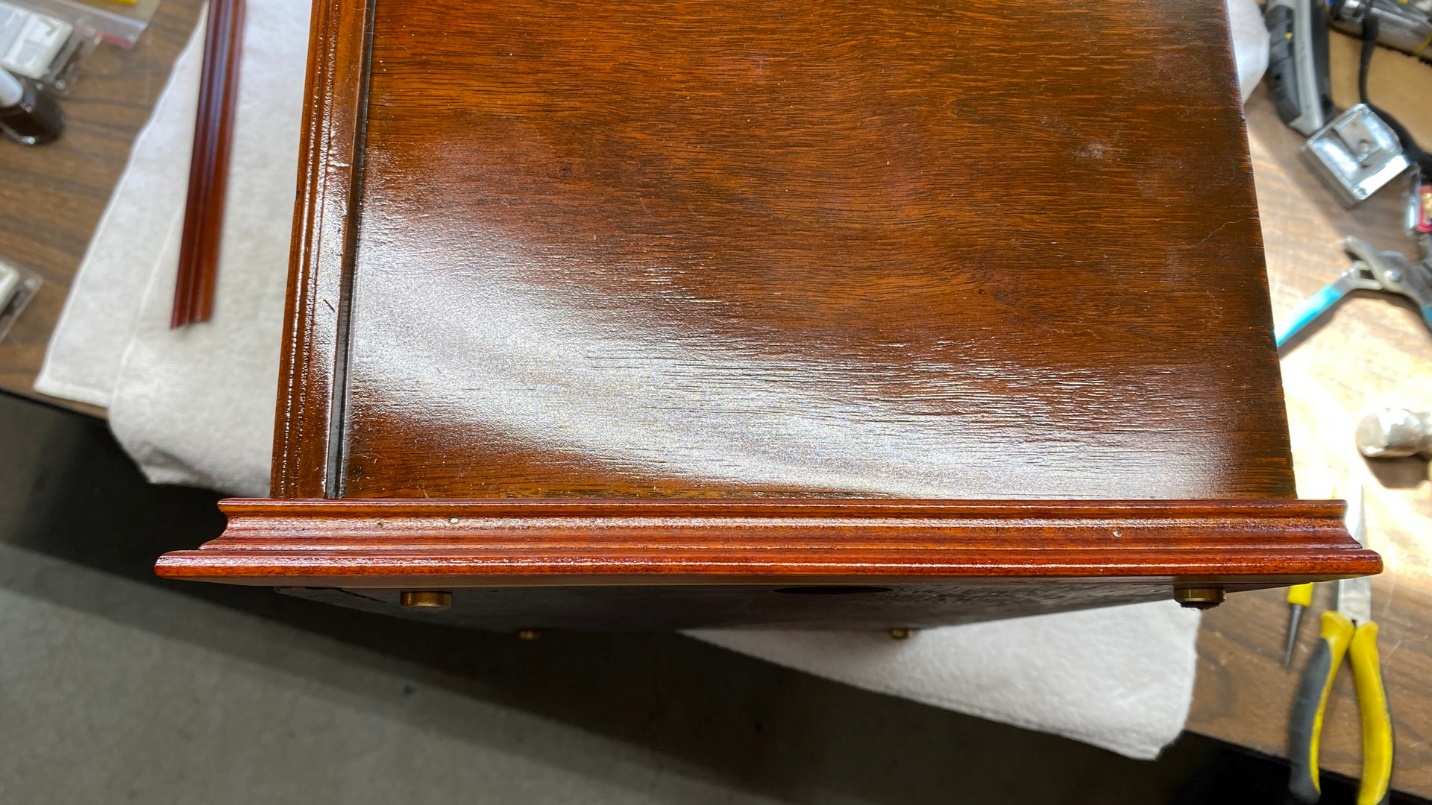
Illustrating the trim has been cut properly. Whew! That was a relief!
After making sure the trim pieces were properly cut by making a test fit on the cabinet as shown above, these pieces were set aside for the time being.
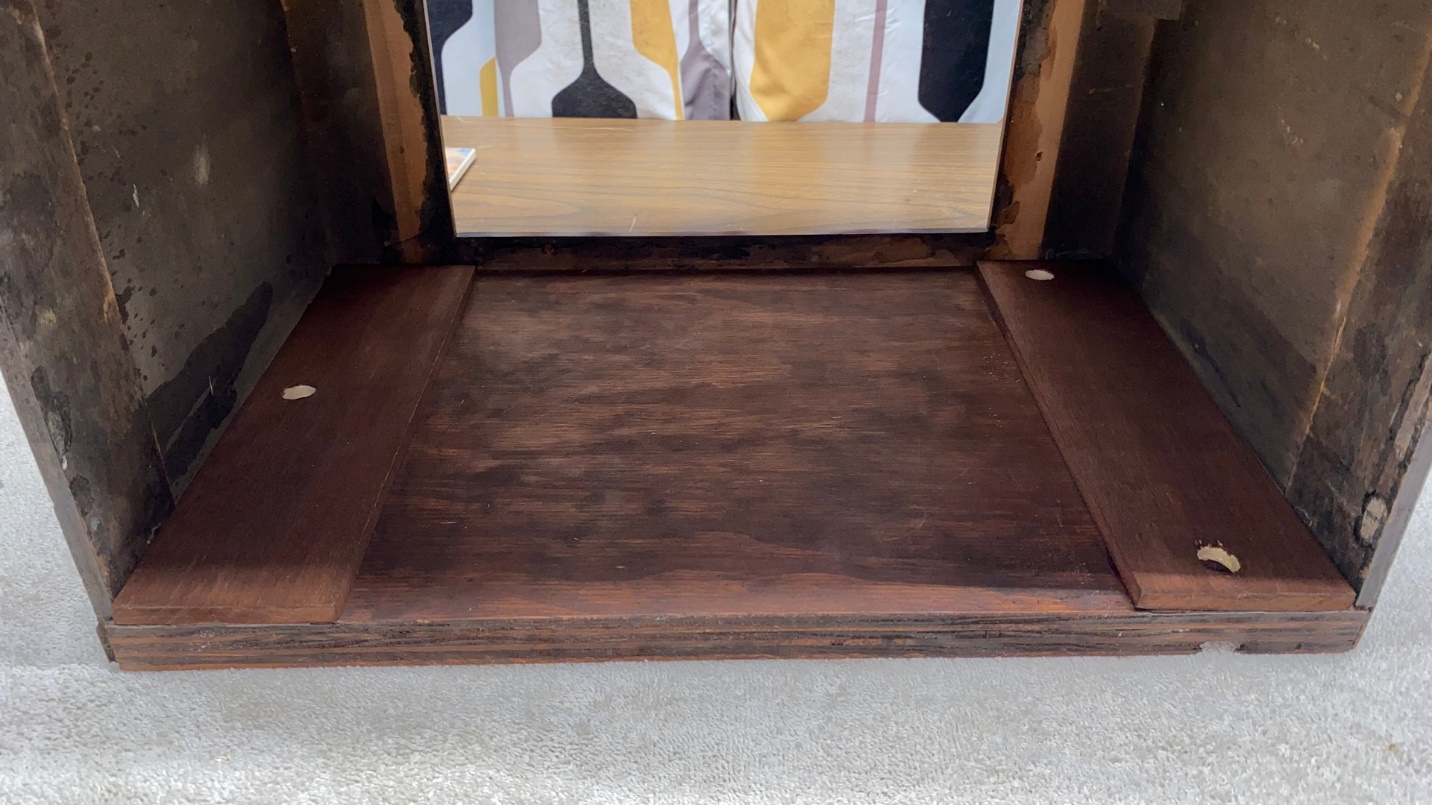
Model 21 cathedral cabinets used two flat “spacers” on the cabinet base, to make the chassis sit at the correct height. I discovered, by test fitting the new front panel to the main cabinet body, that this 46 cabinet would also require the spacers.
The spacers are pieces of wood, ¼ inch thick and 2 inches wide. These were placed on top of the chassis bolt holes, and were drilled with the bolt holes being in the same places as the holes in the base so the chassis could be bolted to the cabinet once it was installed.
I could not find any wood that was 2 inches wide, so I ended up purchasing a piece of wood which was 2-1/2 inches wide. This would serve the purpose very well.
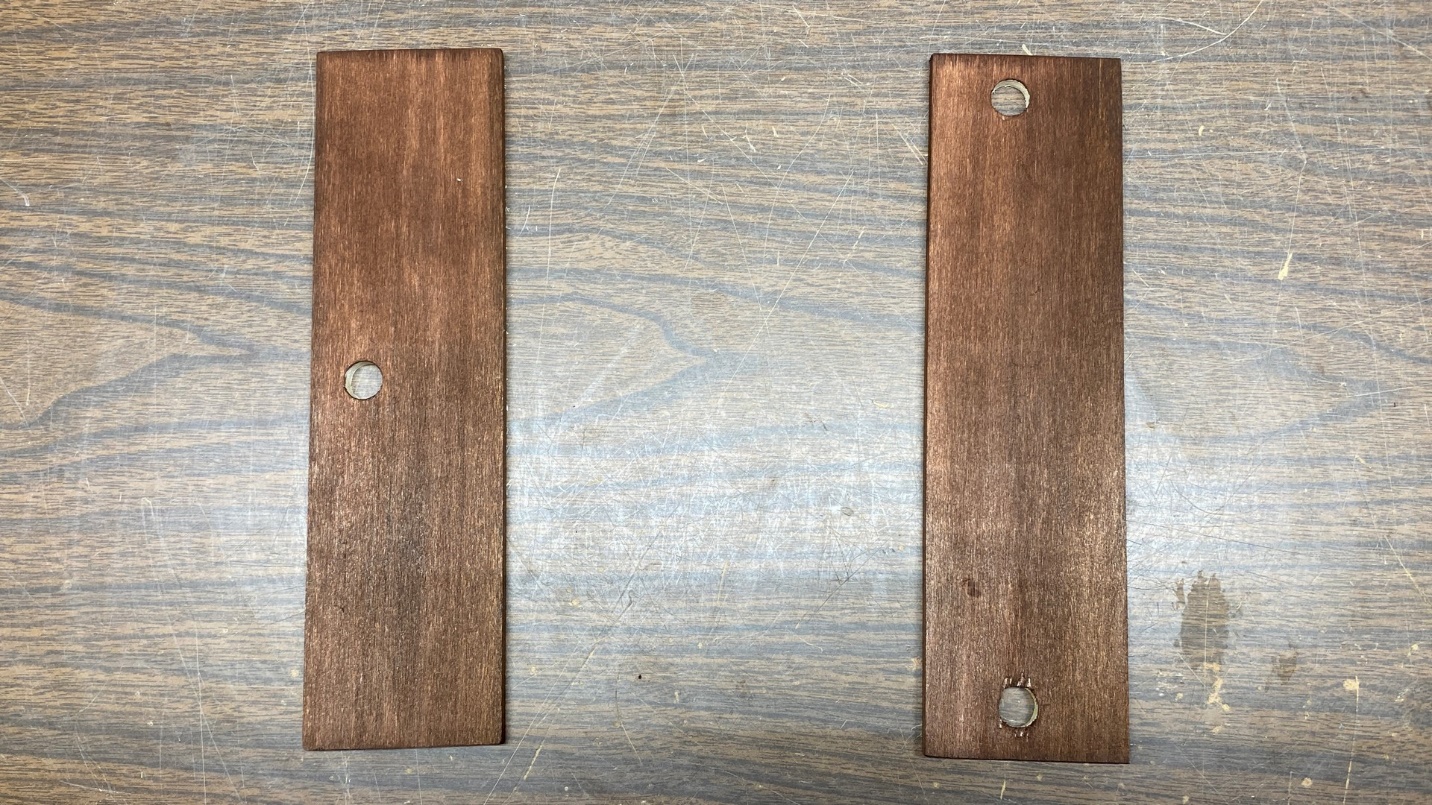
Two spacers have been cut, drilled, and stained, and are ready for installation in the cabinet.
I cut two pieces of wood, each equal to the depth of the cabinet base. I ended up having to remove an extra ¼ inch from each piece, to allow for the front panel which is ¼ inch thick.
Once I had cut them to the proper length, I set each one in place, one at a time, and carefully marked where the bolt hole(s) would need to go. I then drilled the holes using a Forstner bit.
Finally, I stained the tops and edges of each spacer. Once the stain had dried, I glued them inside the cabinet as shown below.

The spacers are being glued inside the cabinet.
I forgot to mention before that I stained the cabinet base (top, bottom, and edges), the spacers, the front arch, and the back of the front panel with Mohawk Medium Walnut Wiping Stain. This isn’t quite as dark as the brown color Philco originally used, but it will do.
The spacers are now glued into place and will properly support the model 46 chassis.
It was now time to prepare the trim pieces for use on the cabinet. The first time I attempted to spray toning lacquer on these pieces, the toner came out very splotchy and looked terrible. As it turned out, I had forgotten to use sanding sealer on the pieces first.
I took the trim pieces outside, wiped them down with acetone which removed all the lacquer, and let them dry. Afterwards, I carefully sanded each piece.
Then, I tried the process again. This time though, I remembered to spray them with sanding sealer first before applying the Medium Brown Walnut toner. Fortunately, the trim turned out well. In this case, the second time was the charm.
Preparing to attach the trim to the bottom of the cabinet.
I began applying trim on the right side of the cabinet, starting with one of the flat pieces. This was only toned on the top and the ends, as this was all that would be seen. I nailed it in place using two brad nails. This was followed by the decorative right side piece.
Before applying it, I made absolutely sure I was putting it in the right place by holding the front trim in place and making sure that the two pieces met at the front as they should.
Once I was sure of its proper position, the decorative piece was also nailed into place using two brad nails. A nail setting tool was used to countersink the brads. There is a reason I did this, which I will explain later.
Both parts of the right side trim are now in place on the cabinet.
By following the same process, I then applied the front trim (which requires no flat piece behind it), and finally, the left side pieces.
I’m afraid I am running out of space again. In the next – and final – chapter, I will finish this cabinet and get it ready to receive its chassis and speaker.