I converted a Philco model 29 chassis to a 45C chassis between March and June 2022. You may read about that process here:
And yes, there will be a Part 8 forthcoming, as I have since replaced the power transformer and the dial scale in the chassis.
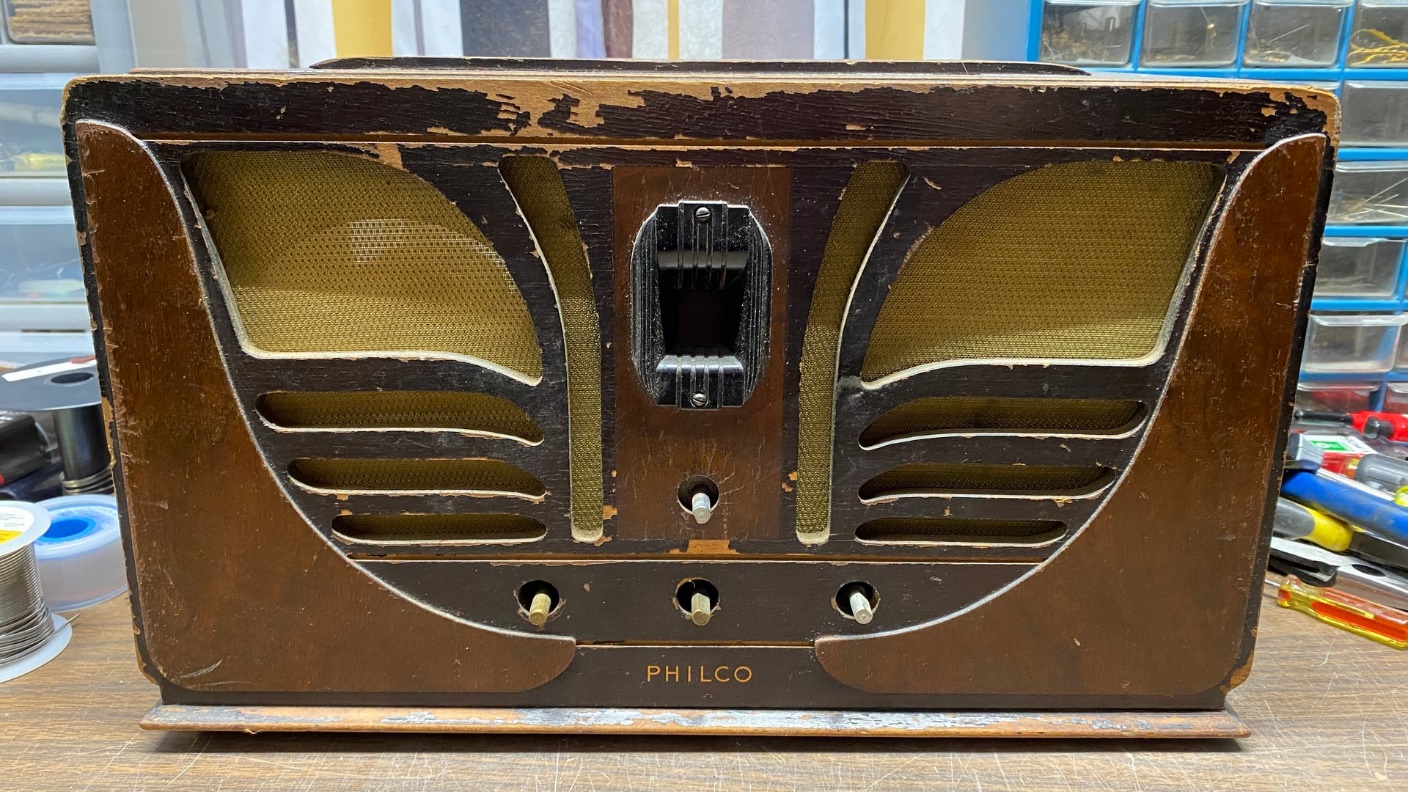
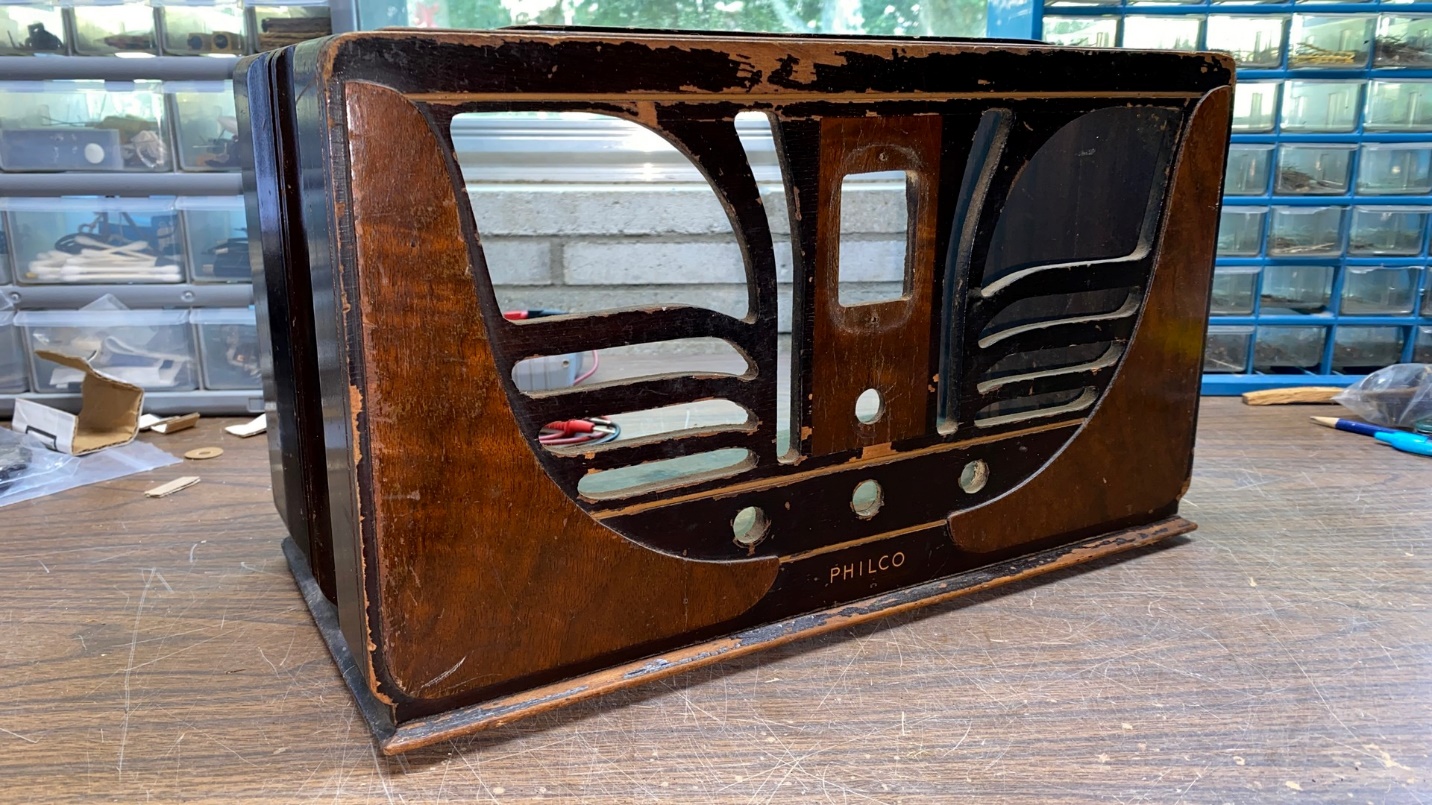
But for now, let’s talk about the 45C “Butterfly” cabinet. These are particularly attractive sets, and highly popular with collectors. You may see from the photos above and below that this particular cabinet was fairly well worn, with thin or missing finish in many areas. Fortunately, the cabinet itself was structurally sound and only needed gluing in one place for complete stability.
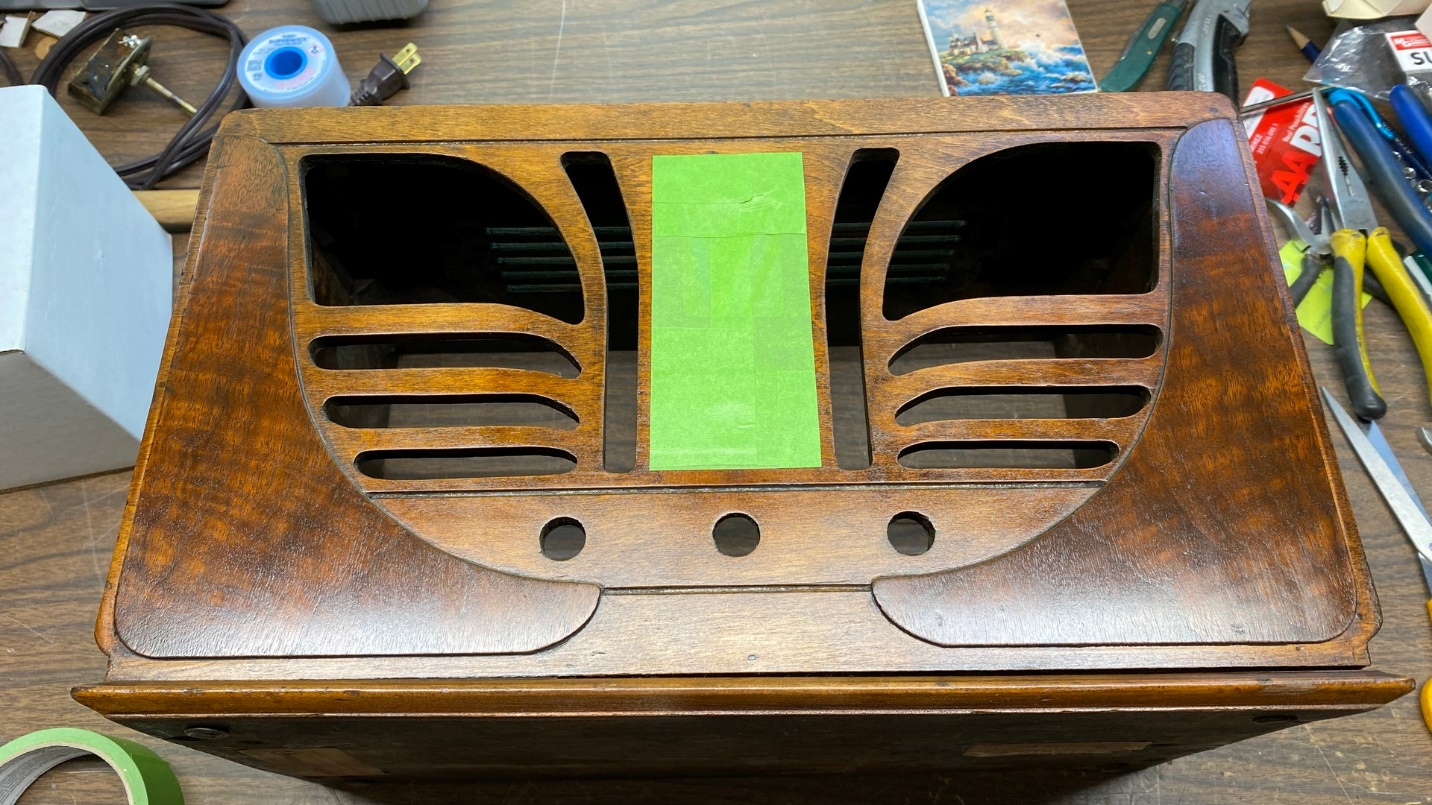
The Philco 45C cabinet, in need of stripping and refinishing.
So, on a sunny day in mid-July, I set up my folding table in the back yard, took the empty cabinet outside with rubber gloves, steel wool pads and acetone, and went to work.
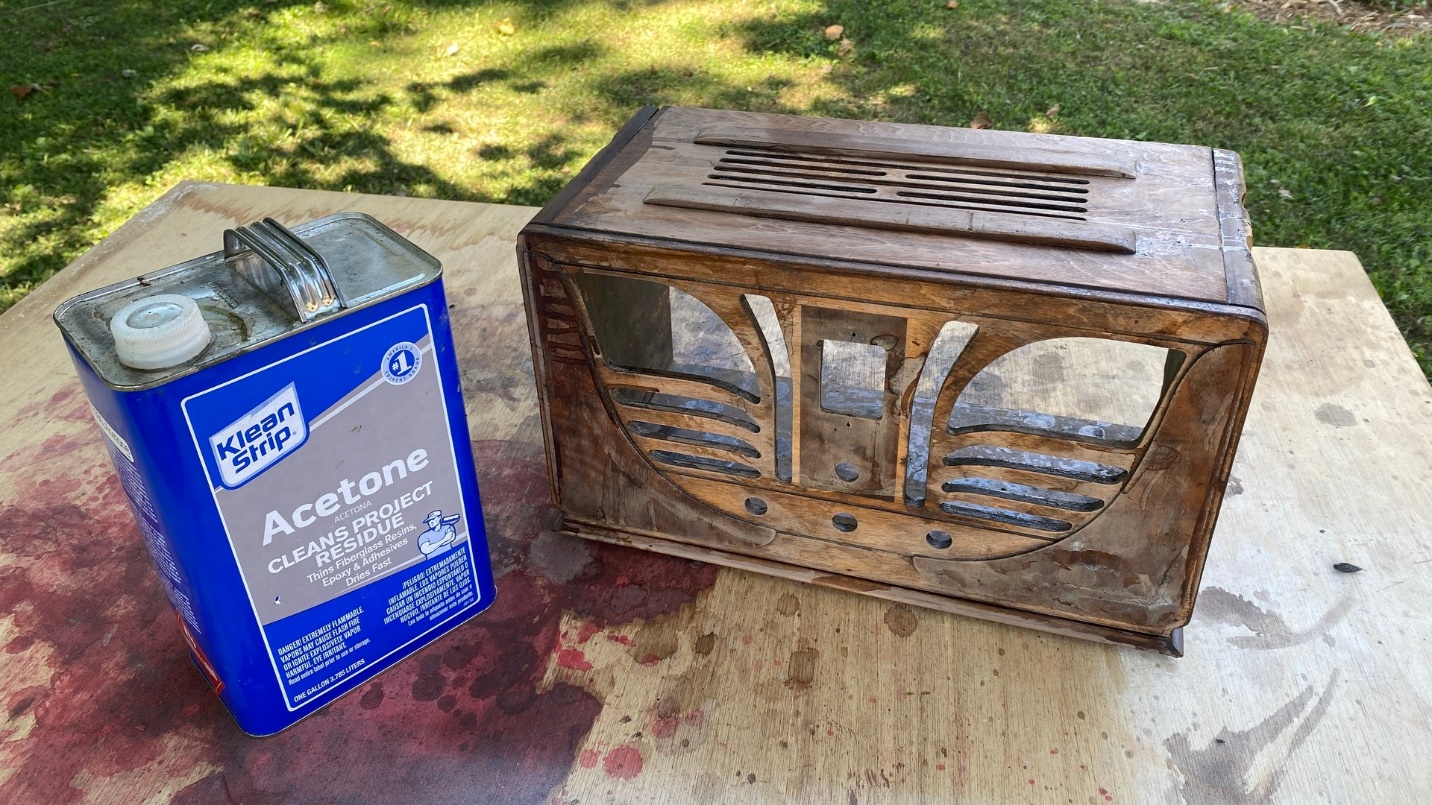
I usually use acetone to strip old radio cabinets. Generally, it melts the old lacquer away easily.
In about 10 minutes or so, I had the cabinet completely stripped of the old lacquer.
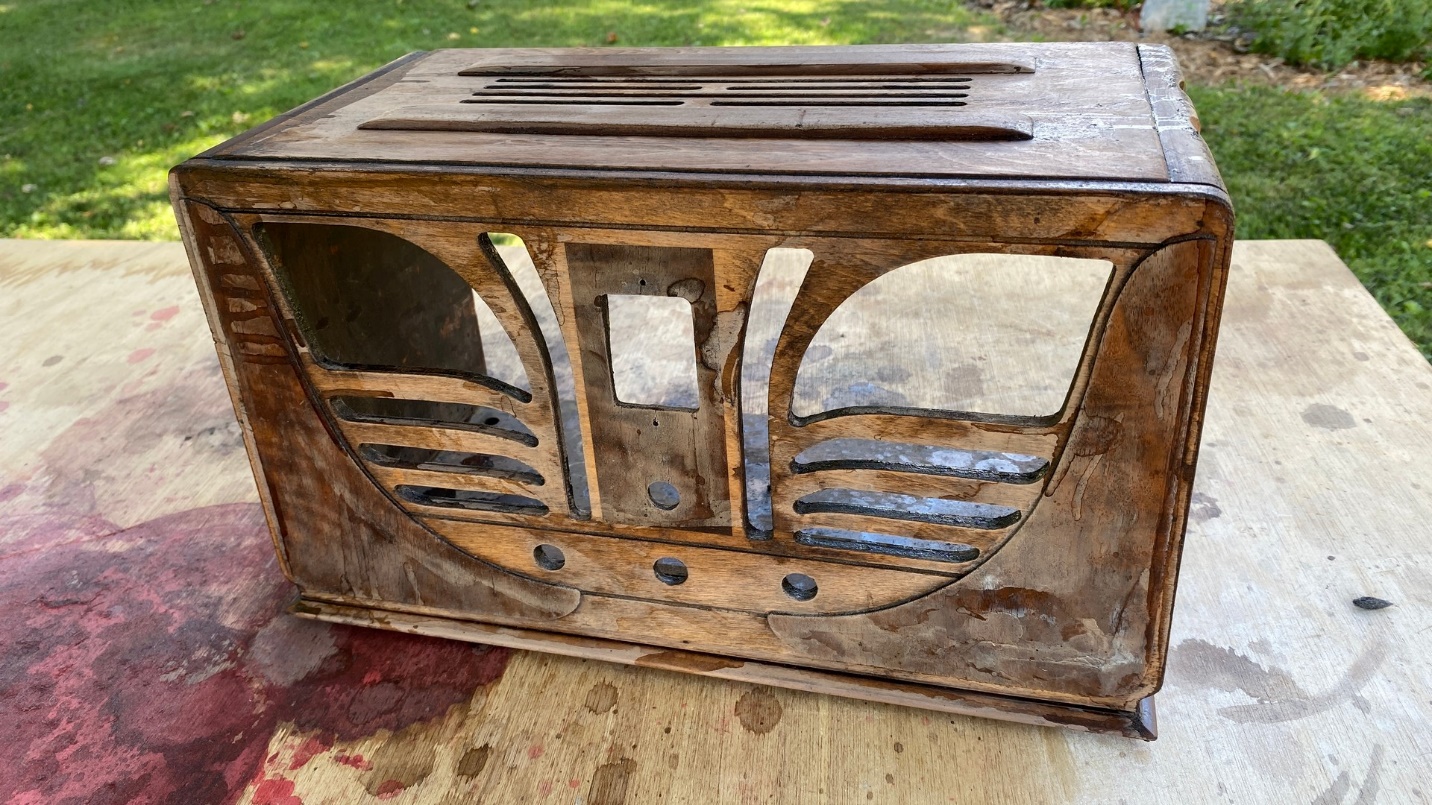
The 45C cabinet is now stripped.
Some 45C cabinets have a raised center panel where the escutcheon is attached, while others have a panel which is flush with the front of the cabinet. This particular cabinet has a flush center panel. Fortunately in this case, Philco only used the fancy walnut veneer in the very center. This would make it easy to mask off when the time would come for two-toning the cabinet.
After allowing the cabinet to air out, I took it inside and sanded away the remaining lacquer residue. Then, trying to remember just how I used to apply grain filler, I attempted this tedious but necessary job. Keep this in mind as we go along here.
I only applied grain filler to the three panels where Philco had used the fancy walnut veneer, as the remainder of the cabinet used the cheap “white wood” which normally has a very tight grain which does not require filling.
I brushed on Pore-O-Pac grain filler, let it sit for 10-15 minutes, and then rub it off with a circular motion using a piece of material cut from an old T-shirt. I would find out later that I did not adequately fill all the pores. Unfortunately, this problem did not manifest itself until after toning lacquer had been applied.
Sure, I could have re-stripped the cabinet and tried again, but I chose not to. However, I also resolved to try and do a better job on my next cabinet.
I sprayed Mohawk Medium Walnut Tone Finish over the entire front panel of the cabinet, getting the right color on those three walnut panels. The overspray onto the rest of the cabinet body would eventually be covered with Mohawk Extra Dark Walnut Tone Finish.
Yes, Medium Walnut Tone Finish. I have found over the years that, while other colors of Tone Finish are very opaque and act more like a paint than a colorant, Mohawk Medium Walnut Tone Finish acts much like the translucent Mohawk Ultra Classic products. The difference? Tone Finish colors use pigments to color the lacquer, which (with the exception of Medium Walnut) tends to act like paint, as mentioned previously. Ultra Classic, on the other hand, uses dyes which allow for a more translucent finish.
Once the Medium Walnut was completely dry, I began the slow process of masking off those walnut panels in order to two-tone the cabinet using Extra Dark Walnut. This is where it was fortunate that Philco only placed the fancy walnut in the very center of the cabinet, as well as the raised panels on left and right. Since it was obvious what part of the cabinet’s center needed to be masked off, I was able to take care of this fairly easily as may be seen below.
I begin to mask off the cabinet in order to spray Extra Dark Walnut on the unmasked areas.
The most difficult job of masking off the front panels was applying masking tape and to the larger left and right front panels. However, with patience and perseverance, the job was soon completed and the cabinet was ready to be sprayed with Extra Dark Walnut.
If you try this, here is some advice. Always use the green “FrogTape.” Never use blue painter’s tape, or any other type of masking tape. Other types of masking tape will pull new lacquer away from the radio cabinet. FrogTape, however, consistently works as it should and does not pull any lacquer finish away. (The yellow FrogTape looks promising; however, as I have never used it, I’m afraid I am not able to recommend it.)
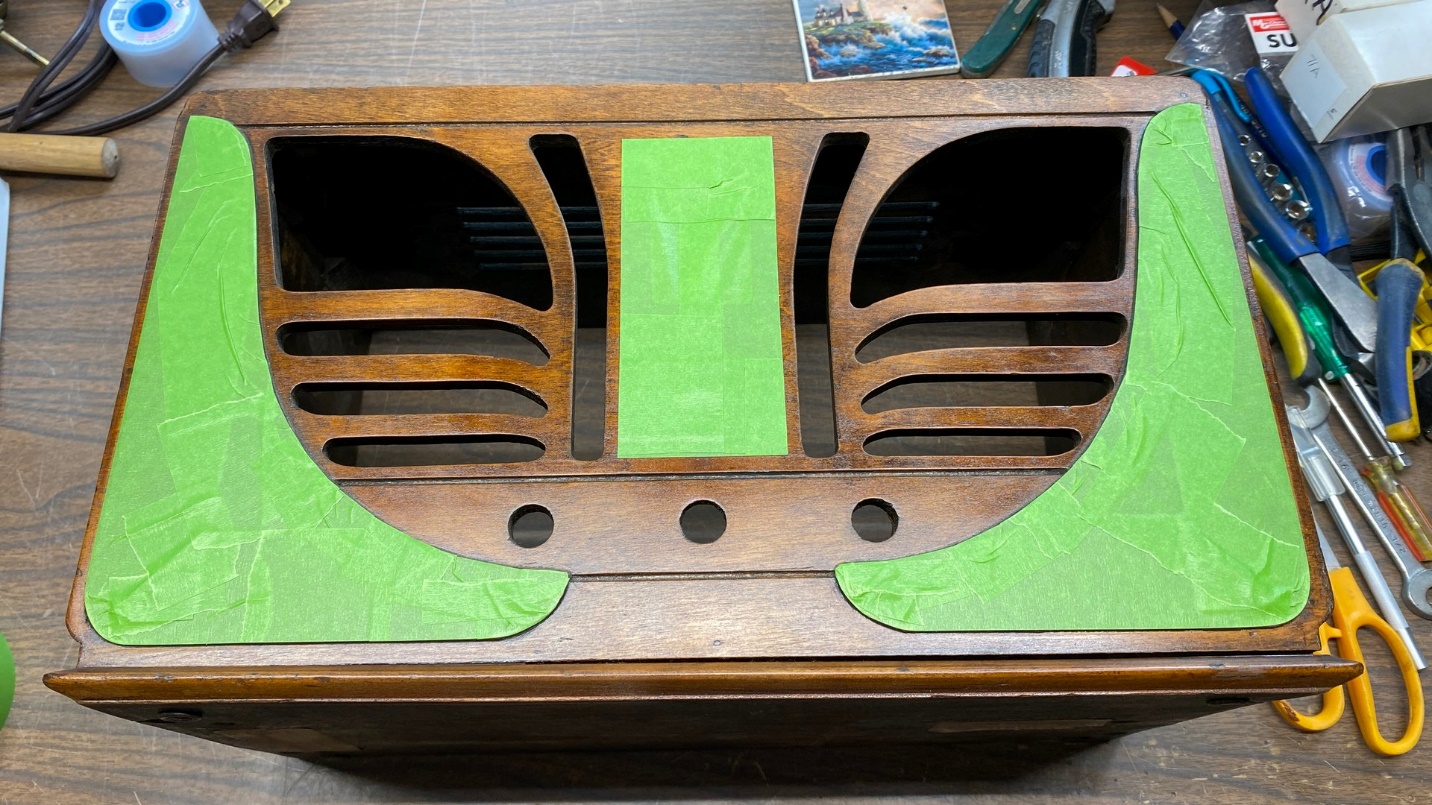
The 45C cabinet is completely masked off and ready for the darker toning lacquer.
Returning to the back yard, I sprayed three coats of Extra Dark Walnut to the entire cabinet, in order to completely cover any light wood.
I should also mention at this point that I always use a respirator when spraying lacquer, and I always do my spraying outdoors. This is why I can only work on cabinets in the summer – one must spray lacquer in temperatures of 60 degrees and above. Actually, when temperatures are below 70 degrees, lacquer starts taking longer to dry and runs and drips may result. This is less likely when temperatures are between 70 and 80-85 degrees.
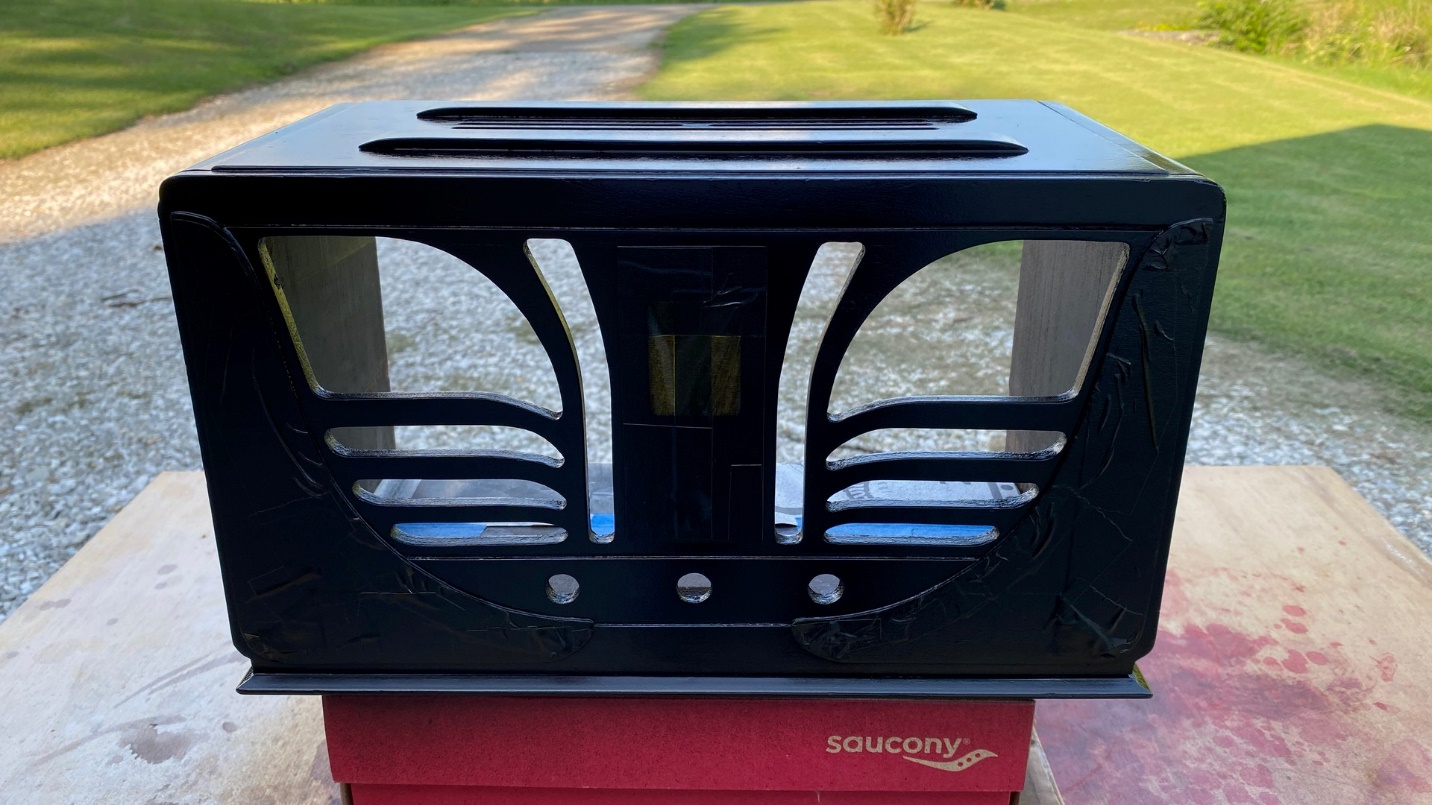
The 45C is now covered in Extra Dark Walnut Tone Finish.
The cabinet was allowed to air out, in the shade, before it was taken back in.
We are running out of space for this blog installment, so next time, I will show you how the cabinet looked after the masking tape had been removed. Stay tuned!
Philco model 45C Cabinet Restoration – Part 2

Last time, I had sprayed Extra Dark Walnut over the entire Philco 45C “Butterfly” cabinet, having taken the precaution of masking off the three walnut panels on the front of the cabinet so they would not also receive that dark lacquer. Now, let us continue.
After a few hours had passed, I began to carefully pull the masking tape away from the cabinet.

Slowly, the masking tape is removed from the 45C cabinet.
This can be tricky. You don’t want to scratch that new Extra Dark Walnut lacquer. By working slowly and carefully, however, you will be rewarded with a nice looking radio cabinet.
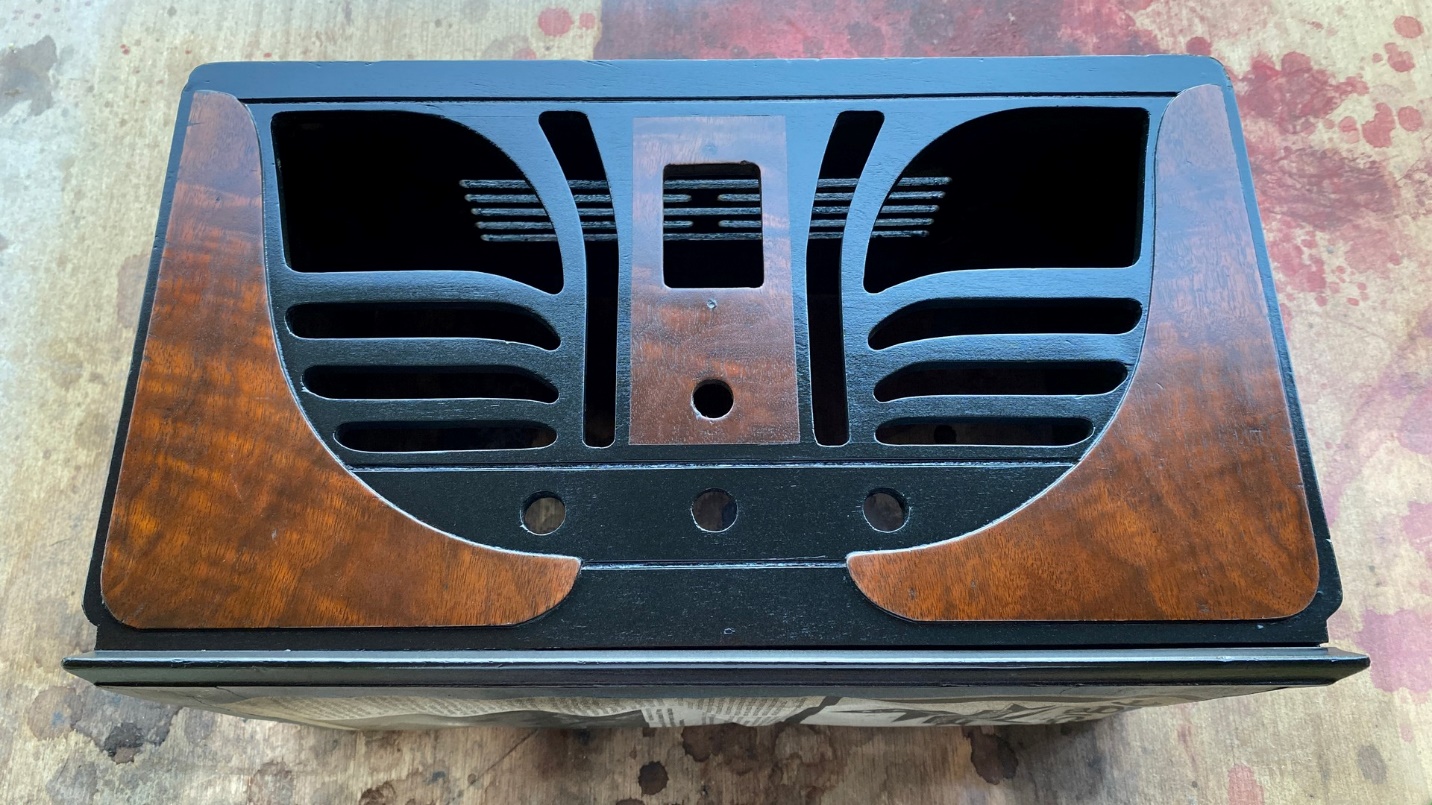
All of the masking tape is now removed, revealing a handsome two-tone cabinet.
My next job was to fill those three horizontal grooves in the front panel with some sort of ivory paint. I settled on ivory nail polish. Nail polish is a form of lacquer, dries fast, and is compatible with sprayed-on Mohawk lacquer finishes.
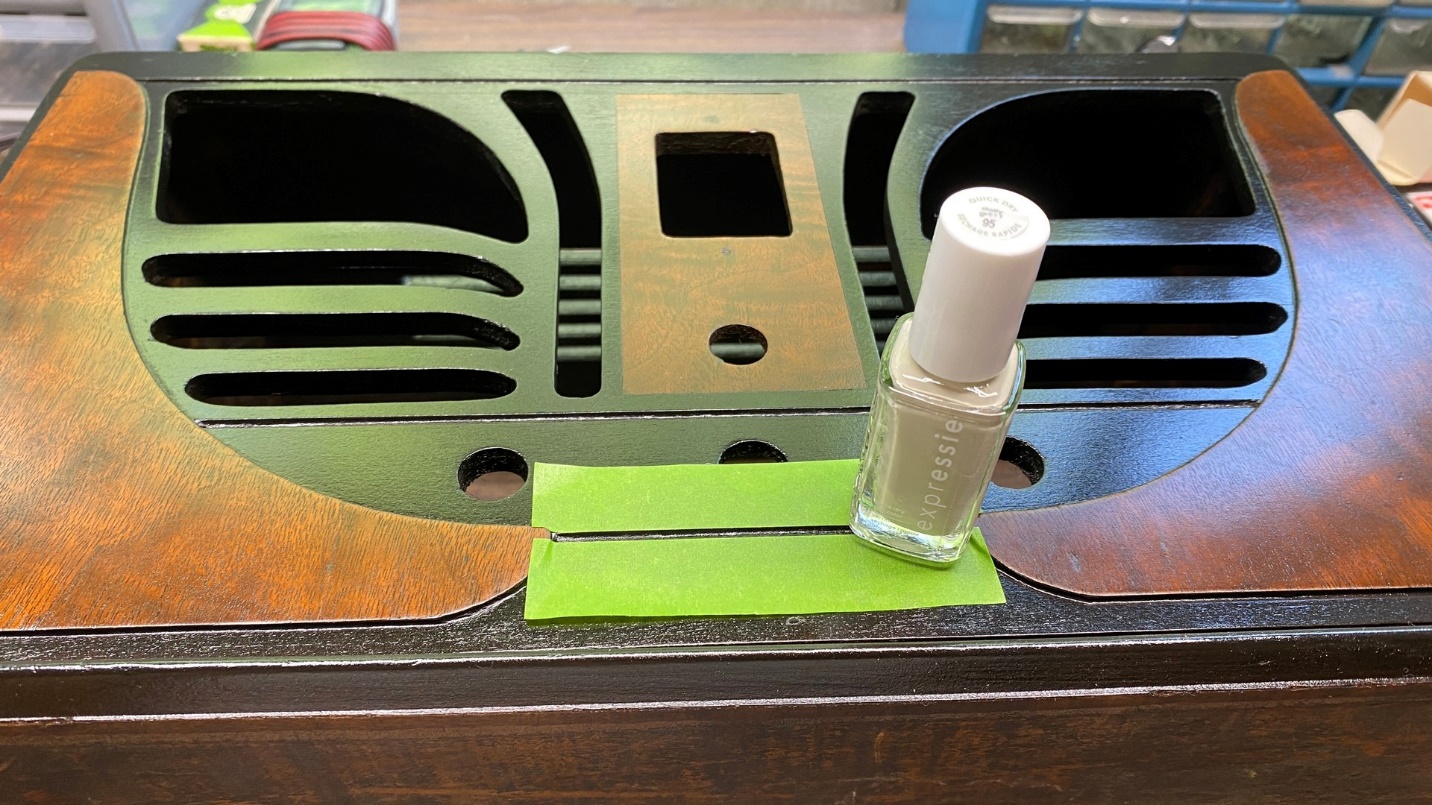
I begin to apply yet more masking tape so that I can more easily apply the ivory stripes to the cabinet.
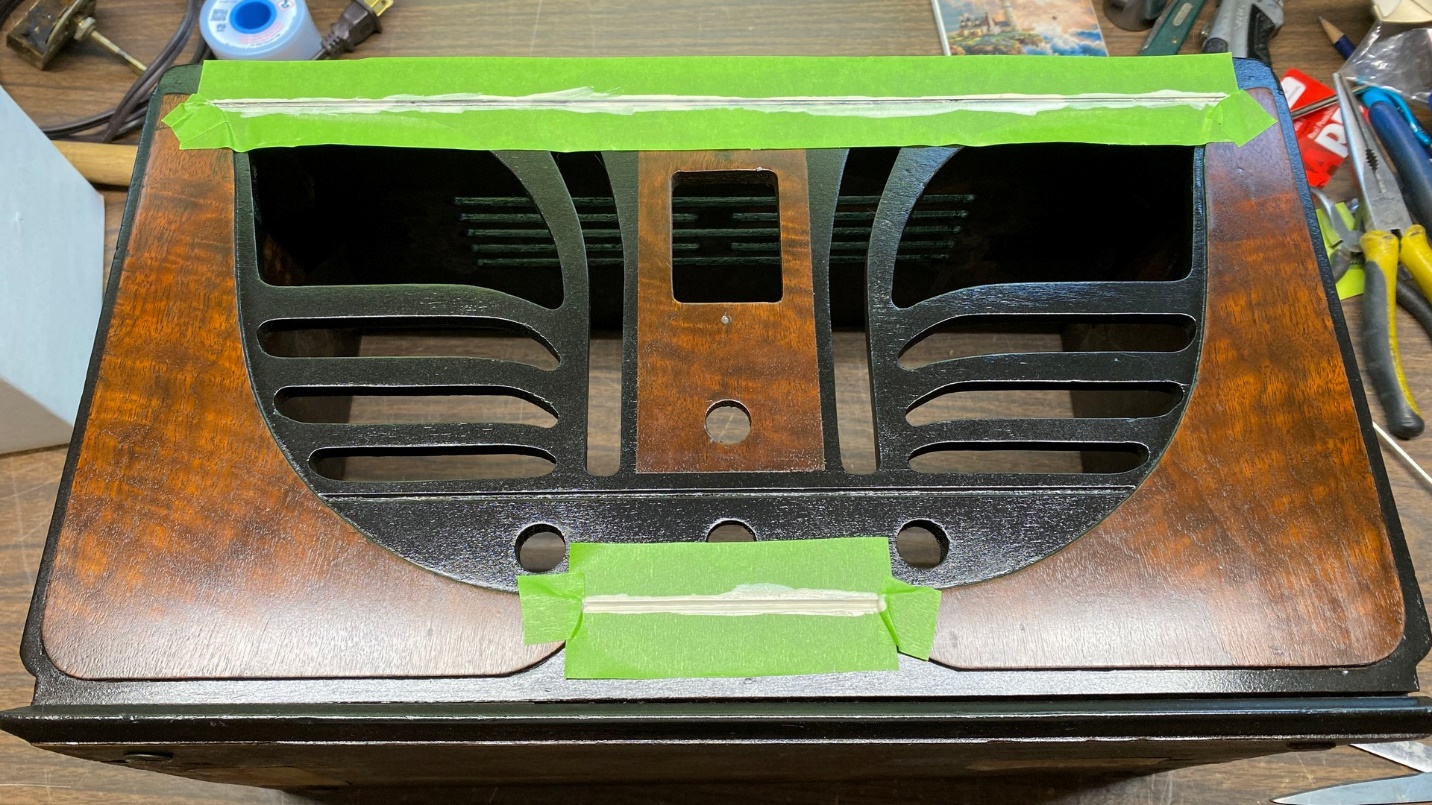
Eventually, I would mask around all three grooves. As you can see, I have already applied the nail polish to two of the grooves.
This process did not turn out quite as well as I had hoped. Some bleedover resulted from applying the ivory nail polish to the grooves. I corrected this by very carefully wet sanding the areas where bleedover had occurred with 800 grit sandpaper. Fortunately, this mostly corrected the issues and the cabinet now looked quite acceptable.
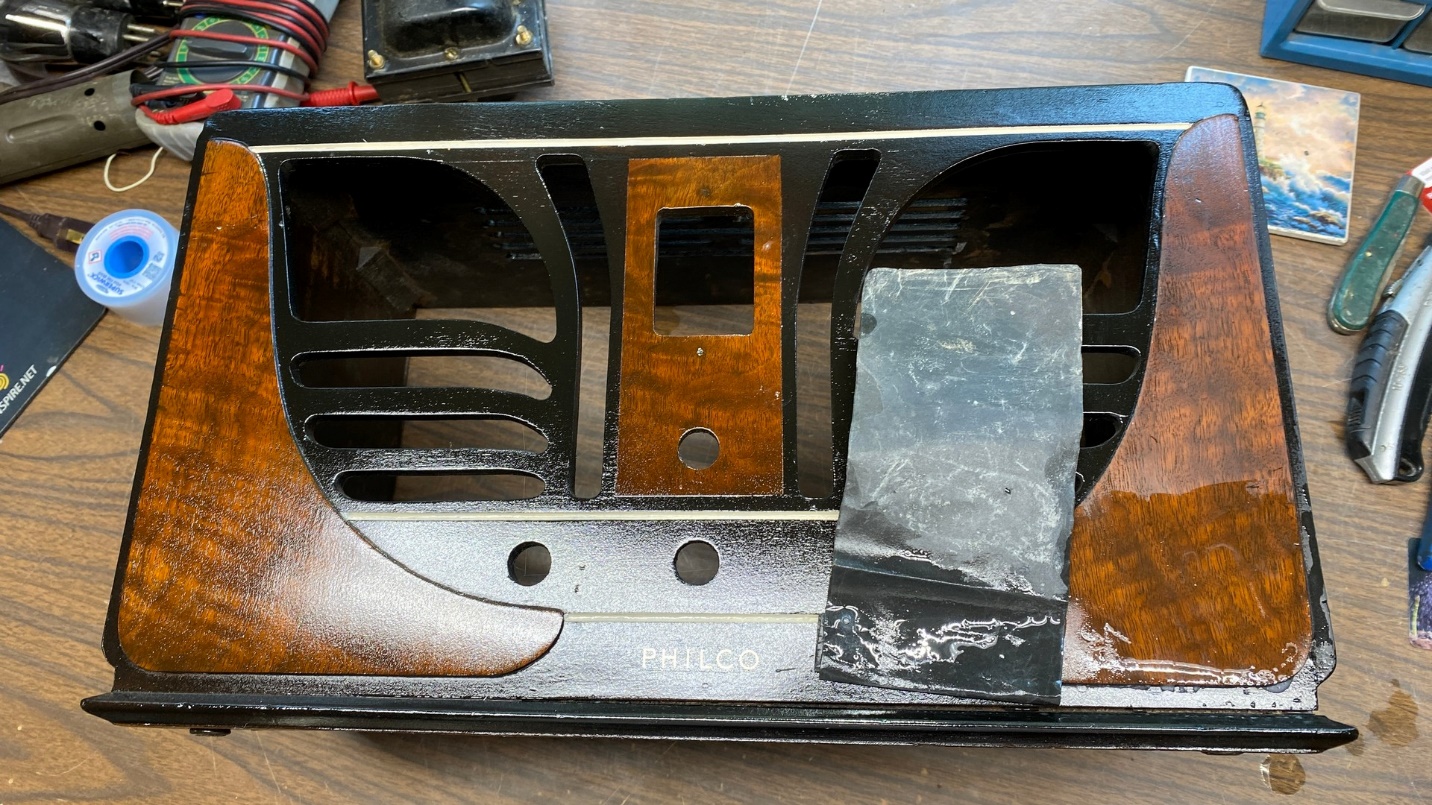
Having applied the ivory nail polish to the grooves in the front panel, I then applied the PHILCO decal.
I added a PHILCO decal to the cabinet next. The proper decal to use on all 1932-1936 Philco models is part no. DCL-PH8 from Radio Daze. This style decal matches the font of the old Philco decals of the time period, and was also used on early production 1937 Philco cabinets.
Once the decal was in place, it was time to begin applying clear lacquer. This is a technique I remembered from my previous cabinet refinishing projects – I spray three coats of clear, wet sand the finish the next day, and then apply 2 more coats of clear.
Starting to wet sand the cabinet after three coats of clear lacquer had been applied the previous day.
Following the three coats of clear lacquer, I wet sanded the entire cabinet with 800 grit wet/dry sandpaper. Next, I applied two more coats of clear lacquer. I prefer gloss lacquer on vintage radio cabinets as this is what the manufacturers used originally.
The cabinet was nearly complete at this point.
I found out that Philco had originally attached the grille cloth to 1/8 inch thick backing boards, and had attached each one inside the cabinet using ¼ inch staples. I have a staple gun, but did not have any ¼ inch staples, so a package of these had to be purchased.
Using the new staples, I reattached the grille cloth and backing board inside the cabinet. In spite of the original cloth being a bit faded, I chose to reuse it as it was not torn and still looked well inside the cabinet.
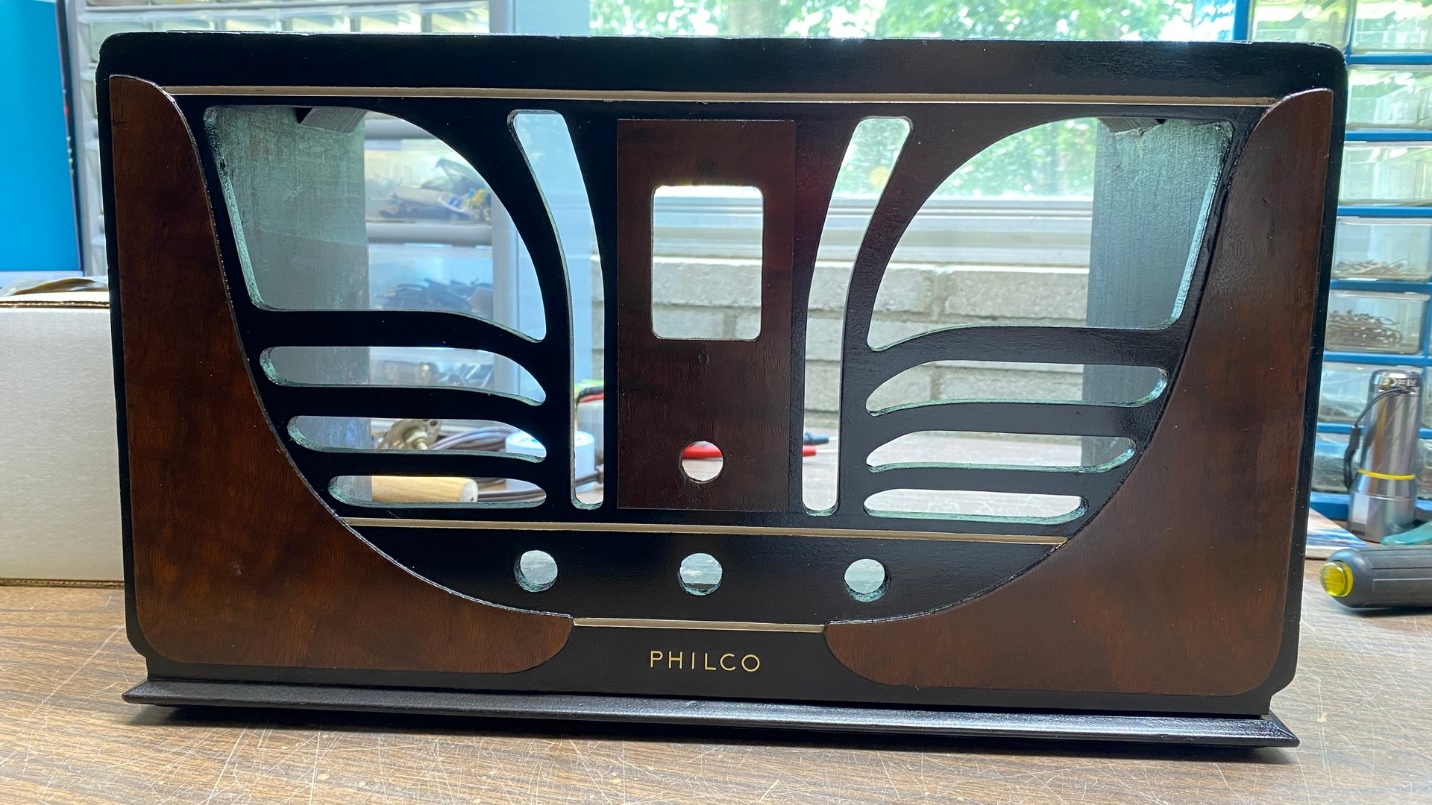
The finished product, with the escutcheon back in place, may be seen below.
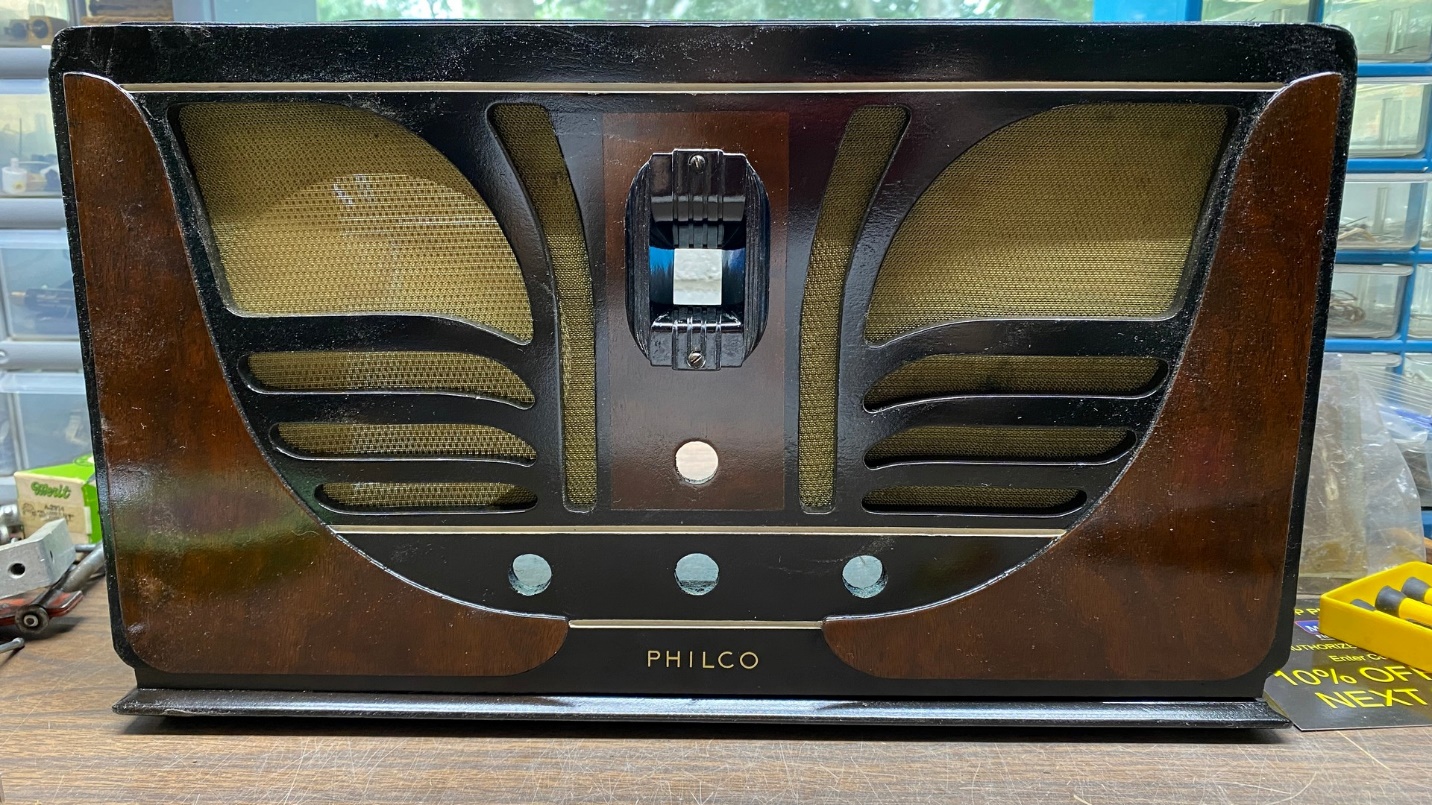
The restored 45C cabinet.
I guess this didn’t turn out too bad for a do-it-yourself project by someone who does not claim to be a cabinet refinishing “expert” by any means, and who had not attempted to refinish a radio cabinet in five years.
Now, to finish out this 45C project, I have a new power transformer and a better dial scale to install in the chassis. I’ll share that story in a final chapter of this radio, coming up soon over most of this blog.