Our house has had a single recessed outlet in an upper wall of our dining room area, presumably ever since the house was built in 1960.
As part of a do-it-yourself wiring project that I have been working on since the early part of this year, I decided it was probably time to replace the 60+ year old recessed outlet on that wall with a new unit.
I have to admit that I was surprised to find that single recessed outlets with a hook for a clock were still being made. After purchasing one of these, and a deep “old work” electrical box, I went to work.
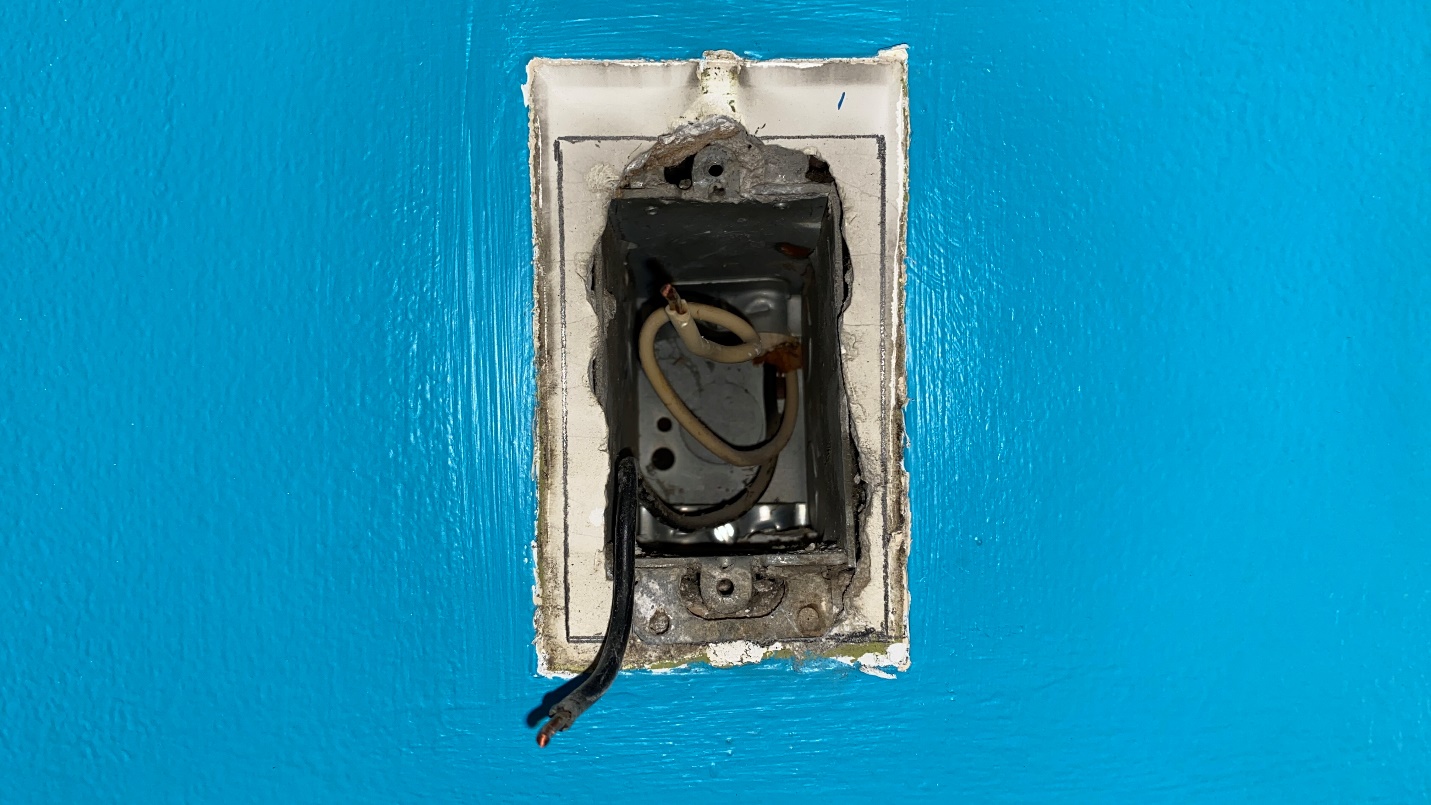
As soon as I removed the old recessed outlet, I saw a major problem. The old electrical box was just hanging there in the wall, and was not attached to anything. The only thing that had kept it in place all these years was the recessed outlet being attached to it.
As you can see in the photo above, I drew a template for the new PVC wall box. I would soon cut a new hole in the wall along these pencil lines using my trusty jigsaw.
Nothing was holding this old metal electrical box inside the wall.
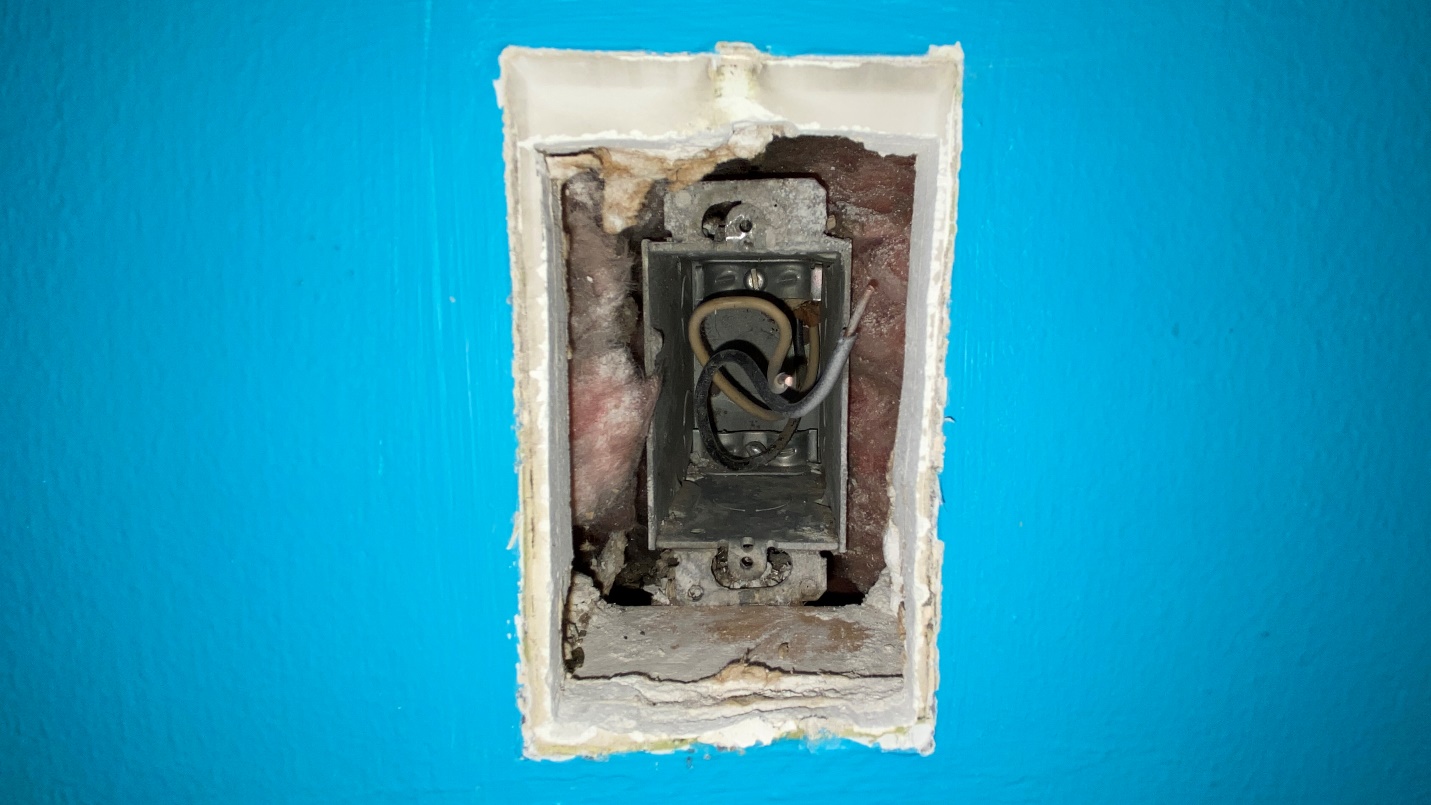
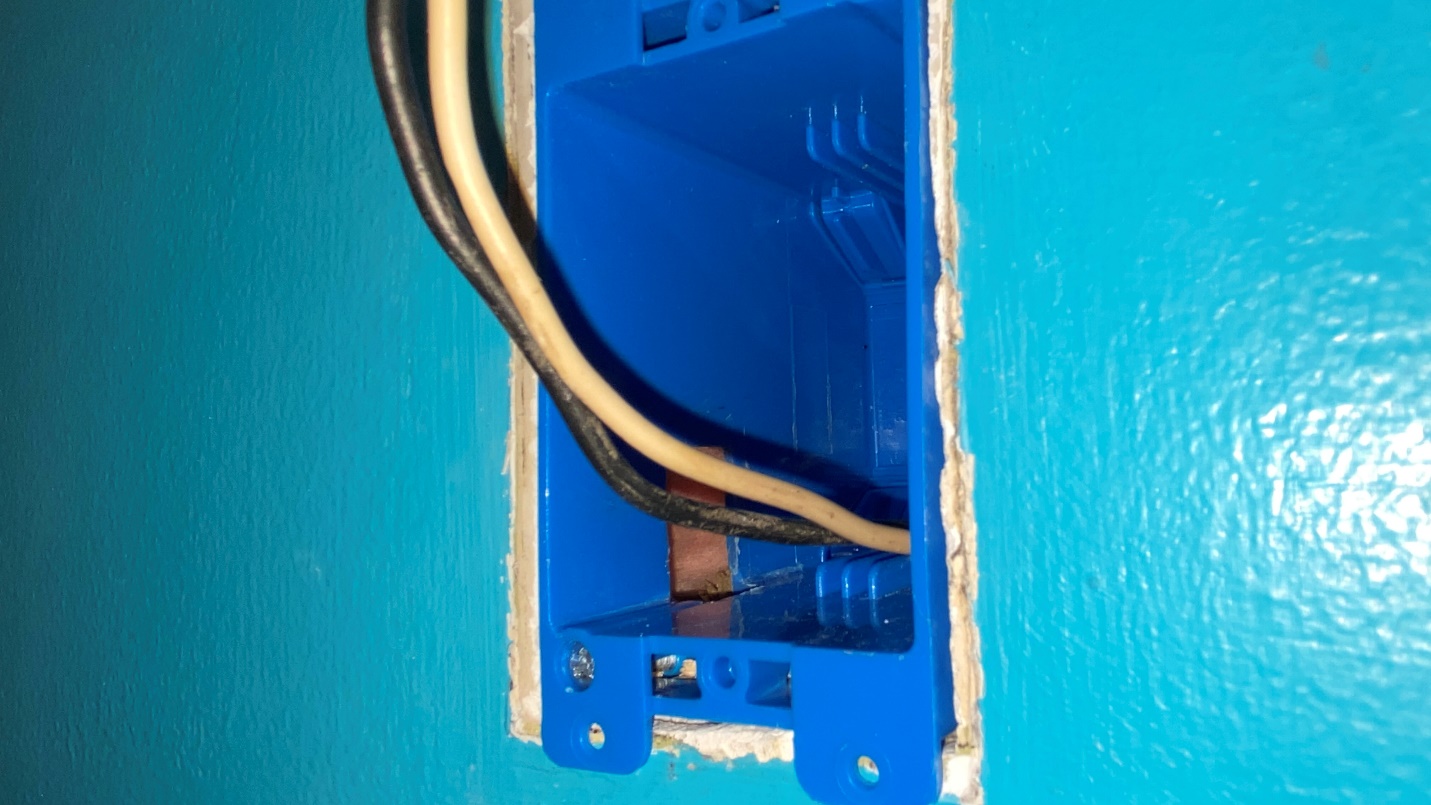
As luck would have it, as soon as I cut out the hole for the new box, I noticed yet another problem. Look closely at the photo above. Notice the wooden stud just under the new hole, which runs horizontally!
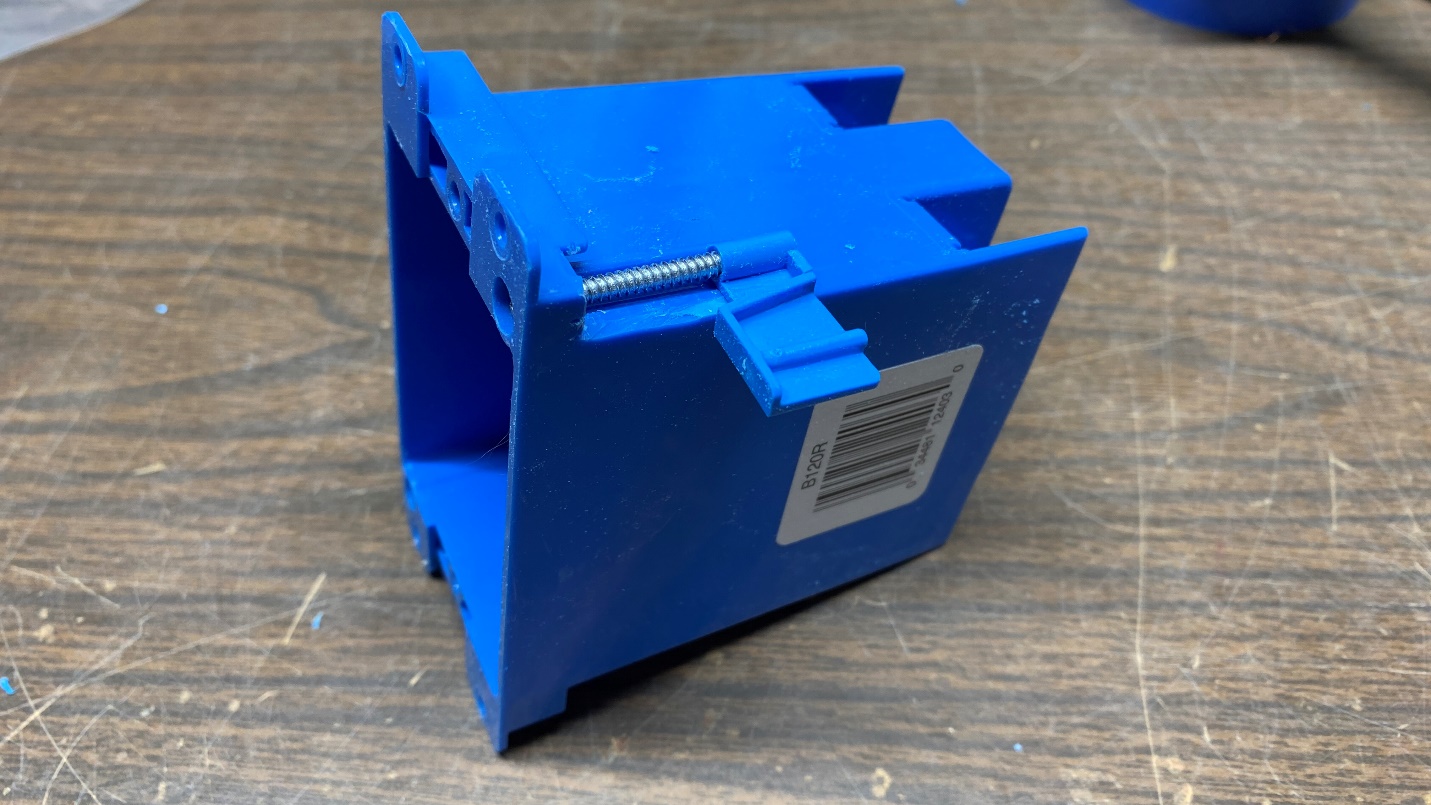
The “old work” PVC box I had purchased was designed to be attached to the wall by way of two plastic “ears” which would swing out 45 degrees and, when the two screws were tightened, clamp the box firmly in place in the wall.
But with that stud in the way, one of the “ears” would not swing out as designed.
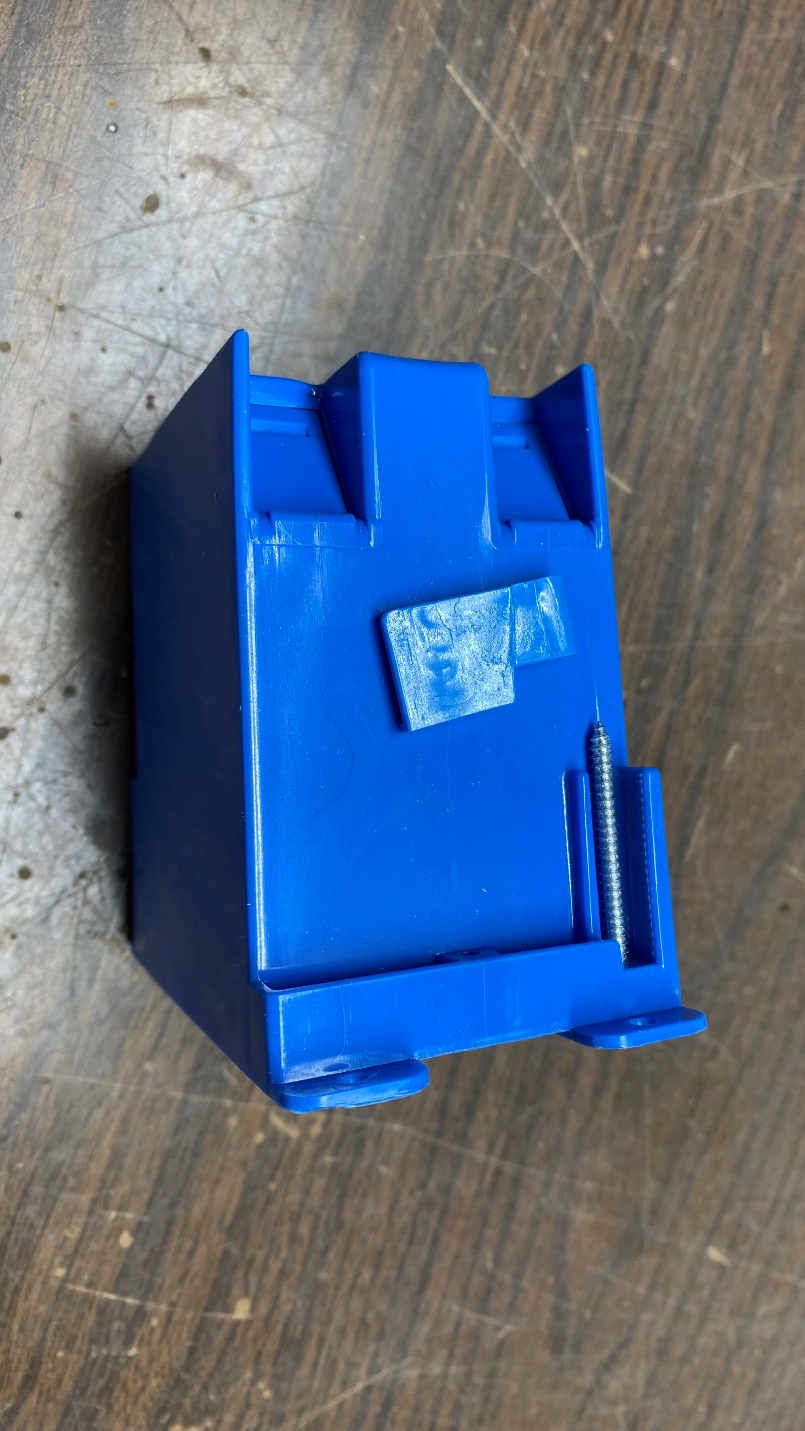
Preparing to modify a new PVC ““old work”” electrical box.
After thinking about it for a while, I decided to try modifying the box so that the bottom “ear” would swing out 90 degrees instead of 45.
The plastic “ear” can now be swung out 90 degrees instead of 45 as designed by the manufacturer.
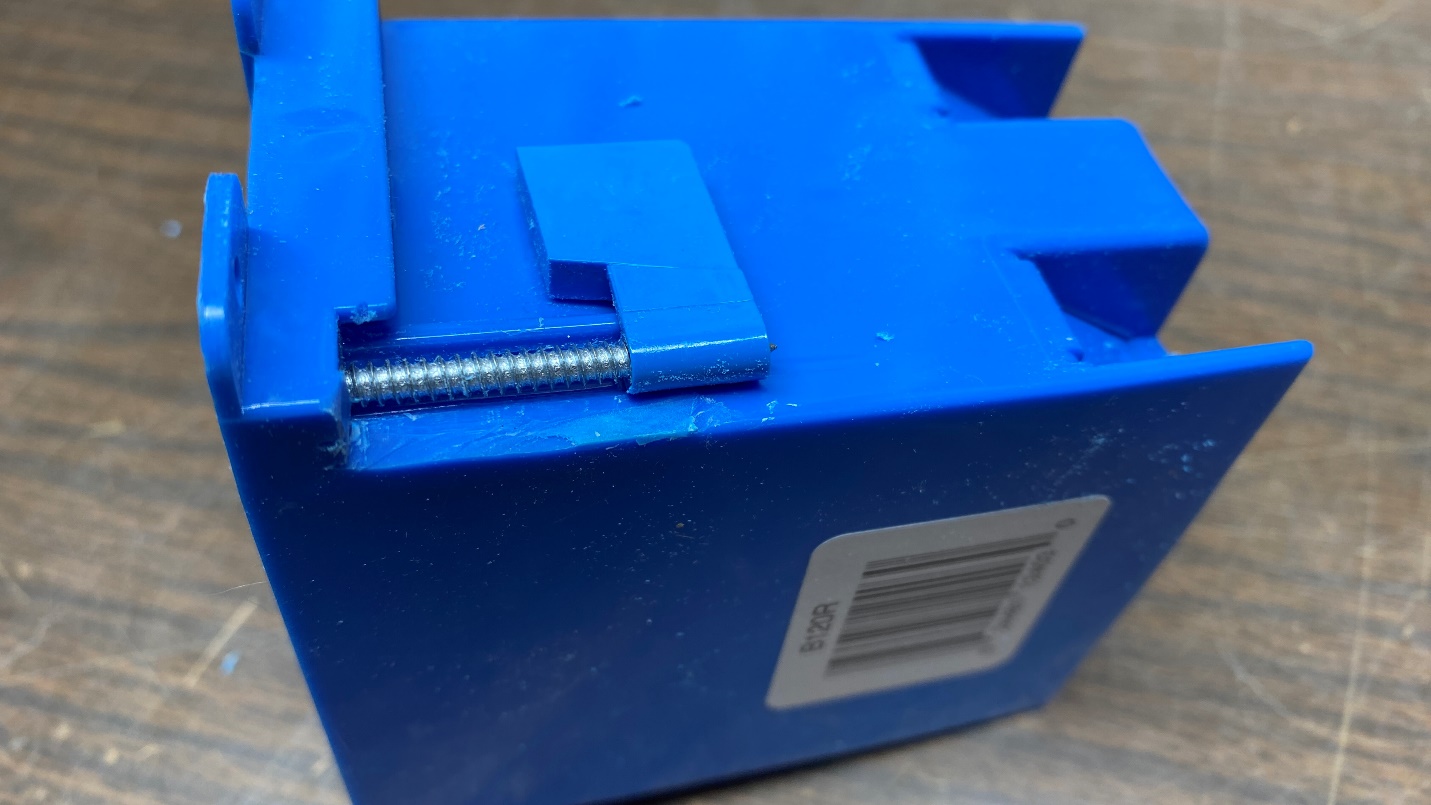
This photo shows how the ridge was removed which formerly prevented the “ear” from swinging out more than 45 degrees.
With the help of my Ryobi “Dremel” tool, I removed the ridge along the bottom edge of the box which formerly prevented the “ear” from swinging out more than 45 degrees.
However, when I tried to put it into the wall, I soon discovered that this still would not work!
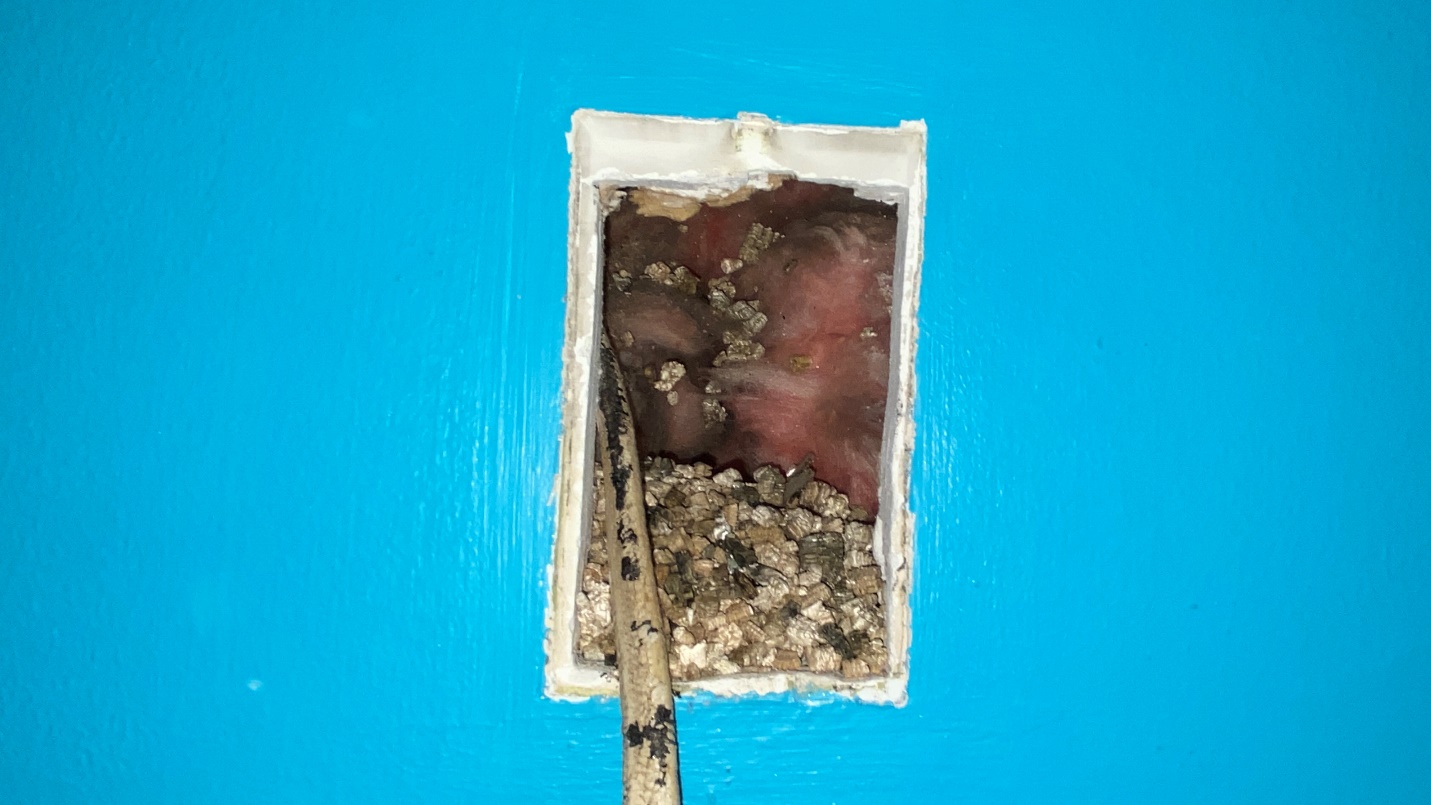
Pulling on or otherwise touching this Romex cable resulted in ceiling insulation spilling out of the hole.
In the meantime, I found myself faced with more issues. Having removed the old metal electrical box, I was happy to find that the old Romex cable had plenty of “slack” for me to do this job.
The bad news? Every time I moved the Romex cable – every time I even looked at it – lots of ceiling insulation material came pouring out of the hole. This not only filled the area where I wished to install the new box, but also ran out onto the shelf under where this box was to be installed, and down onto the floor.

The ceiling insulation created quite a mess.
What a mess! But with a broom and dust pan, as well as a vacuum cleaner, I soon had the mess taken care of.

Preparing to modify the new PVC wall box yet again.
Having taken care of the insulation mess for now, I turned my attention back to the issue of getting the box into the wall and being able to anchor it in place so it would be held at the top and bottom.
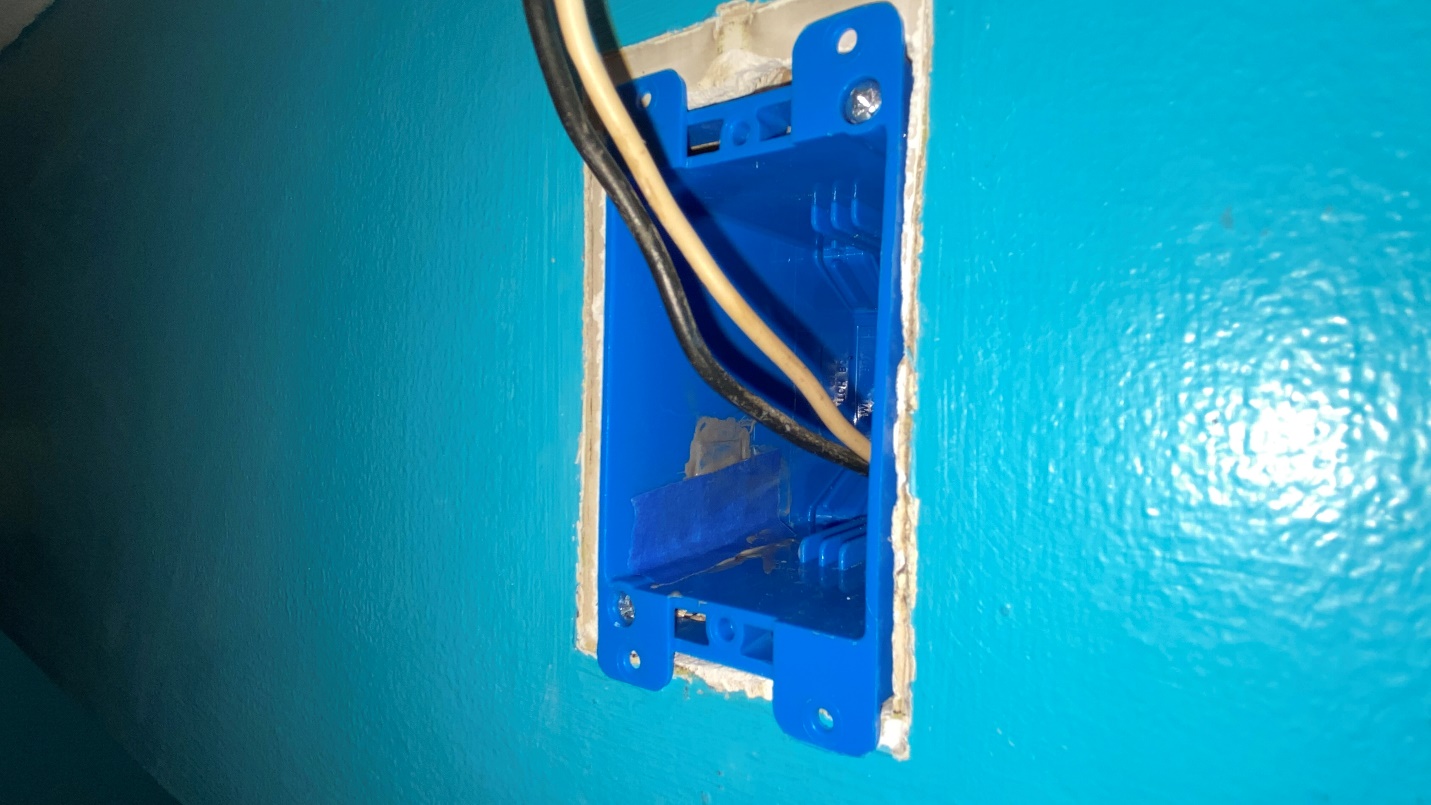
With nothing to lose at this point, I decided to cut a small hole in the box so I would then be able to swing the “ear” up into the box long enough to get the box into the wall.
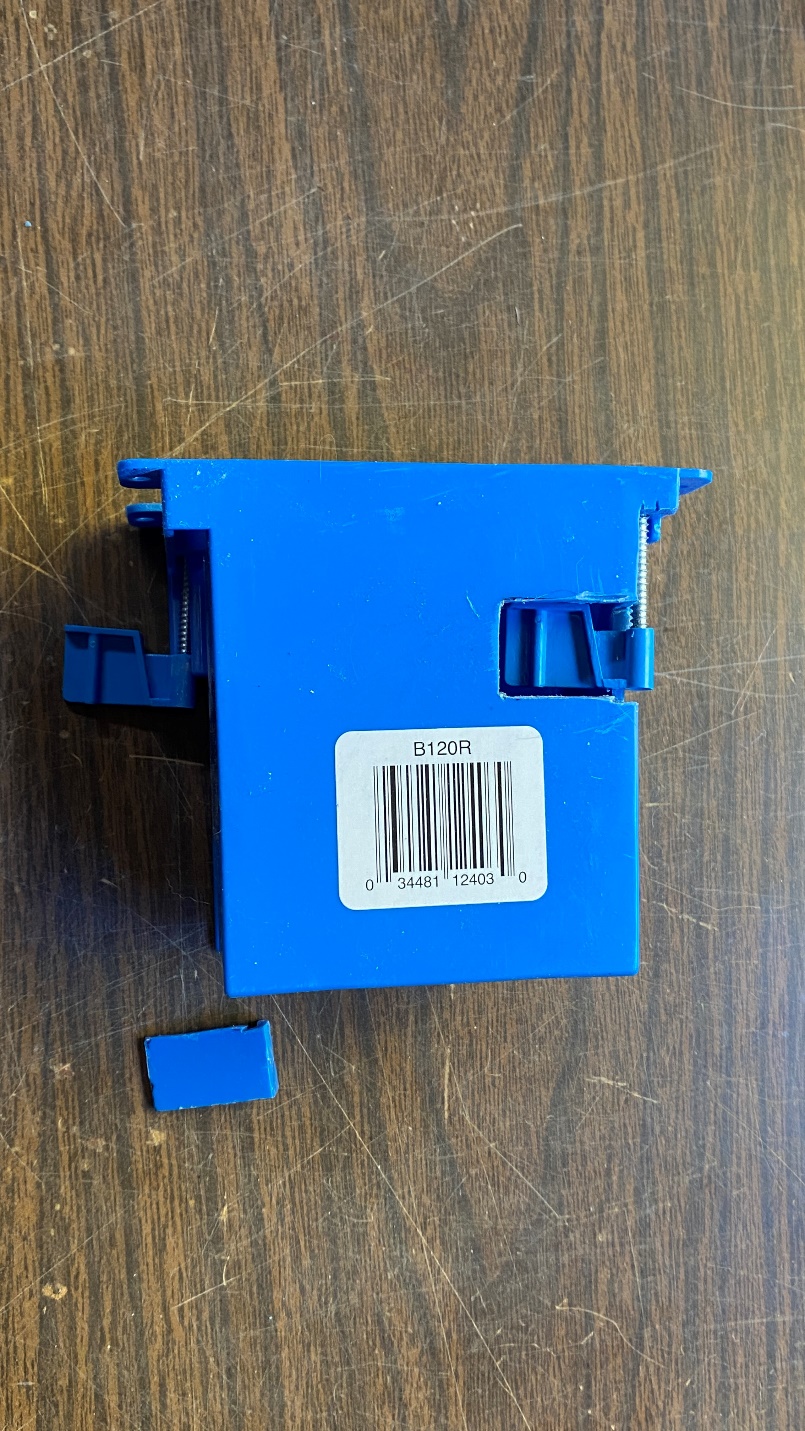
A hole was cut in the side of the box so that the “ear” could be swung up into the box.
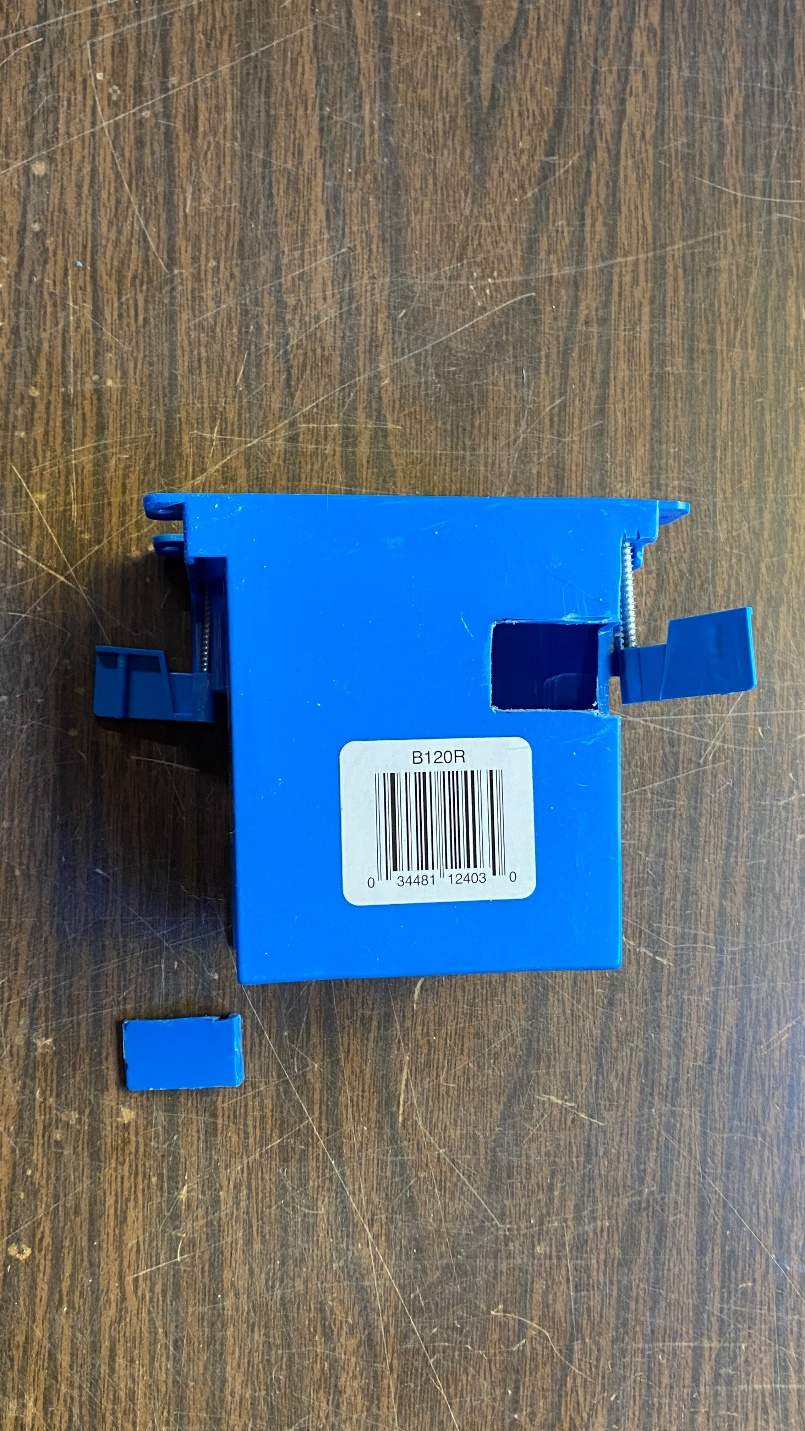
This photo helps to illustrate what I hoped to accomplish with this modification – to be able to swing the “ear” out 45 degrees from the hole once the box was in the wall.
My plan was to get the box into the wall through the limited space I had, and then to hold the “ear” down as far as I could hold it with one finger while tightening the screw so it would anchor into place.
Fortunately, this worked out perfectly and I soon had the box anchored into the wall. (Yes, I remembered to put the Romex cable into the box first.)

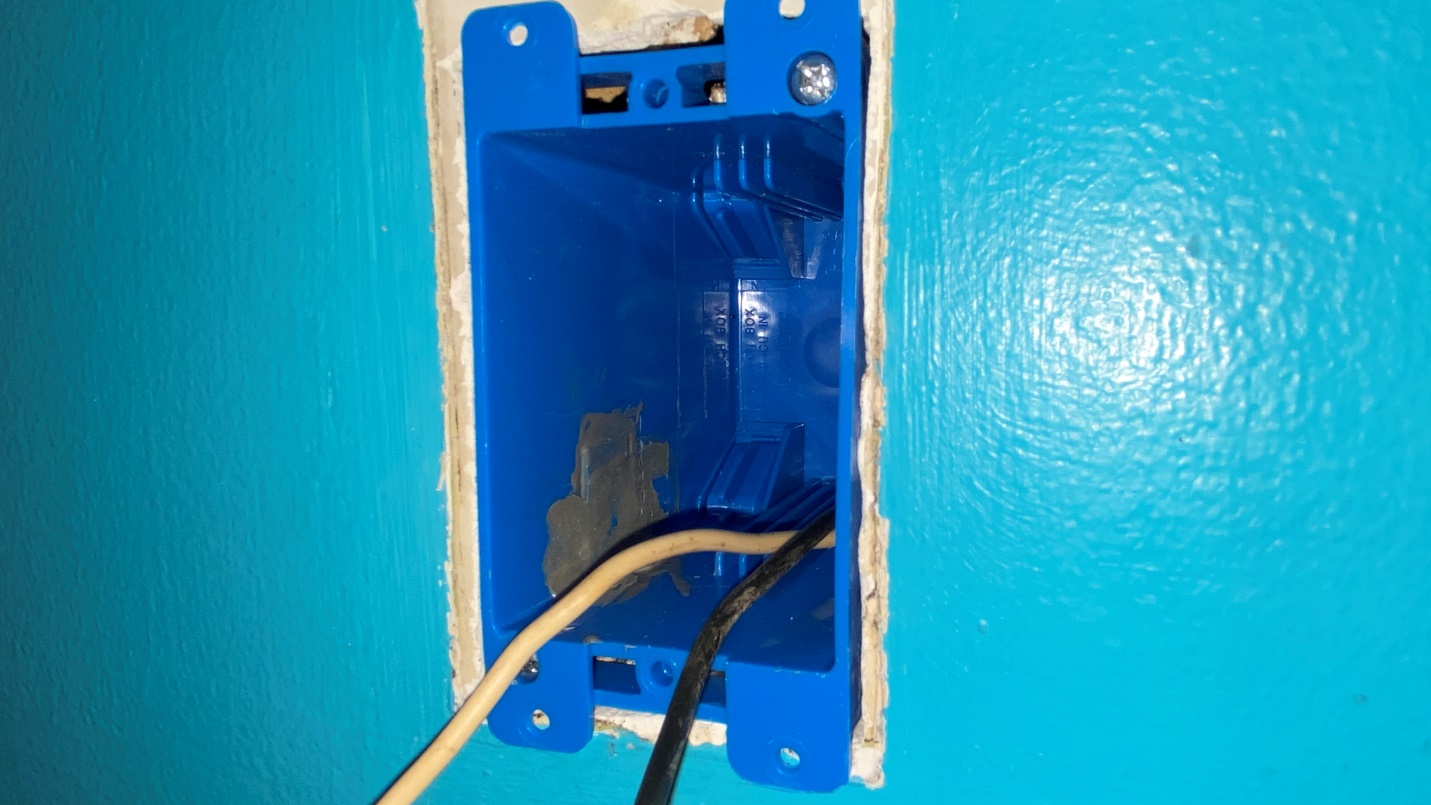
The new box is now firmly anchored in place inside the wall.
The hole in the side of the box needs to be sealed back up.
The box looked good and was firmly anchored as it should have been. But now I needed to do something about that hole I had cut into the side of it.
I decided to take the piece of plastic I had cut out of the box, and glue it back into position. This would prevent any ceiling insulation from getting into the box, as well as keeping any possible insects out.
I looked around in vain for some J-B Kwik epoxy (the kind which dries fast), Not finding any, I had no choice but to use regular J-B Weld which I had on hand.
The plastic piece which I cut out of the box is now glued back into place. A piece of tape holds the piece while the glue dries.
After carefully placing the cut piece of plastic back into where it had been cut out, I applied the J-B Weld mixture around the cuts.
I then applied a piece of painter’s masking tape across the cut piece to hold it in place while the glue dried.
The next day, the tape was removed and the plastic piece is glued in as it should be.
The next day, I removed the tape. Everything looked good. You can tell a piece of plastic had been cut out and glued back in, of course, but I was not going after looks – I just wanted to seal up the hole.
Finally, I wired up the new recessed outlet and put it into place in the new box.
The new recessed outlet installed in the new wall box.
As you can see by the telltale white above and to the left of the new outlet, I didn’t get this placed exactly as the old one was. However, with a clock hung over the outlet, no one will know the difference.
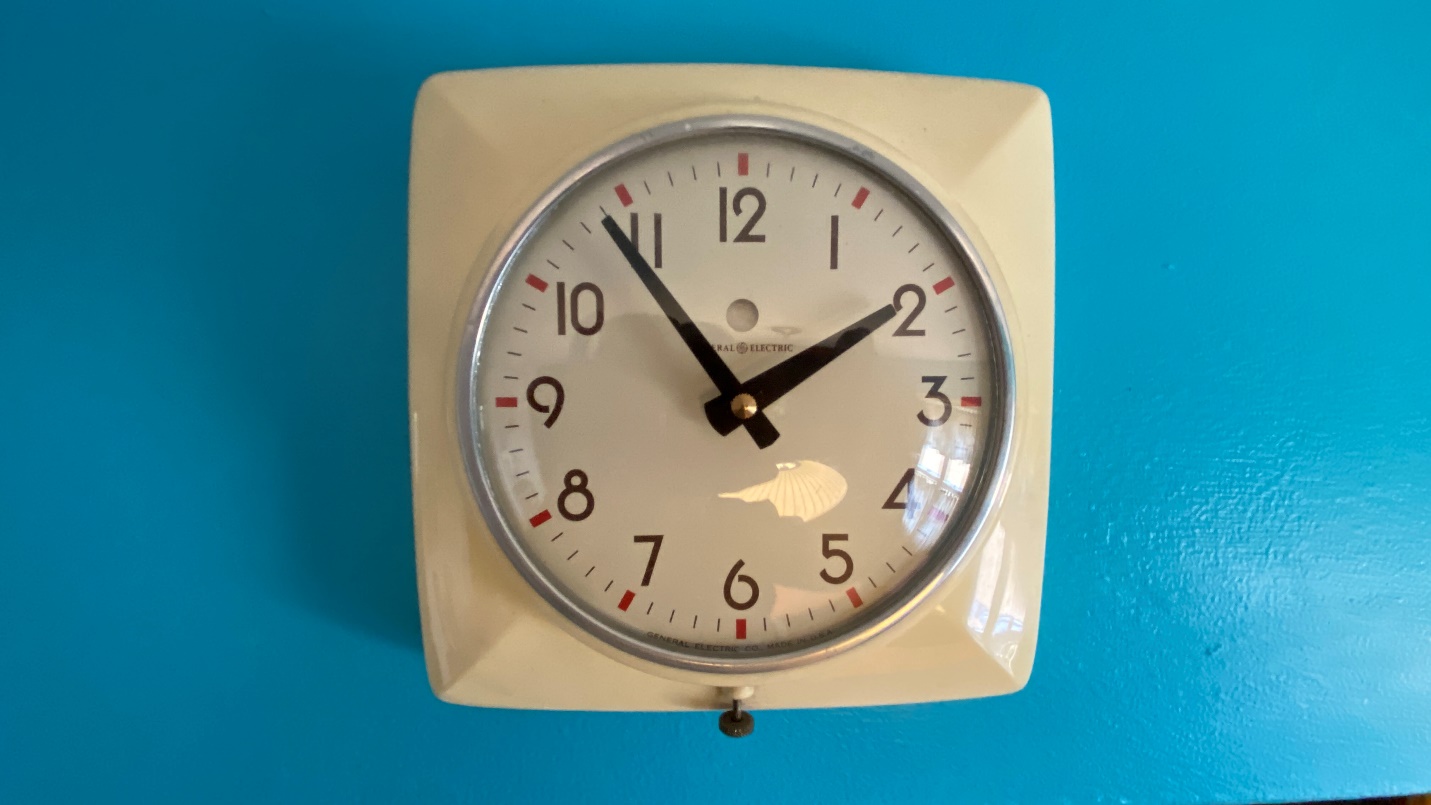
A vintage GE wall clock now covers the recessed outlet.
As you might imagine, I am glad that job is finished!