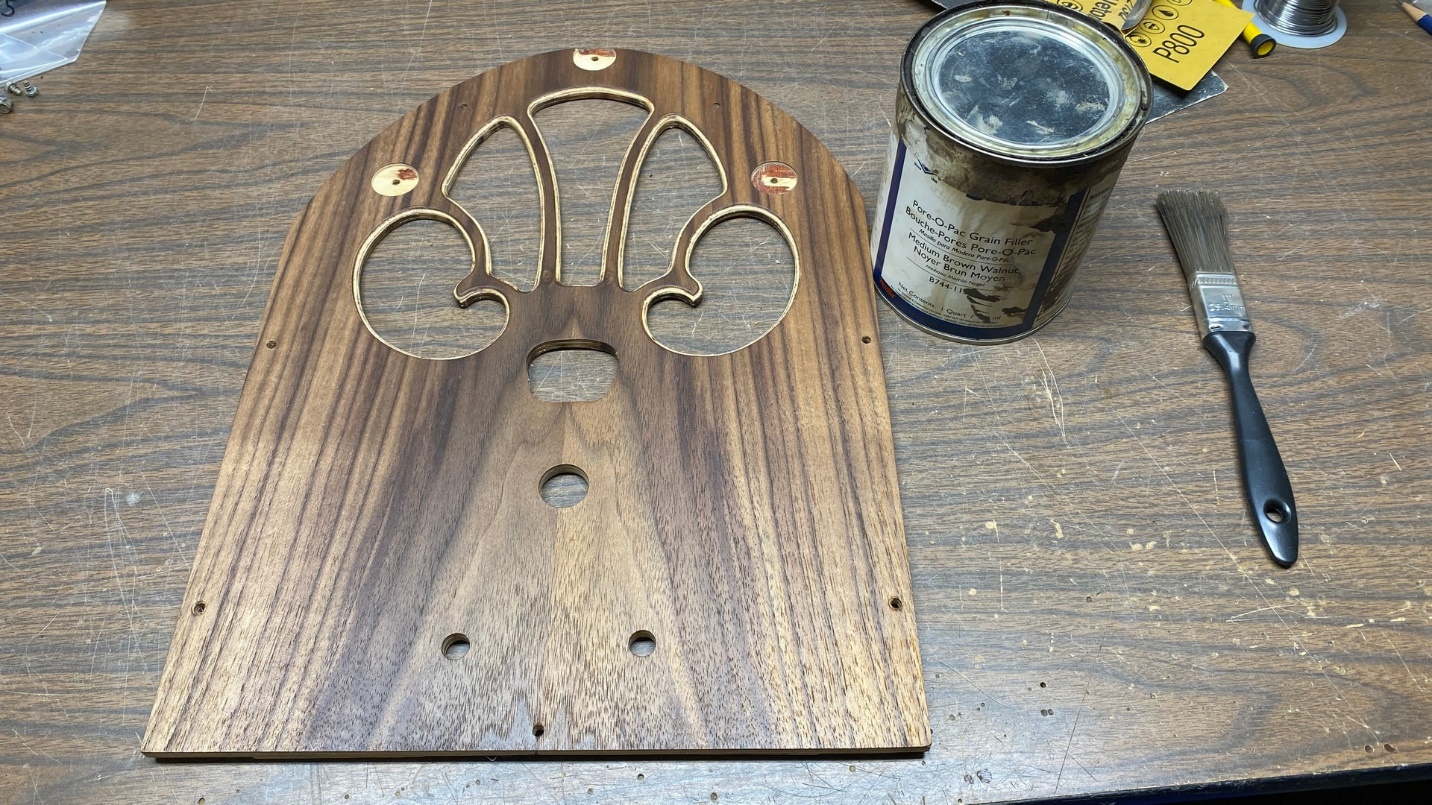
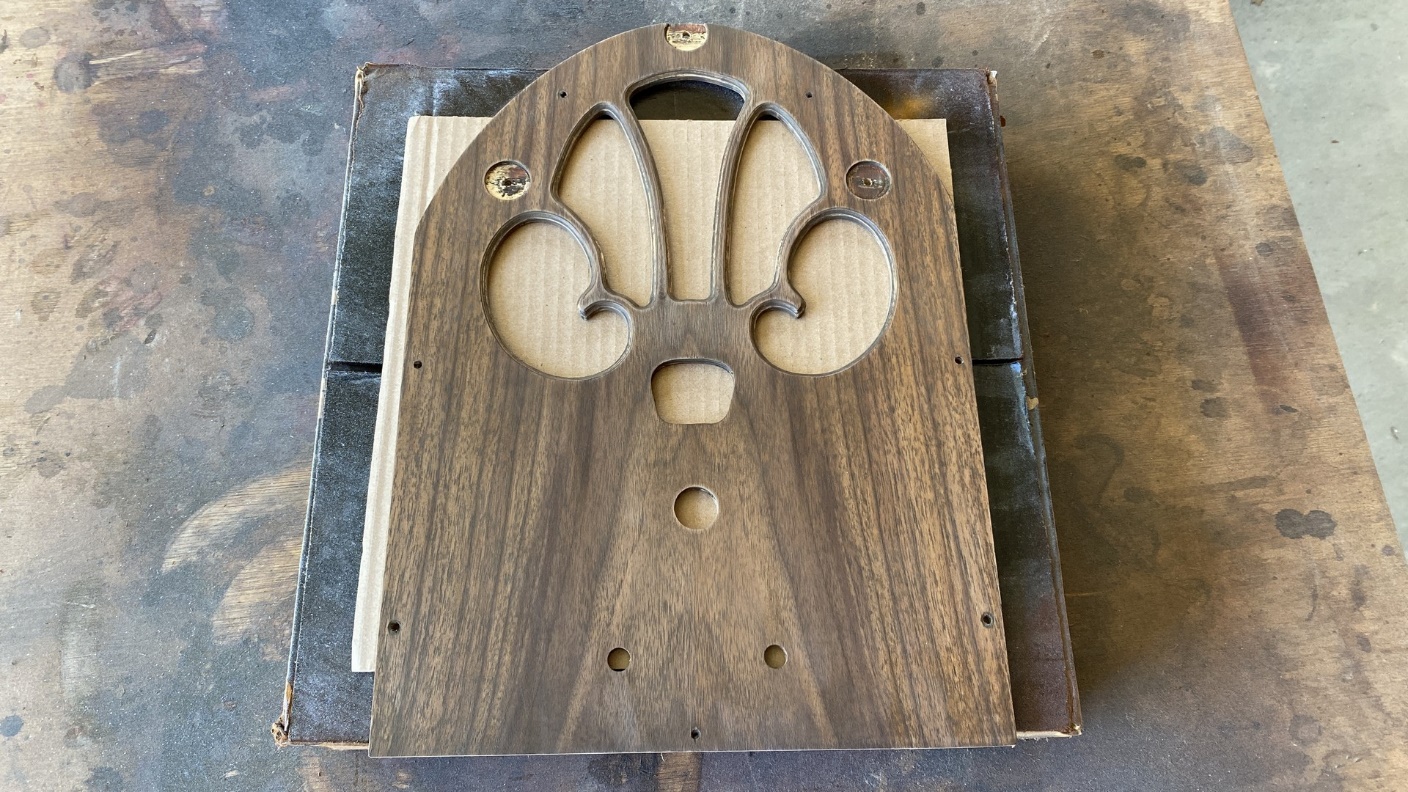
October 18, 2023. The temperature warmed back into the upper 60s, so I was able to take this model 21 front panel outside and spray sanding sealer on it. I then allowed the panel to dry overnight.
The next day, I began the chore of applying grain filler to the panel. This really did not take that long to apply; it is the removal of excess filler which is difficult and laborious. But I am getting ahead of myself. I opened the can of Pore-O-Pac filler, stirred it up until it was an even consistency, and then began to apply it to the panel with an old brush.
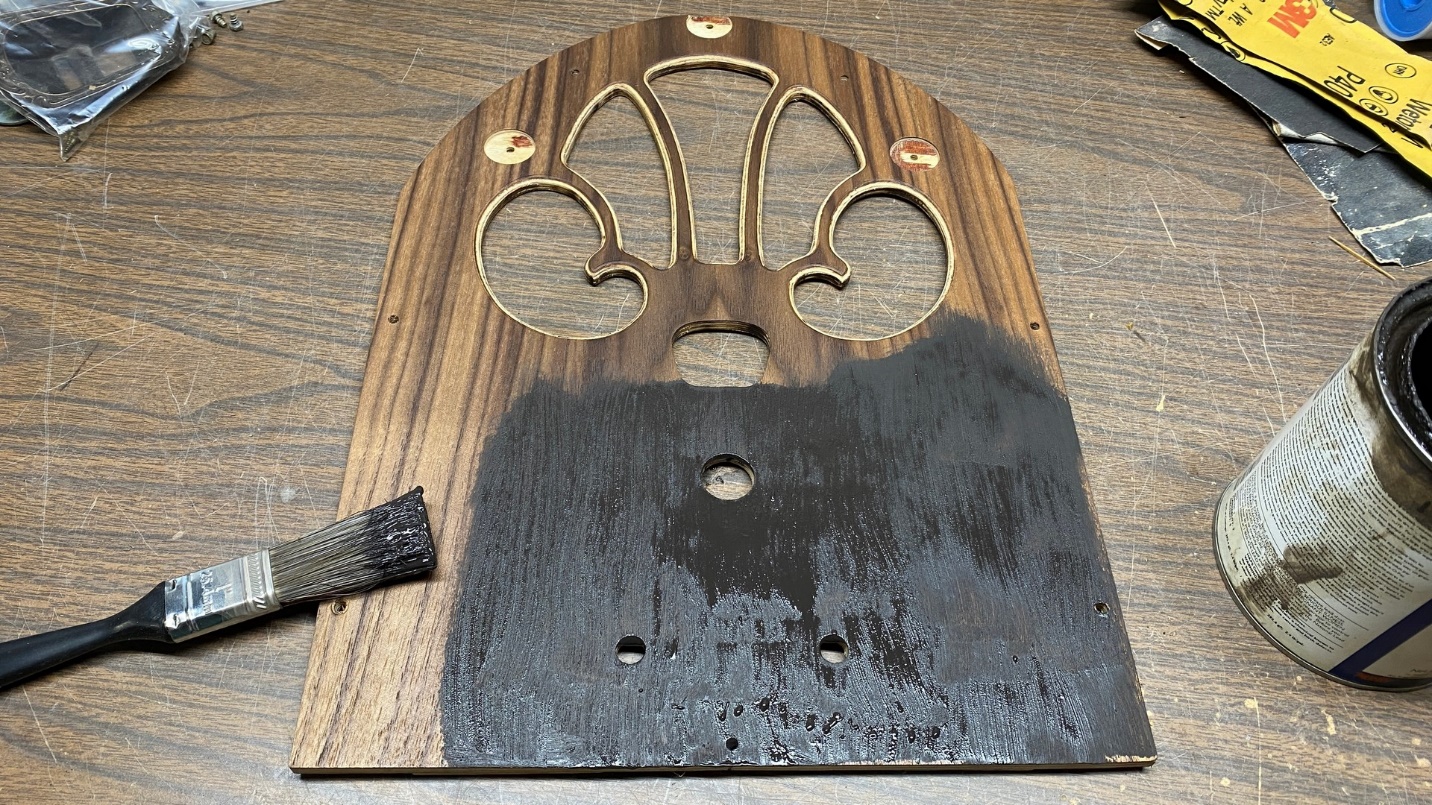
Applying grain filler to the Philco 21 front panel.
Once the entire front side of the panel had been thoroughly coated with the grain filler, I paused for fifteen minutes to allow the filler to set.
The Philco 21 panel is now covered in grain filler.
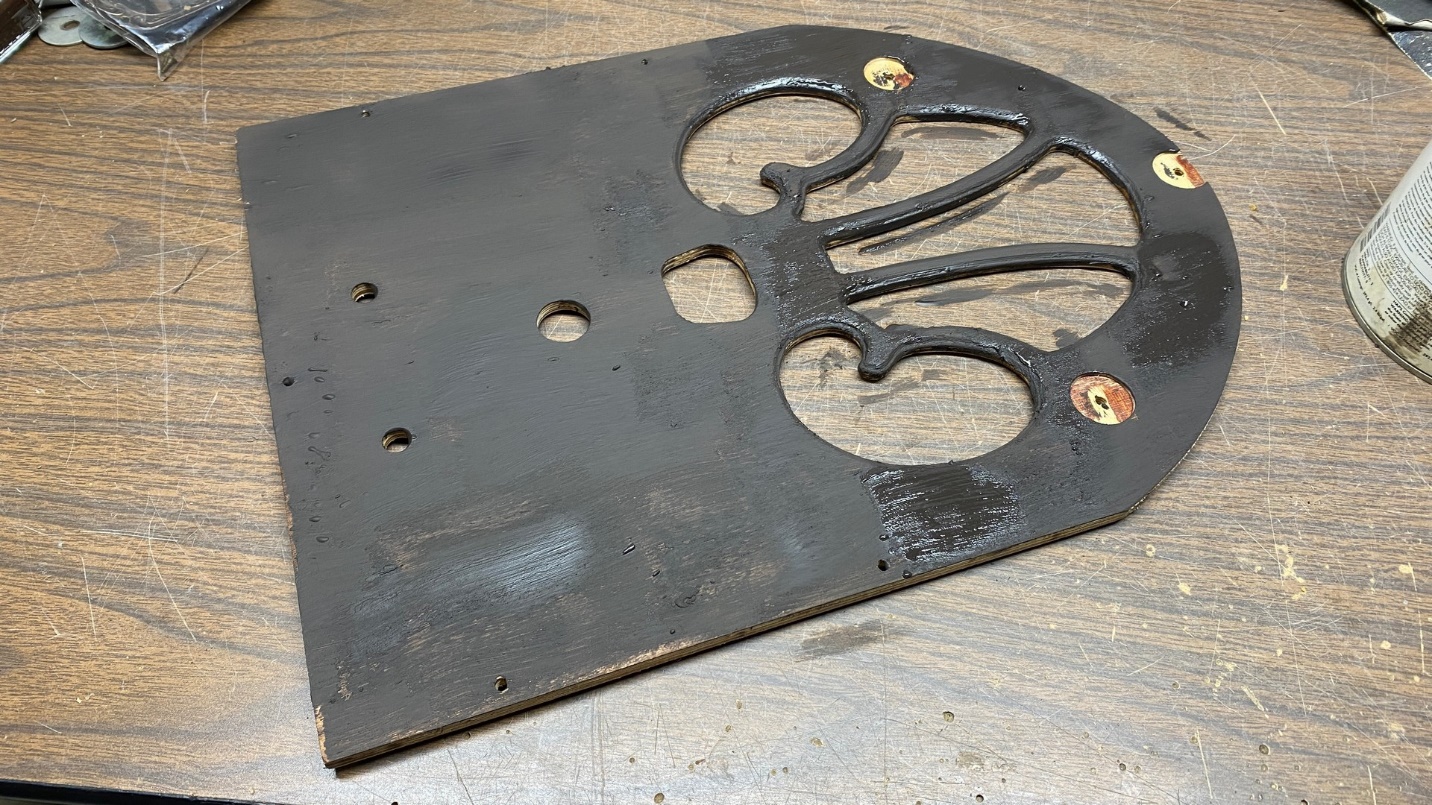
Next, the excess filler must be rubbed off the panel. This is done with a piece of cotton fabric. A piece of an old T-shirt is ideal, and is what I used. I rubbed in a circular motion. The idea was to remove excess filler from the panel while pushing the filler into the pores of the wood as much as possible. In this manner, I was “filling the grain.”
This is the tiresome part of the job. It requires quite a bit of elbow grease and patience, and I admit that patience is something I tend to not always have enough of.
Nevertheless, I continued rubbing the panel until all the excess filler had been removed, and it appeared that the pores of the wood were now filled. I then set the panel aside to dry until the next day.
Here, I have started to sand excess filler from the surface of the panel.
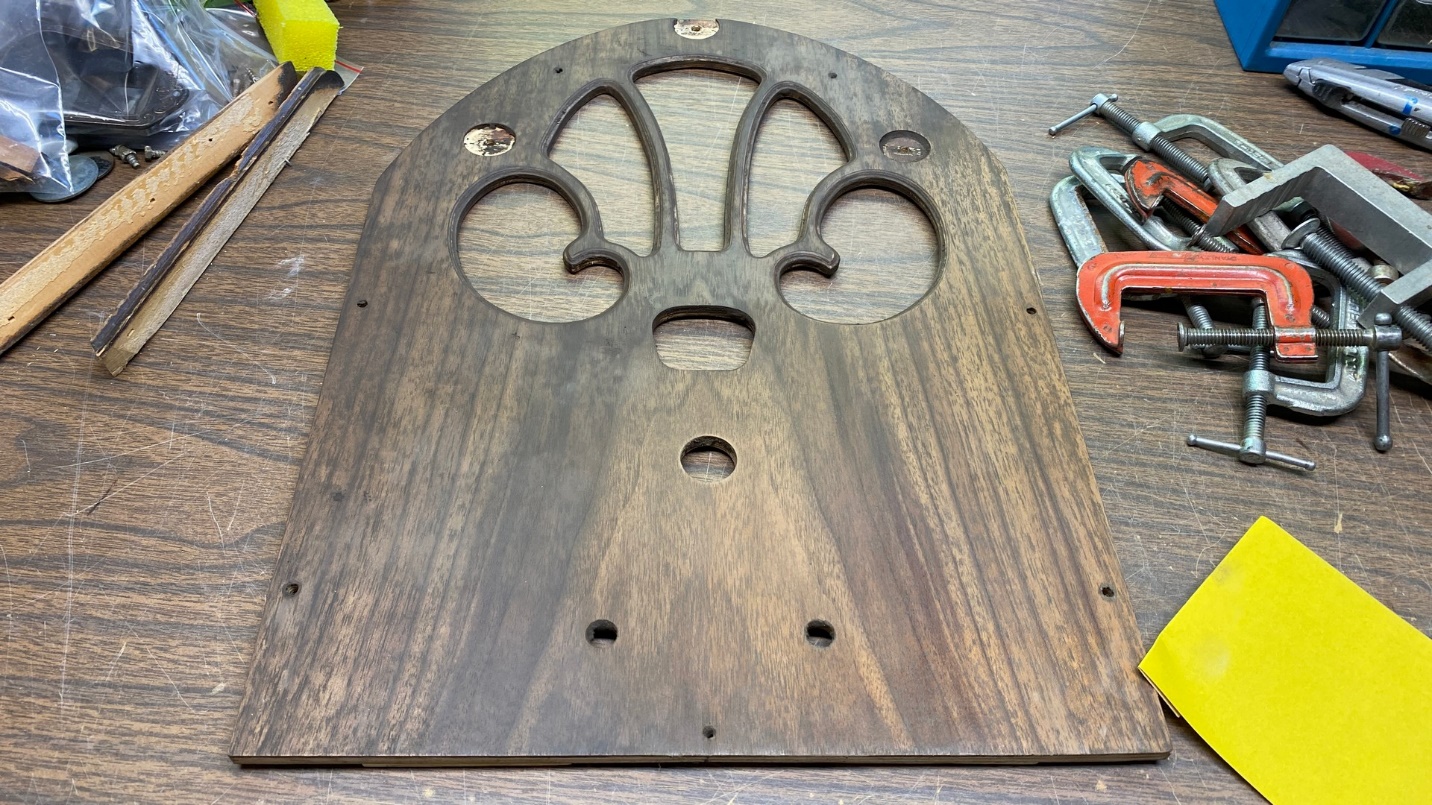
On that next day – October 21, two days later as it turned out – I returned the panel to my workbench and, with a piece of 320 grit sandpaper, began to sand off the excess filler from the surface of the panel. Once again, this required hard work and patience.
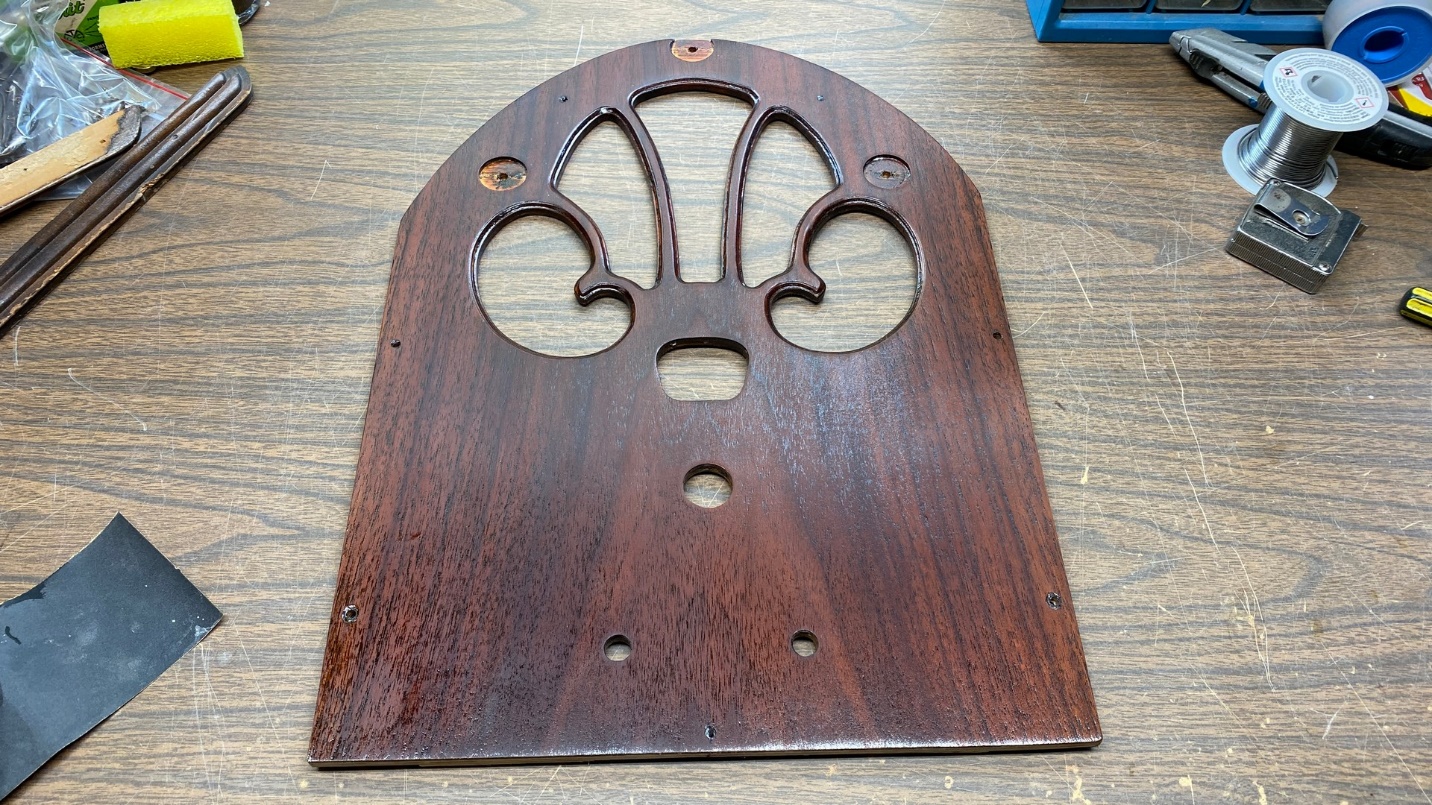
When the entire panel had been sanded smooth, it was then time to start applying toning lacquer. I carefully wiped the panel down with a soft rag, and took it out to the garage.
The Philco 21 front panel is ready for the application of toning lacquer.
I set up shop outside in the garage, after moving my truck out of the garage. When I was ready, I began to spray Mohawk Ultra Classic Dark Walnut toner to the panel.
I probably sprayed one coat too many, but I think it will do.
I let the panel dry for a little while, then I followed up the toner with three coats of clear lacquer. As luck with have it, my can of clear gloss lacquer started to get low, and on the third coat, began to spit – resulting in some drips in the finish!
I hoped that I would be able to wet sand those drips out.
In any event, I finished spraying clear lacquer, and let the panel sit out in the open garage for a while before bringing it back into the basement to dry overnight.
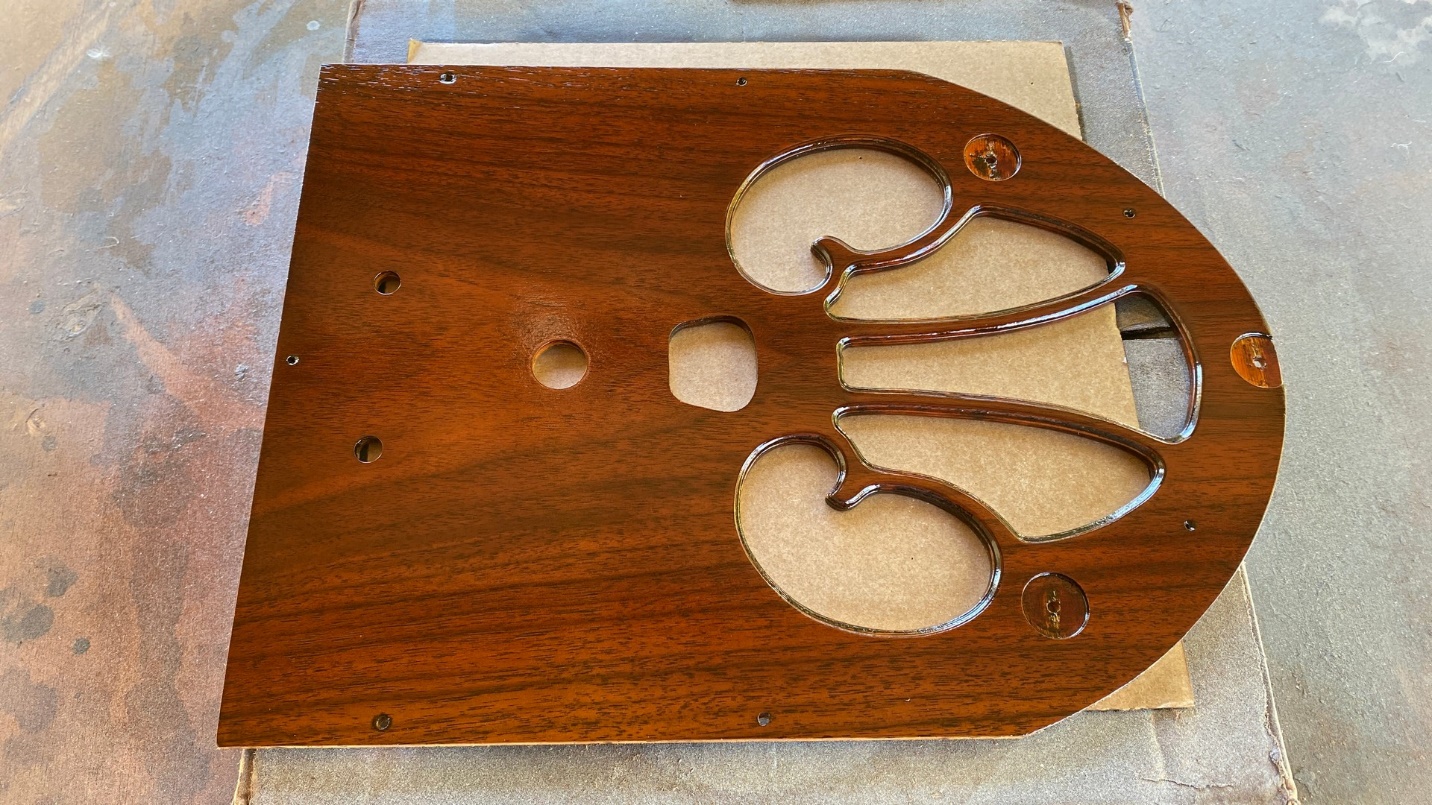
The panel after wet sanding. It is now ready for its final coats of clear lacquer.
I began my work the following day by getting out a plastic container, filling it about half full of water, and set it on my workbench. My sandpaper was already there and waiting. I retrieved the front panel, set it on the bench, sat down and went to work.
I started by attacking those drips. Very carefully, I wet sanded the drips with 400 grit wet/dry sandpaper, stopping and checking my work frequently to make sure I was not burning through the layers of toning lacquer.
Fortunately, I was able to remove all but one of the drips. The one drip I did not remove was on the top left edge of the panel, which would be hidden once the panel was reinstalled in the cabinet. Therefore, I did not worry about that drip.
Once I had finished removing the drips, I went over the entire front panel with 800 grit wet/dry sandpaper. You see, in the process of wet sanding, the water acts as a lubricant, allowing you to sand more efficiently without having the paper get clogged up with lacquer, and without removing too much lacquer at a time.
It was now October 23. The weather forecast called for rain over the coming weekend, to be followed by much cooler temperatures with highs in the 50s instead of the 70s. November was on its way, and I knew my days for spraying lacquer in the 2023 season were just about at an end.
This particular afternoon was warm (low 70s), and there was a light breeze. I set up my work table outside in the carport which we use as a sitting area, which is attached to the garage.
I took the 21 panel outside, place it on some cardboard on top of the work table, and began to spray Mohawk Ultra Flo Clear Gloss lacquer.
The Philco 21 front panel after the first of two final coats of clear lacquer had been applied.
This all went without incident (thankfully), and soon I had a completed front panel for my Philco 21 cabinet. I would allow the panel to dry for several days, after which I planned to install the panel inside the cabinet and attach the bottom trim to the cabinet as well.