
Having carefully repaired and reglued the cabinet, then refinishing it, what had once been a Philco 70 cabinet was slowly turning into a Philco 46 cabinet.
Since the cabinet and front panel were finished by now, and the bottom trim had been applied, it was time to install the front panel into the cabinet.
A test fitting of the front panel, using the chassis as a guide, revealed that the panel would not fit properly unless I cut two notches, one on each side of the panel. If you look carefully at the photo above, you can just see these notches where the cabinet has curved supports.
The notches were necessary to clear these supports. They were easily cut using a jig saw.
Once the notches were cut, I installed the panel into the main cabinet. Yes, I attached the speed nuts in their proper positions in the front panel before I attached the front panel to the cabinet.
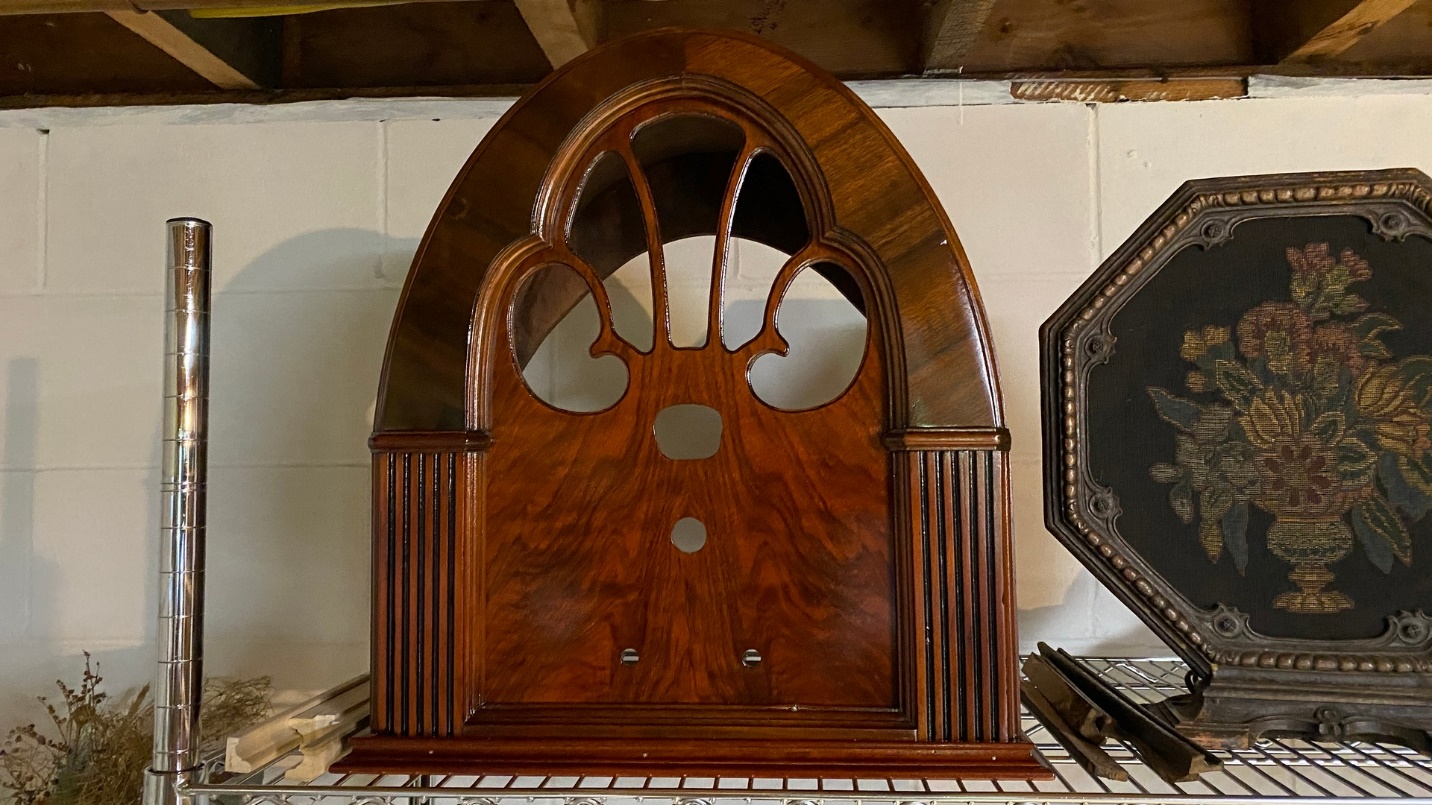
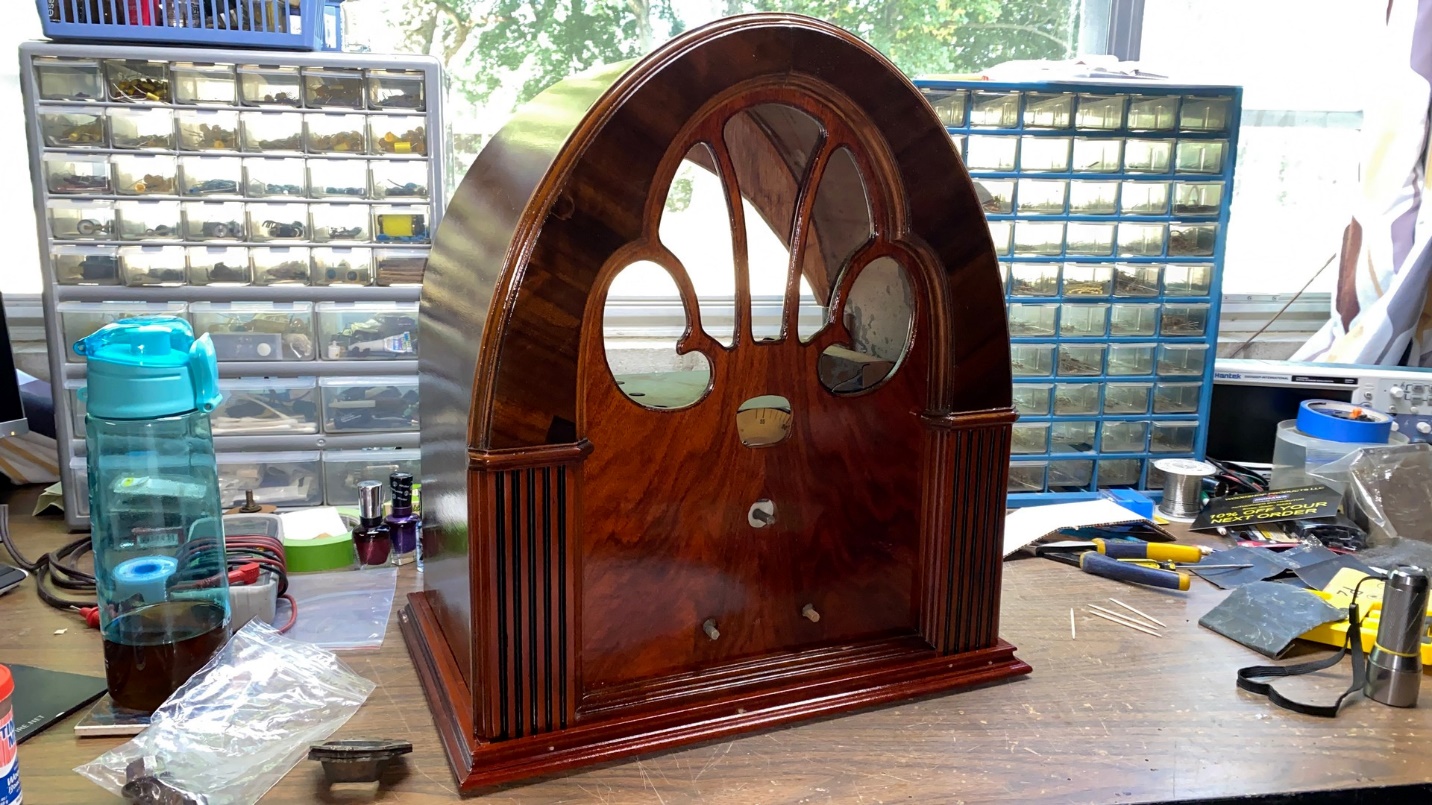
The cabinet is nearly finished at this point.
As you can see in the photo above, the cabinet was looking good at this point for the most part. Unfortunately, in the process of attaching the front panel, one of the attaching screws made a hole into the bottom front of the cabinet, above the bottom trim. If you look really close in the photo above, you will see this flaw just under and to the right of the right-hand control shaft hole (which is for the set’s volume control).
I thought about it for a while, and soon came up with a possible way to deal with that. I would try my idea later. For now, though, I removed that panel mounting screw which has caused that flaw in the cabinet.
Countersunk nail holes are filled with Timber Mate filler.
Returning to those countersunk nail holes where the bottom trim had been nailed into place, I carefully filled each hole with Timber Mate wood filler. This would need to dry before I could do anything further to them.
I did not originally intend to have two nail holes so close together. That happened because the first time I attempted to nail a brad in, it hit an existing nail in the cabinet! Oops. Thus, I was forced to add another nail (and hole) nearby.
A test fitting of the chassis inside the cabinet.
While I waited for the Timber Mate to dry, I decided to try one more test fitting of the 46 chassis inside the cabinet. As you can see in the pictures above and below, it fit properly, just as it should have.
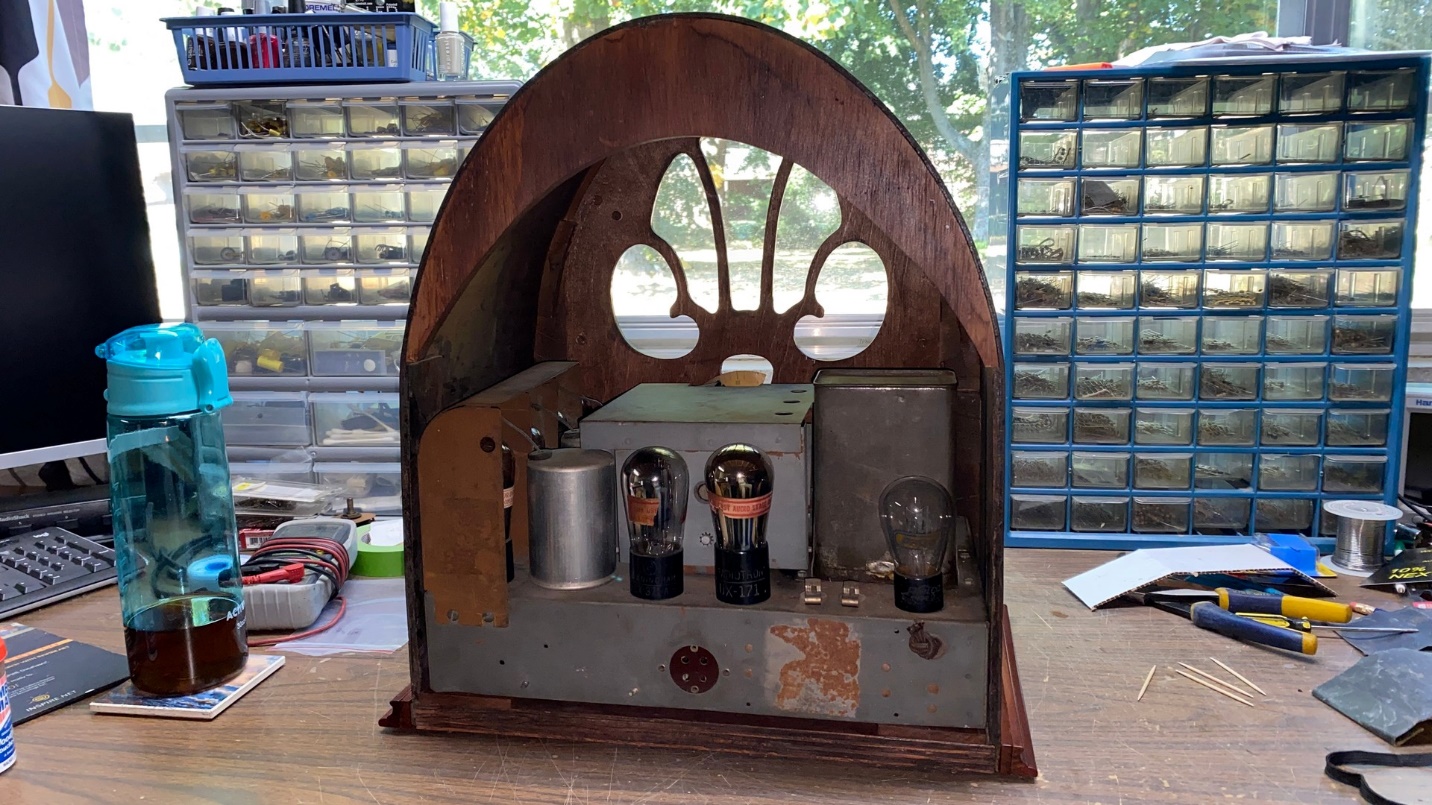
A back view of the 46 chassis inside its new “home.”
I then removed the chassis from the cabinet and set both aside.
The next day, I sprayed some Medium Brown Walnut toner inside the plastic lid of an old spray can. Then, using a small artist brush, I attempted to cover each nail hole on the bottom trim with a dab of toner.
Each nail hole required two coats of lacquer to properly match the surrounding trim.
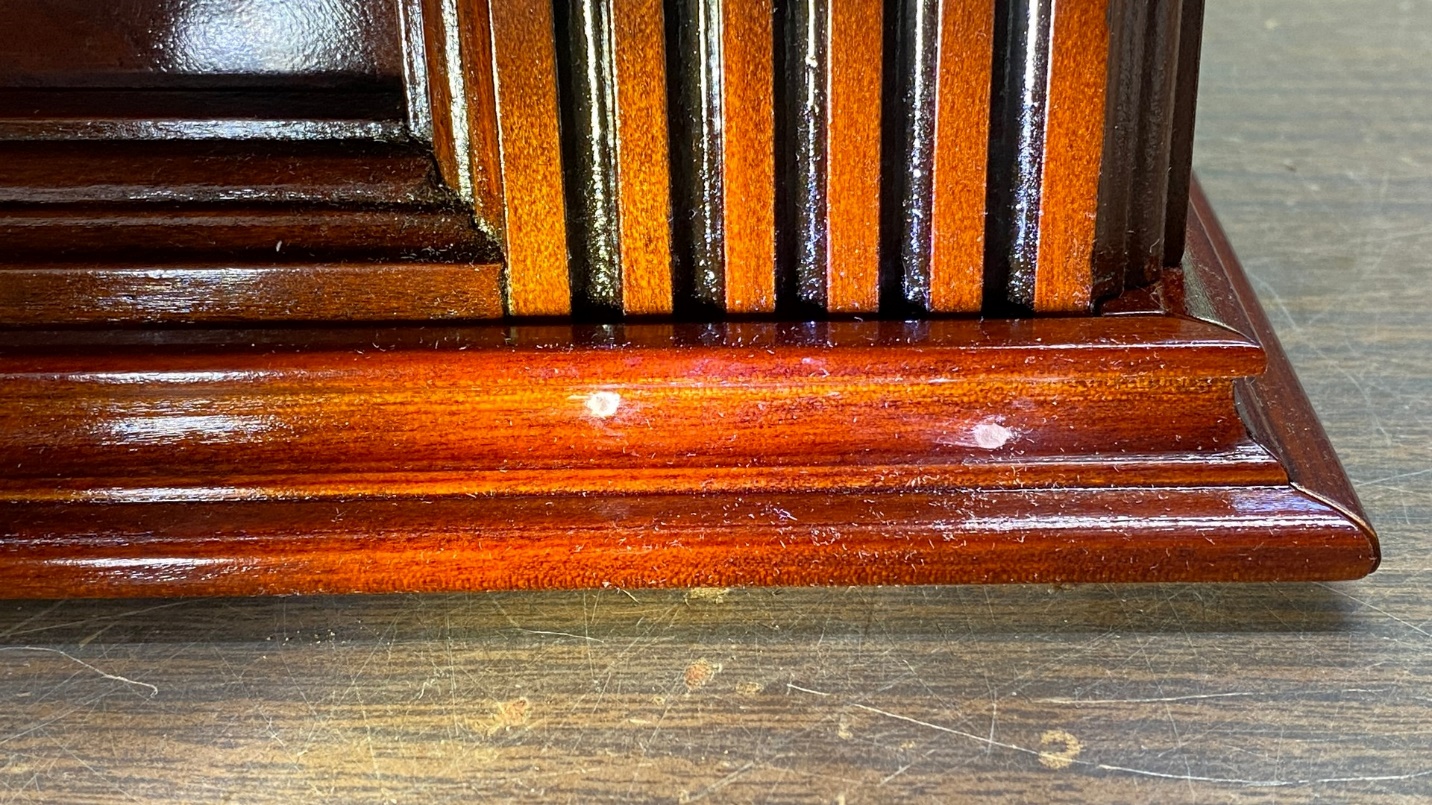
While I was at it, I also dabbed some of this same toner to the area where the front panel screw had damaged the cabinet close to the bottom front. I had previously pressed the wood down and back into place, and filled the small remaining hole with Timber Mate. With this technique, I was able to make the damaged area nearly invisible.
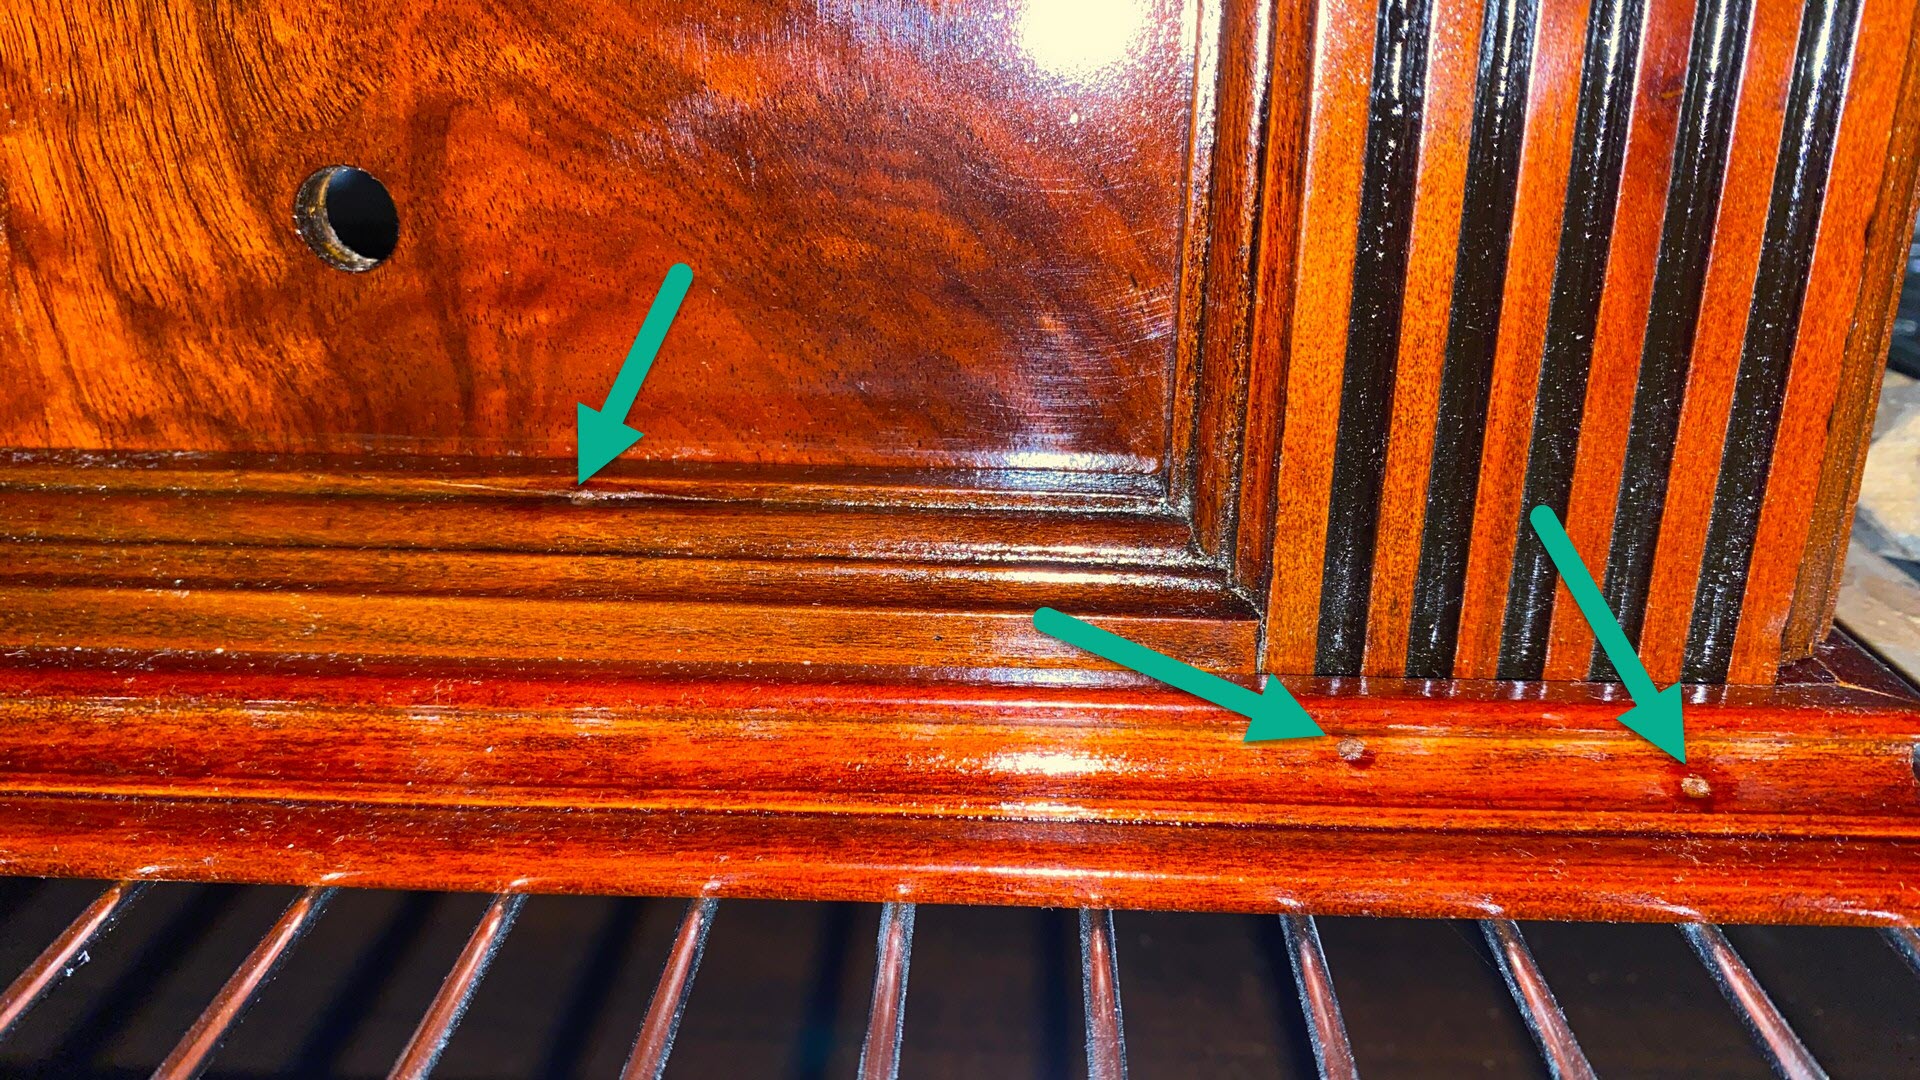
The repaired damage at lower front, and a couple of the nail heads covered with Timber Mate and toning lacquer.
I discovered that the hole where the escutcheon goes was not large enough. I needed to enlarge it somehow. I did not wish to use a jig saw for fear of damaging my lacquer finish.
The answer was easy enough – a Dremel drum sanding bit. Using this with my Ryobi “Dremel” tool quickly resulted in a hole large enough for the escutcheon.
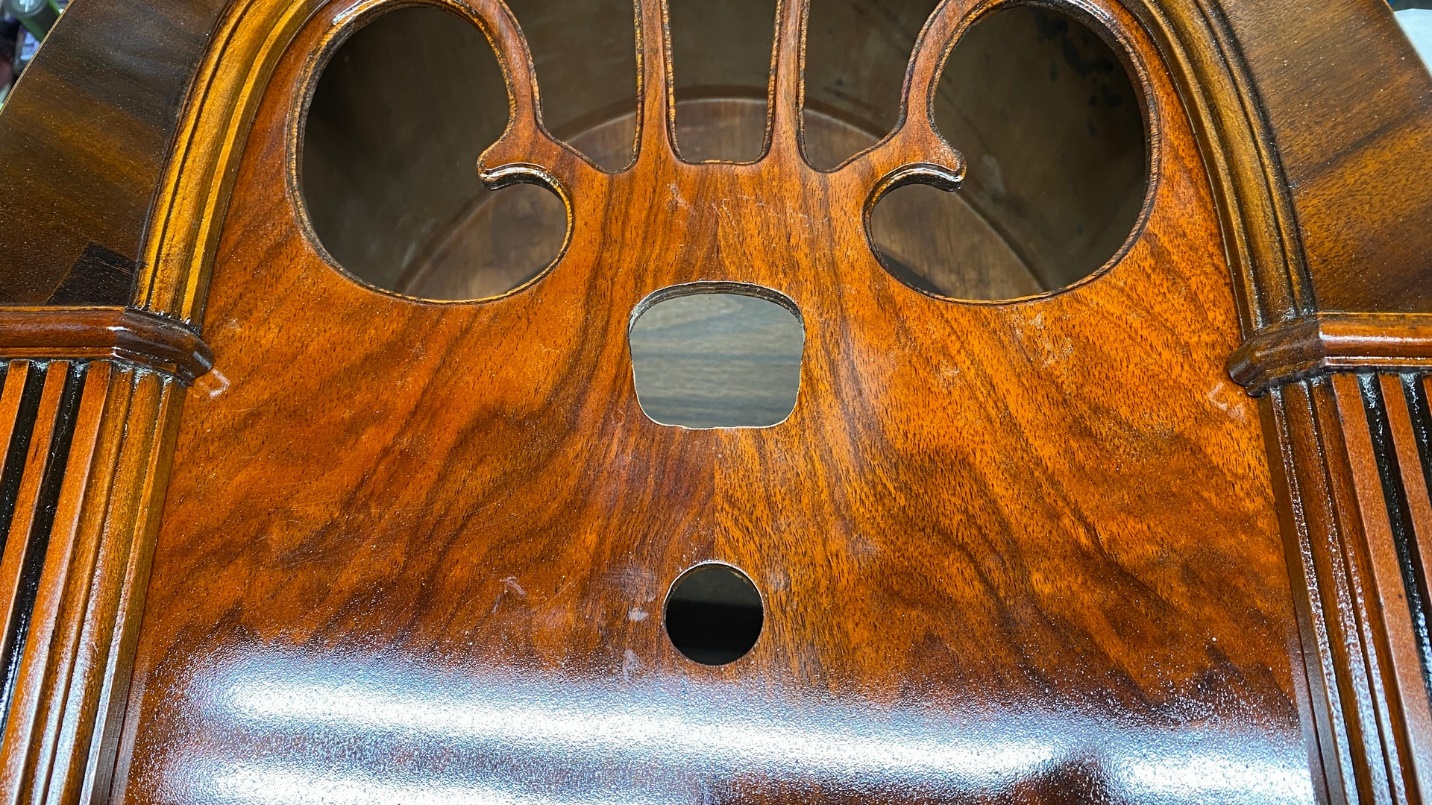
The hole in the front panel is now large enough for the escutcheon.
Next, I polished the escutcheon with Brasso, then placed the escutcheon on the front panel in order to mark the spots for the two escutcheon mounting screws. I actually used a tiny screwdriver to make pilot holes for these screws, then I attached the polished escutcheon to the front panel. You may see the result below.
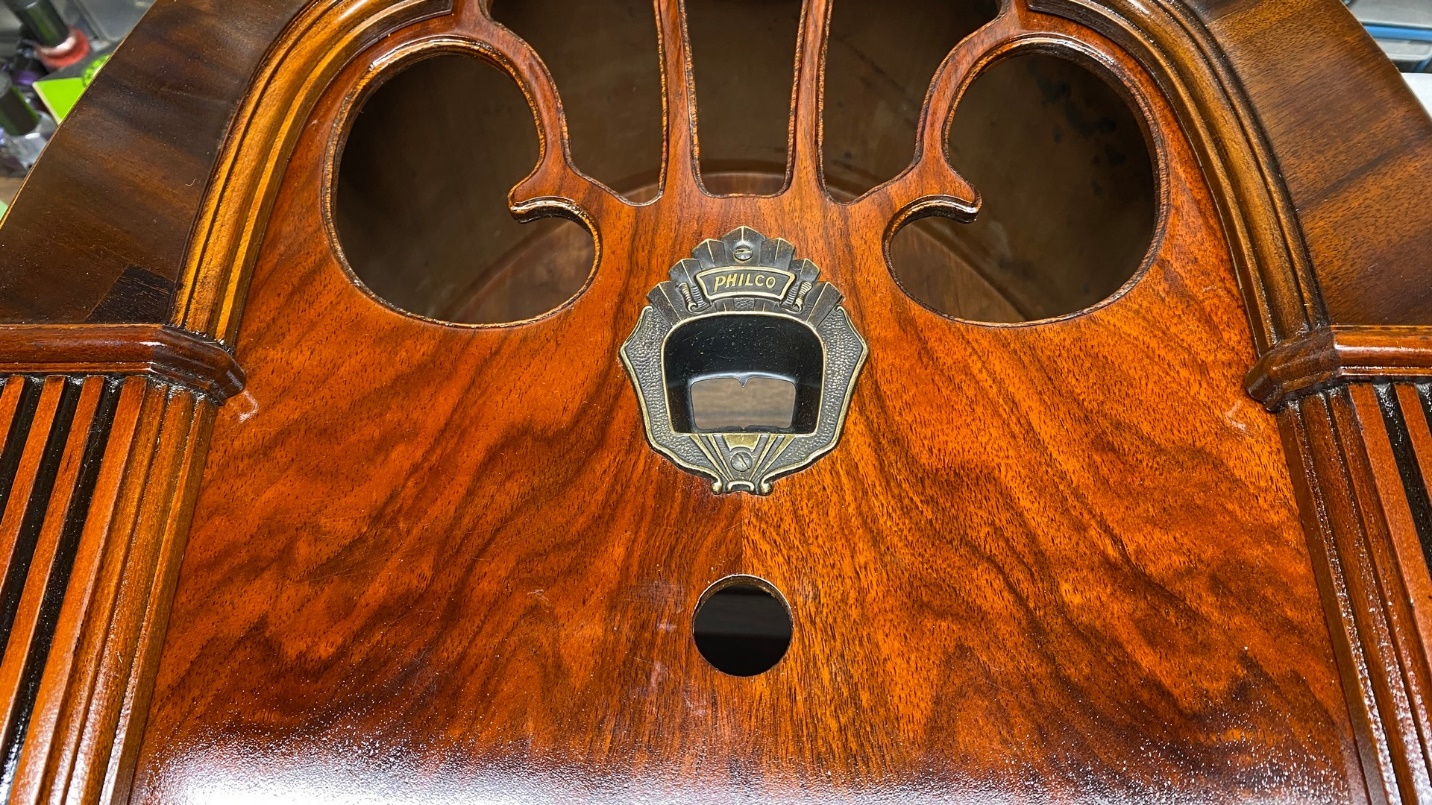
The escutcheon is now in place on the radio cabinet.
To wrap things up, the cabinet needed grille cloth. I have several pieces of reproduction Philco cloth which had been purchased from Radio grille Cloth Headquarters before they went out of business. Among the cloth I had on hand was some Philco 70/90 cloth, the very pattern which this cabinet needed.
(A note: If you need reproduction grille cloth for your radio, Michael Katz is offering several patterns, with more constantly being added. One of the patterns he offers is the Philco 70/90 pattern. You may find his website by clicking here.)
The former Radio Grille Cloth Headquarters always folded their cloth before sending it out, requiring the purchaser to iron the cloth before installing it. I pulled out an old ironing board which we keep in the basement, a good steam iron I had purchased new just for ironing grille cloth, and a spray bottle filled with water.
By spraying water on the creases in the cloth, I was able to make them disappear with the iron.
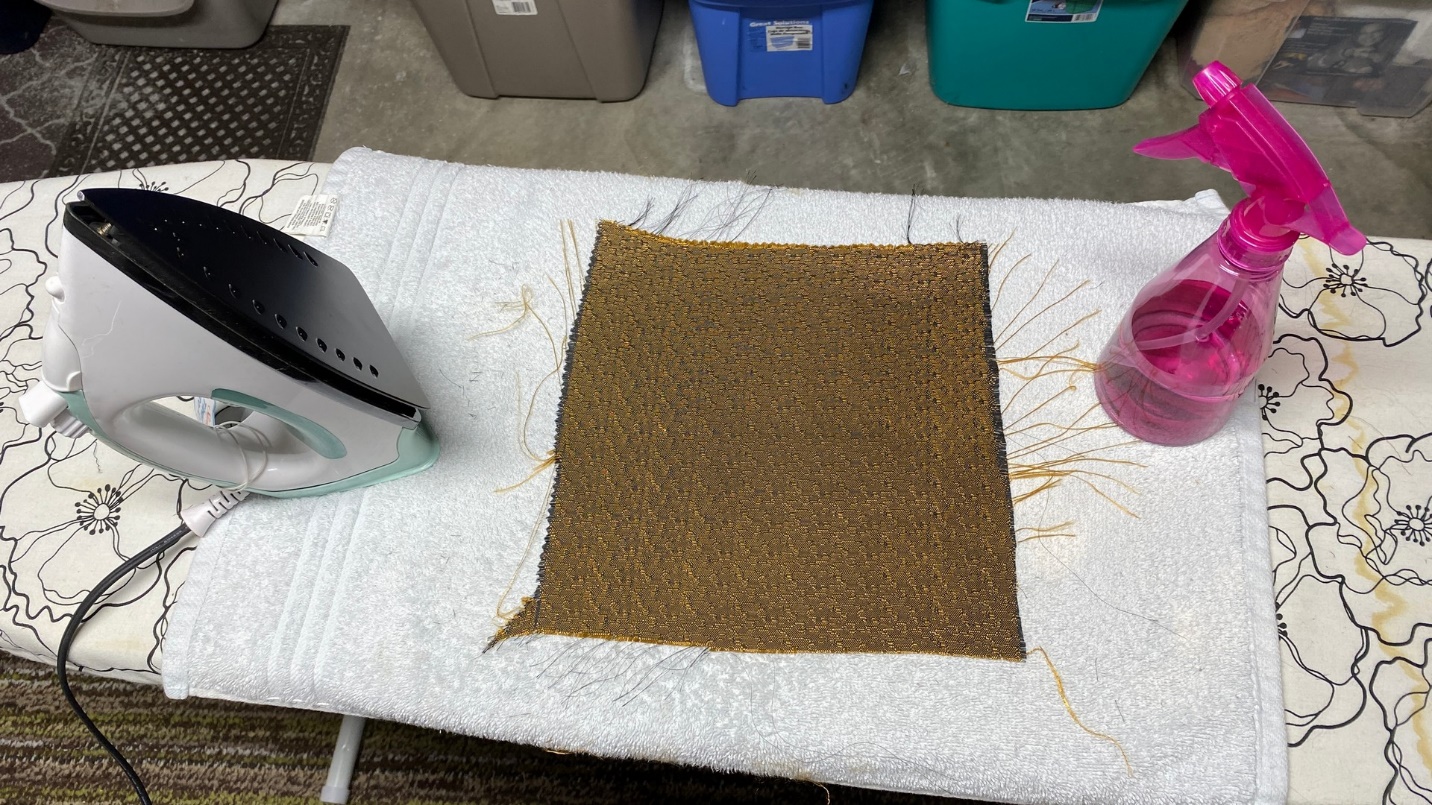
The replacement grille cloth is ready for installation.
I had a grille cloth mounting board for this radio, which had no cloth on it. I took this board outside and sprayed the surface where the cloth needed to go with Scotch Super 77 adhesive. I then waited a few minutes to allow the adhesive to get tacky. Then, I brought the board inside, and carefully attached the cloth.
There were three holes where mounting screws needed to pass through the cloth mounting board, which meant those three screws needed to go through the cloth. If you try to just force the screws through the cloth, you will damage the cloth. Therefore, I cauterized the cloth at each of the three mounting screw hole points with my soldering gun. The soldering gun makes the cloth melt only where you place the gun (or soldering iron), cauterizing the mounting holes and allowing the mounting screws to pass through the holes freely with no fear of damaging the cloth.
The cloth and mounting board were then placed inside the cabinet, with the screw holes in the proper positions inside the cabinet. Next, the model 46 speaker was attached to the cabinet using three number 8 x ¾” wood screws. These screws not only hold the speaker in place, but also hold the grille cloth and its mounting board. The front panel has three speed nuts mounted on the front side of the front panel. These help to hold the screws in place so the speaker will not fall out.
Finally, the chassis was installed in the cabinet, three appropriate knobs were found and installed. The radio was now finished!
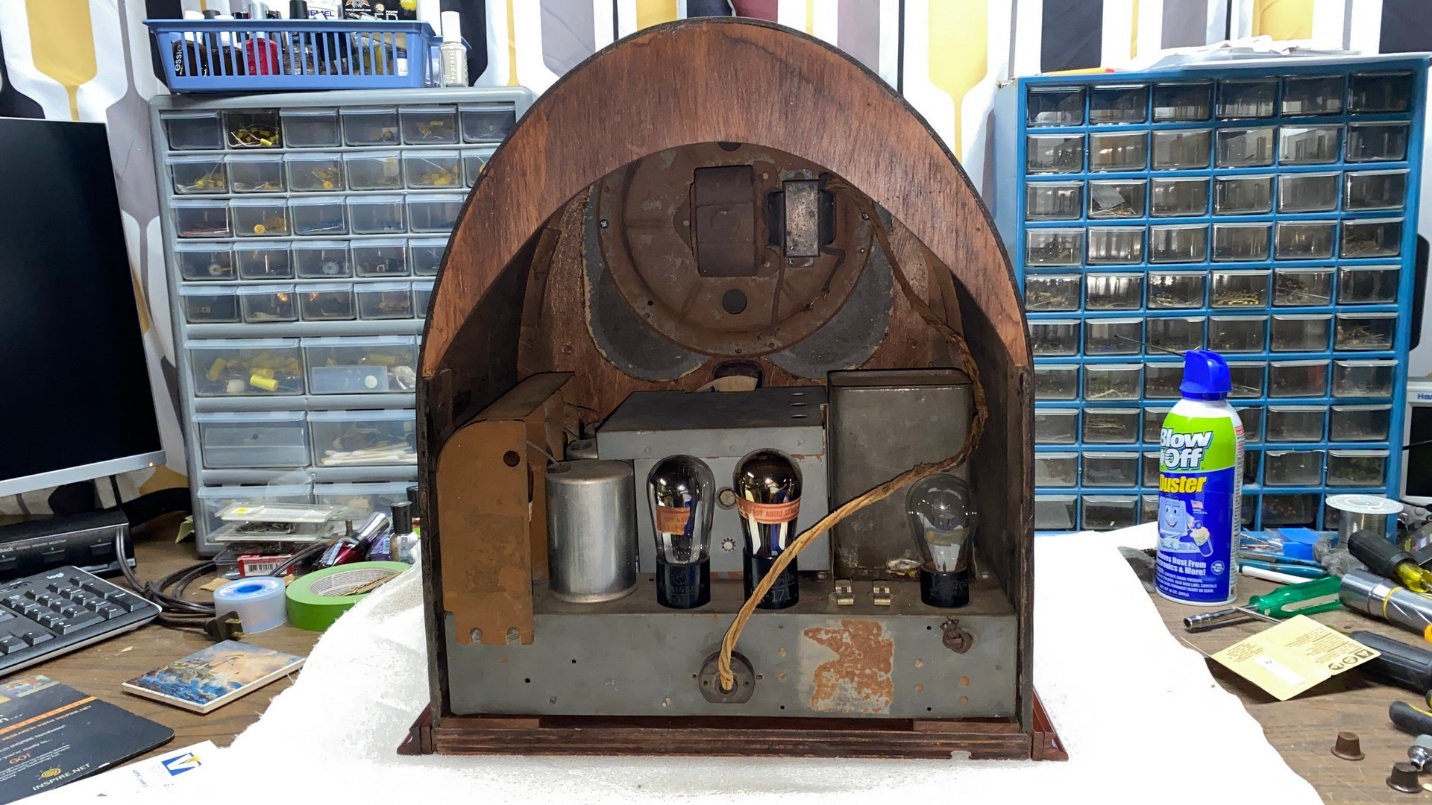
Back view of the completed Philco 46 Baby Grand.

The 46 Baby Grand in its new home, among other radios in my collection.
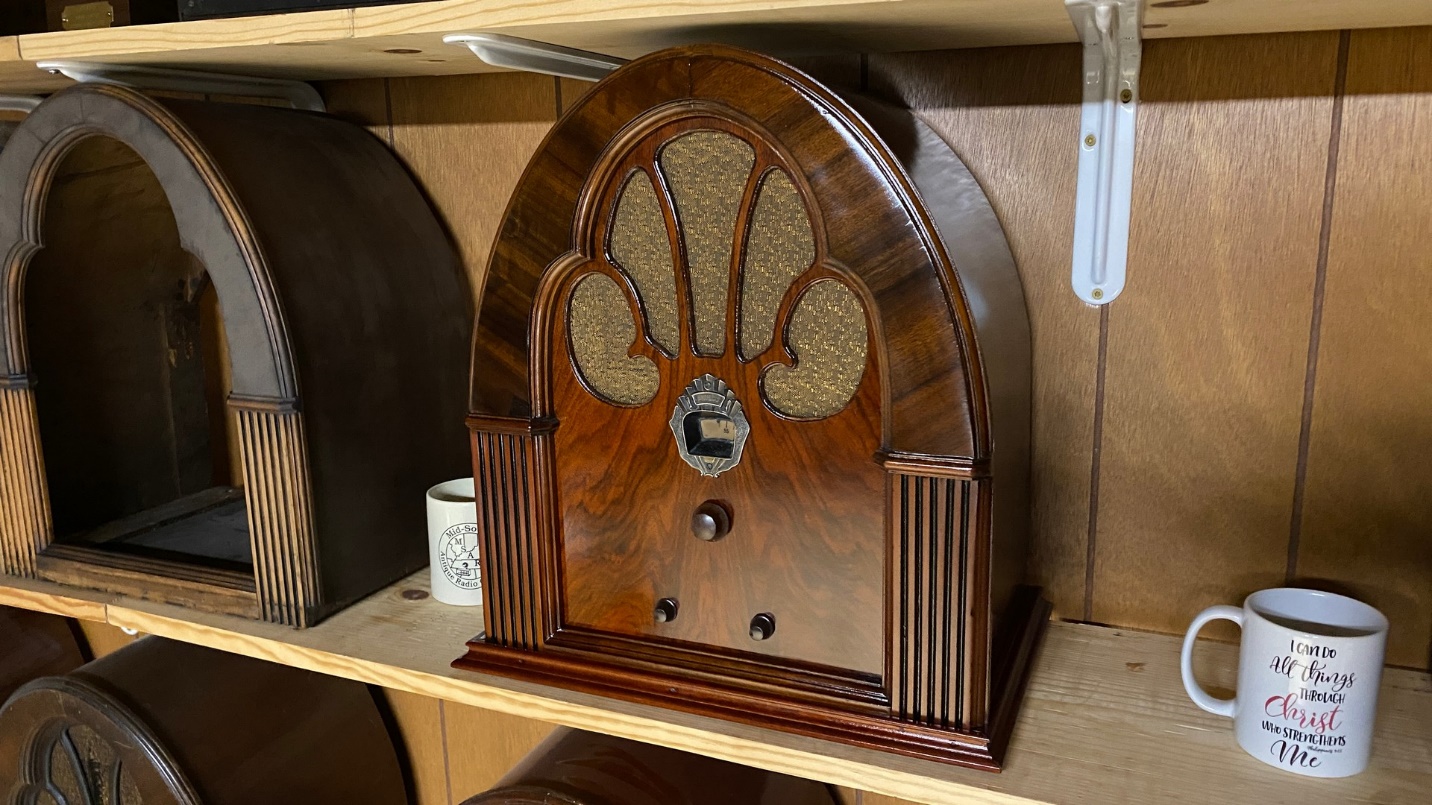
Another front view of the 46 Baby Grand. A Philco model 21 cabinet, which was in process of being restored, sits next to the 46.
This was a job that took the entire summer, as I started working on it in June and continued working on it, off and on, until late September. I worked on other cabinets when I was not working on this 46.
My Philco 46 chassis and speaker now have a new home, and they no longer have to reside in my house garage. This radio has now taken its place beside my Philco 21, 35, 70, and early 50 cathedrals, among others on my wall of shelves in the basement.
I have no plans to restore the chassis. It would require a special DC power supply, and I have no desire to build such a thing. This radio will remain a “shelf queen” for the time it is in my possession.
Thanks for following along!